Microsoft Translator is an add-in for PowerPoint that allows you to add live subtitles to your presentation. In order to begin using Translator, you'll need to first install the add-in.
Note: The Presentation Translator add-in for PowerPoint has been retired and is no longer supported. If you're using PowerPoint for Microsoft 365 you already have this functionality built in. See Present with real-time, automatic captions or subtitles in PowerPoint for more information.
Use Microsoft Translator in a PowerPoint presentation
Translator will require a user to have a microphone. Most microphones work, but the following is a list of recommended microphones.
-
Open your desired PowerPoint presentation.
-
From the top ribbon, select Slide Show, then Start Subtitles.
Note: First-time users will need to Accept the Terms of Use.
-
From the dropdown bars, select the language you will be speaking in and the desired language to display in subtitles.
-
We recommend selecting the box next to Customize speech recognition to improve the performance of Microsoft Translator.
-
You may choose to configure your microphone from the Microphone dropdown menu or customize other settings in Additional Settings.
-
Select Next to continue.
Note: depending on the length of your presentation, it may take several minutes for the artificial intelligence to run the setup.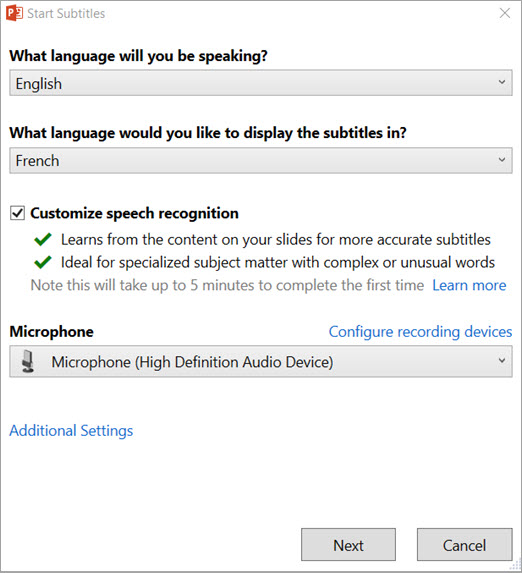
-
A new slide will be inserted before your first slide that will display a QR code and instructions in the language you selected.
Note: If you would like your students to participate, ask them to open the Microsoft Translator app on their device and scan for the QR code of your presentation.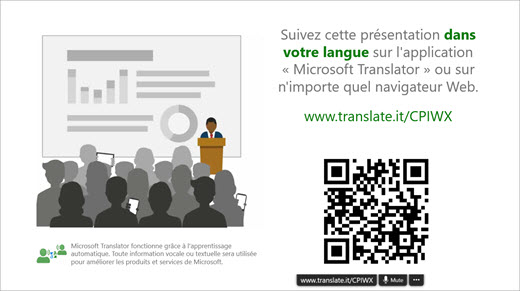
-
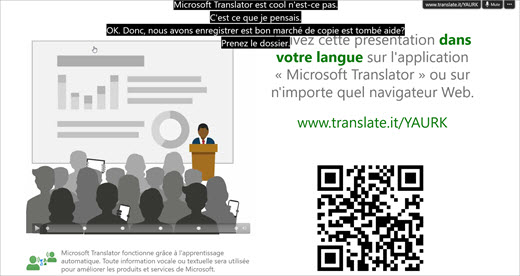
As you speak into your microphone, a live transcript of your words will appear on the screen.
No comments:
Post a Comment