If you don't have a mailing list as a source for names and addresses in a mail merge, you can create one in Word.
Create a new mail merge list
-
Go to File > New > Blank Document.
-
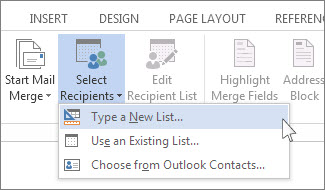
Choose Select Recipients > Type a New List.
-
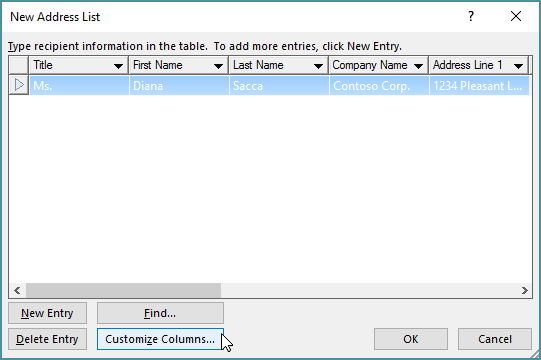
In the New Address List dialog box type recipient information in each column as appropriate. For more info on using the dialog box, see Edit Data Source.
-
For each new record, select Add New.
-
If you need more columns, such as for an order number, follow these steps:
-
In the New Address List dialog box choose Customize Columns.
-
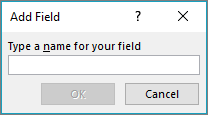
Choose Add.

-
Type a field name and then select OK.
-
Repeat steps b and c for each column or field to add.
-
-
When you're done adding all the people you want to your list, choose OK.
-
In the Save Address List dialog box, give your new file a name, and then choose Save.
You can now insert mail merge fields in your document. For more information, see Insert mail merge fields.
Create a mailing list in Word
A mailing list can be created within Word for sending bulk mail during mail merge process.
-
Go to File > New > New Document.
-
Go to Mailings > Select Recipients > Create a New List.
-
In the Edit List Fields, you'll see a set of automatic fields that Word supplies. If you want a new field, type a name into New Field name to add it to the list.
-
Use the Up
 and Down
  buttons to reposition fields
 -
Select Create.
-
In the Save dialog, give the list a name and save it.
-
In Edit List Entries, type the data in each column for the mailing list.
-
For each new record, select the + button. To remove a record, go to the record and press the - button
-
When you're done adding all the people you want to your list, choose OK.
To later modify the list, follow these steps:
-
Go to Mailings > Select Recipients.
-
Select Use an existing list, choose the list you previously created and select Open.
-
Add or edit records in the Edit List Entries dialog box.
Create a mailing list in Word
A mailing list can be created within Word for sending bulk mail during mail merge process.
-
On the View menu, choose Print Layout.
-
On the Standard toolbar, choose New
 .
.You use this blank document to create a data source.
-
On the Tools menu, choose Mail Merge Manager.
-
Under 1. Select Document Type, choose Create New, and then select Form Letters.
-
Under 2. Select Recipients List, choose Get List, and then select New Data Source.
-
In the Field names in header row box, click any field names that you don't want to include in your data source, choose Remove Field Name, and then selectOK.
-
Type a name and choose a location for your data source, and then choose Save.
Remember where you save the data source. You will need to know the location later.
-
In the Data Form dialog box, type the data for one data record (for example, a recipient's first name in FirstName, last name in LastName, street address in Address1, and so on).
Note: Do not enter spaces in boxes that you want to leave blank.
-
After you finish filling in the boxes for one record, choose Add New.
-
Repeat steps 8 and 9 for each record that you want to enter.
-
After you add all the records that you want, choose OK.
Tip: To return to the Data Form dialog box later, in the Mail Merge Manager, under 2. Select Recipients List, select Edit Data Source
 .
. -
On the File menu, choose Close.
-
To save the data source, choose Save.
-
To discard the blank open document, choose Don't Save.
No comments:
Post a Comment