View or change the properties for an Office file
Document properties, also known as metadata, are details about a file that describe or identify it. They include details such as title, author name, subject, and keywords that identify the document's topic or contents.
If you include the document properties for your files, you can easily organize and identify them later. You can also search for documents based on their properties or insert them into your documents.
What do you want to do?
Learn more about document properties
There are four types of document properties:
-
Standard properties - By default, Office documents are associated with a set of standard properties, such as author, title, and subject. You can specify your own text values for these properties to make it easier to organize and identify your documents. For example, in Word, you can use the Keywords property (also called Tags) to add the keyword "customers" to your sales files. You can then search for all sales files with that keyword.
-
Automatically updated properties - These properties include both file system properties (for example, file size or the dates when a file was created or last changed) and statistics that are maintained for you by Office programs (for example, the number of words or characters in a document). You cannot specify or change the automatically updated properties.
You can use the automatically updated properties to identify or find documents. For example, you can search for all files created after August 3, 2015, or for all files that were last changed yesterday.
-
Custom properties - You can define additional custom properties for your Office documents. You can assign a text, time, or numeric value to custom properties, and you can also assign them the values yes or no. You can choose from a list of suggested names or define your own.
For more information see View or create custom properties for a file
-
Document library properties - These are properties that are associated with documents in a document library on a website or in a public folder. When you create a new document library, you can define one or more document library properties and set rules on their values. When you add documents to the document library, you are prompted to include the values for any properties that are required, or to update any properties that are incorrect. For example, a document library that collects product ideas can prompt the person for properties such as Submitted By, Date, Category, and Description. When you open a document from a document library in Word 2016, Excel 2016, or PowerPoint 2016, you can edit and update these document library properties by clicking File > Info. All required properties from the document library are outlined with red borders on the Info tab in Word 2016, Excel 2016, and PowerPoint 2016.
To learn more about editing document library properties in Office 2016 applications, see Where is the Document Information Panel in Office 2016?
If you want to insert any of these properties into your Word document see Add the file name, date, author, or other document properties to a header or footer.
View and change the standard properties for the current file
-
Click the File tab.
-
Click Info.
-
Click the View and edit database properties link at the top of the page.
-
In the Properties dialog box, click the tabs to select the properties that you want to view or update.
-
Click OK. Any changes you made are saved automatically.
-
Click the File tab again to return to your database.
-
Click the File tab.
-
Click Info to view the workbook properties.
-
To add or change properties, hover your pointer over the property you want to update and enter the information.
-
Click the File tab again to return to your workbook. Any changes you made are saved automatically.
Optional steps:
-
To see more properties, click the Show All Properties link at the bottom of the page.
-
To open a properties dialog box where you can add or edit all the properties at once and view document information and statistics, click Properties at the top of the page, and then click Advanced Properties.

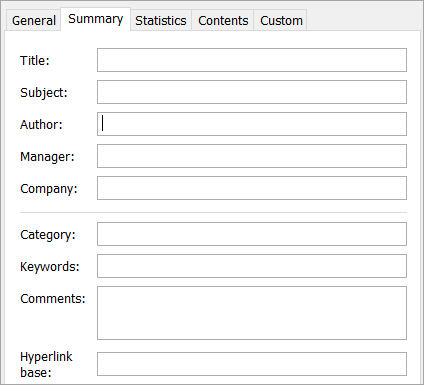
On the Summary tab, you can add or edit the Title, Subject, Author, Manager, Company, Category, Keywords (also called Tags), and Comments.
-
-
Click the File tab.
-
Click Info to view the presentation properties.
-
To add or change properties, hover your pointer over the property you want to update and enter the information.
-
Click the File tab again to return to your presentation. Any changes you made are saved automatically.
Optional steps:
-
To see more properties, click the Show All Properties link at the bottom of the page.
-
To open a properties dialog box where you can add or edit all the properties at once and view document information and statistics, click Properties at the top of the page, and then click Advanced Properties.
On the Summary tab, you can add or edit the Title, Subject, Author, Manager, Company, Category, Keywords (also called Tags), and Comments.
-
-
Click the File tab.
-
Click Info to view the project properties.
-
To add or change properties, hover your pointer over the property you want to update and enter the information.
-
Click the File tab again to return to your project. Any changes you made are saved automatically.
Optional steps:
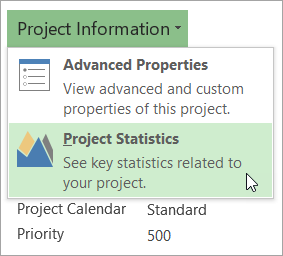
To see more properties or statistics, click Project Information at the top of the page, and then click Advanced Properties or Project Statistics.
On the Summary tab in the Properties dialog box, you can add or edit the Title, Subject, Author, Manager, Company, Category, Keywords (also called Tags), and Comments.
-
Click the File tab.
-
Click Info to view the properties.
-
Click the File tab again to return to your publication. Any changes you made are saved automatically.
Optional steps:
To open a properties dialog box where you can add or edit all the properties at once and view document information and statistics, click Publication Properties at the top of the page, and then click Advanced Properties.
On the Summary tab, you can add or edit the Title, Subject, Author, Manager, Company, Category, Keywords (also called Tags), and Comments.
-
Click the File tab.
-
Click Info to view the properties.
-
To add or change properties, hover your pointer over the property you want to update and enter the information.
-
Click the File tab again to return to your publication. Any changes you made are saved automatically.
Optional steps:
-
To open a properties dialog box where you can add or edit all the properties at once and view document information, click Properties at the top of the page, and then click Advanced Properties.
On the Summary tab, you can add or edit properties such as the Title, Subject, Author, Manager, Company, Category, Keywords (also called Tags), and Comments.
-
To add a link to related documents, click Related Documents at the bottom of the Info page, and select Add a Link to a Related Document.
-
-
Click the File tab.
-
Click Info to view the document properties.
-
To add or change properties, hover your pointer over the property you want to update and enter the information. Note that for some metadata, such as Author, you'll have to right-click on the property and choose Remove or Edit.
-
Click the File tab again to return to your document. Any changes you made are saved automatically.
Optional steps:
-
To see more properties, click the Show All Properties link at the bottom of the page.
-
To open a properties dialog box where you can add or edit all the properties at once and view document information and statistics, click Properties at the top of the page, and then click Advanced Properties.
On the Summary tab, you can add or edit the Title, Subject, Author, Manager, Company, Category, Keywords (also called Tags), and Comments.
-
View or create custom properties for the current file
Custom properties are properties that you define for an Office document. You can assign a text, time, or numeric value to custom properties, and you can also assign them the values yes or no. You can choose from a list of suggested names or define your own.
-
Click the File tab.
-
Click Info.
-
Click Properties at the top of the page, and then select Advanced Properties.
Notes:
-
In Access you'd click View and edit database properties
-
In Project you'd click Project Information
-
In Publisher you'd click Publication Properties
-
-
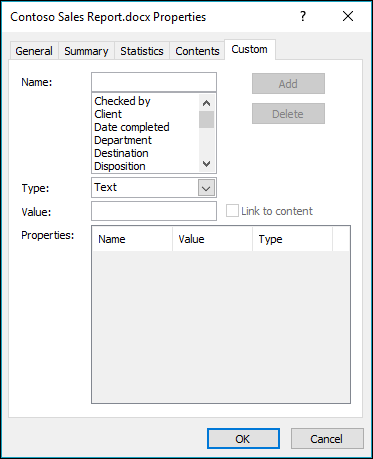
Click the Custom tab.
-
In the Name box, type a name for the custom property, or select a name from the list.
-
In the Type list, select the data type for the property that you want to add.
-
In the Value box, type a value for the property. The value that you type must match the selection in the Type list. For example, if you select Number in the Type list, you must type a number in the Value box. Values that don't match the property type are stored as text.
-
-
Click OK.
What do you want to do?
Learn more about the document properties
There are five types of document properties:
-
Standard properties By default, Office documents are associated with a set of standard properties, such as author, title, and subject. You can specify your own text values for these properties to make it easier to organize and identify your documents. For example, in Word, you can use the Keywords property (also called Tags) to add the keyword "customers" to your sales files. You can then search for all sales files with that keyword.
-
Automatically updated properties These properties include both file system properties (for example, file size or the dates when a file was created or last changed) and statistics that are maintained for you by Office programs (for example, the number of words or characters in a document). You cannot specify or change the automatically updated properties.
You can use the automatically updated properties to identify or find documents. For example, you can search for all files created after August 3, 2005, or for all files that were last changed yesterday.
-
Custom properties You can define additional custom properties for your Office documents. You can assign a text, time, or numeric value to custom properties, and you can also assign them the values yes or no. You can choose from a list of suggested names or define your own.
-
Properties for your organization If your organization customized the Document Information Panel, the document properties that are associated with your document may be specific to your organization.
-
Document library properties These are properties that are associated with documents in a document library on a website or in a public folder. When you create a new document library, you can define one or more document library properties and set rules on their values. When you add documents to the document library, you are prompted to include the values for any properties that are required, or to update any properties that are incorrect. For example, a document library that collects product ideas can prompt the person for properties such as Submitted By, Date, Category, and Description. When you open a document from a document library in Word, Excel, or PowerPoint, you can edit and update these document library properties in the Document Information Panel.
View and change the properties for the current file
-
Click the File tab.
-
Click Info.
-
Click the View and edit database properties link at the top of the page.
-
In the Properties dialog box, click the tabs to select the properties that you want to view or update.
Note: If your organization customized the Document Information Panel, or if the document for which you want to view properties is saved to a document library or a document management server, additional document property views may be available.
-
Click OK. Any changes you made will be saved automatically.
-
Click the File tab again to return to your file.
-
Click the File tab.
-
Click Info to view the workbook properties.
-
To add or change properties, hover your pointer over the property you want to update and enter the information.
-
Click the File tab again to return to your workbook. Any changes you made will be saved automatically.
Optional steps:
-
To see more properties, click the Show All Properties link at the bottom of the page.
-
To open a properties dialog box where you can add or edit all the properties at once and view document information and statistics, click Properties at the top of the page, and then click Advanced Properties.
On the Summary tab, you can add or edit the Title, Subject, Author, Manager, Company, Category, Keywords (also called Tags), and Comments.
To view custom properties, click the Custom tab.
-
To see the properties in a panel within your workbook, click Properties at the top of the page and select Show Document Panel.
Note: If your organization customized the Document Information Panel, or if the document for which you want to view properties is saved to a document library or a document management server, additional document property views may be available.
-
-
Click the File tab.
-
Click Info to view the form statistics.
-
To change the Name, ID or Description of the form, click Form Template Properties, and make changes to those fields as needed.
-
To show this form in a custom category in InfoPath Filler, select the Enable custom category check box and enter a name for the custom category.
-
Click OK.
-
Click the File tab again to return to your workbook. Any changes you made will be saved automatically.
-
Click the File tab.
-
Click Info to view the presentation properties.
-
To add or change properties, hover your pointer over the property you want to update and enter the information.
-
Click the File tab again to return to your presentation. Any changes you made will be saved automatically.
Optional steps:
-
To see more properties, click the Show All Properties link at the bottom of the page.
-
To open a properties dialog box where you can add or edit all the properties at once and view document information and statistics, click Properties at the top of the page, and then click Advanced Properties.
On the Summary tab, you can add or edit the Title, Subject, Author, Manager, Company, Category, Keywords (also called Tags), and Comments.
To view custom properties, click the Custom tab.
-
To see the properties in a panel within your workbook, click Properties at the top of the page and select Show Document Panel.
Note: If your organization customized the Document Information Panel, or if the document for which you want to view properties is saved to a document library or a document management server, additional document property views may be available.
-
-
Click the File tab.
-
Click Info to view the project properties.
-
To add or change properties, hover your pointer over the property you want to update and enter the information.
-
Click the File tab again to return to your project. Any changes you made will be saved automatically.
Optional steps:
To see more properties or statistics, click Project Information at the top of the page, and then click Advanced Properties or Project Statistics.
On the Summary tab in the Properties dialog box, you can add or edit the Title, Subject, Author, Manager, Company, Category, Keywords (also called Tags), and Comments.
To view custom properties, click the Custom tab in the Properties dialog box.
Note: If your organization customized the Document Information Panel, or if the document for which you want to view properties is saved to a document library or a document management server, additional document property views may be available.
-
Click the File tab.
-
Click Info to view the properties.
-
Click the File tab again to return to your publication. Any changes you made will be saved automatically.
Optional steps:
To open a properties dialog box where you can add or edit all the properties at once and view document information and statistics, click Publication Properties at the top of the page, and then click Advanced Properties.
On the Summary tab, you can add or edit the Title, Subject, Author, Manager, Company, Category, Keywords (also called Tags), and Comments.
To view custom properties, click the Custom tab.
Note: If your organization customized the Document Information Panel, or if the document for which you want to view properties is saved to a document library or a document management server, additional document property views may be available.
-
Click the File tab.
-
Click Info to view the properties.
-
To add or change properties, hover your pointer over the property you want to update and enter the information.
-
Click the File tab again to return to your publication. Any changes you made will be saved automatically.
Optional steps:
To open a properties dialog box where you can add or edit all the properties at once and view document information, click Properties at the top of the page, and then click Advanced Properties.
On the Summary tab, you can add or edit properties such as the Title, Subject, Author, Manager, Company, Category, Keywords (also called Tags), and Comments.
Notes:
-
To add a link to related documents, click Related Documents at the bottom of the Info page, and select Add a Link to a Related Document.
-
If your organization customized the Document Information Panel, or if the document for which you want to view properties is saved to a document library or a document management server, additional document property views may be available.
-
-
Click the File tab.
-
Click Info to view the document properties.
-
To add or change properties, hover your pointer over the property you want to update and enter the information.
-
Click the File tab again to return to your document. Any changes you made will be saved automatically.
Optional steps:
-
To see more properties, click the Show All Properties link at the bottom of the page.
-
To open a properties dialog box where you can add or edit all the properties at once and view document information and statistics, click Properties at the top of the page, and then click Advanced Properties.
On the Summary tab, you can add or edit the Title, Subject, Author, Manager, Company, Category, Keywords (also called Tags), and Comments.
To view custom properties, click the Custom tab.
-
To see the properties in a panel within your workbook, click Properties at the top of the page and select Show Document Panel.
Note: If your organization customized the Document Information Panel, or if the document for which you want to view properties is saved to a document library or a document management server, additional document property views may be available.
-
View or create custom properties for a file
Custom properties are properties that you define for an Office document. You can assign a text, time, or numeric value to custom properties, and you can also assign them the values yes or no. You can choose from a list of suggested names or define your own.
-
Click the File tab.
-
Click Info.
-
Click the View and edit database properties link at the top of the page.
-
Click the Custom tab.
-
In the Name box, type a name for the custom property, or select a name from the list.
-
In the Type list, select the data type for the property that you want to add.
-
In the Value box, type a value for the property. The value that you type must match the selection in the Type list. For example, if you select Number in the Type list, you must type a number in the Value box. Values that don't match the property type are stored as text.
-
-
Click Add, and then click OK.
-
Click the File tab again to return to your workbook.
-
Click the File tab.
-
Click Info.
-
Click Properties at the top of the page, and then select Advanced Properties.
-
Click the Custom tab.
-
In the Name box, type a name for the custom property, or select a name from the list.
-
In the Type list, select the data type for the property that you want to add.
-
In the Value box, type a value for the property. The value that you type must match the selection in the Type list. For example, if you select Number in the Type list, you must type a number in the Value box. Values that don't match the property type are stored as text.
-
-
Click Add, and then click OK.
-
Click the File tab again to return to your presentation.
-
Click the File tab.
-
Click Info.
-
Click Project Information at the top of the page, and then select Advanced Properties.
-
Click the Custom tab.
-
In the Name box, type a name for the custom property, or select a name from the list.
-
In the Type list, select the data type for the property that you want to add.
-
In the Value box, type a value for the property. The value that you type must match the selection in the Type list. For example, if you select Number in the Type list, you must type a number in the Value box. Values that don't match the property type are stored as text.
-
-
Click Add, then click OK.
-
Click the File tab again to return to your project.
-
Click the File tab.
-
Click Info.
-
Click Publication Properties at the top of the page, and then select Advanced Properties.
-
Click the Custom tab.
-
In the Name box, type a name for the custom property, or select a name from the list.
-
In the Type list, select the data type for the property that you want to add.
-
In the Value box, type a value for the property. The value that you type must match the selection in the Type list. For example, if you select Number in the Type list, you must type a number in the Value box. Values that don't match the property type are stored as text.
-
-
Click the File tab again to return to your publication.
-
Click the File tab.
-
Click Info.
-
Click Properties at the top of the page, and then select Advanced Properties.
-
Click the Custom tab.
-
In the Name box, type a name for the custom property, or select a name from the list.
-
In the Type list, select the data type for the property that you want to add.
-
In the Value box, type a value for the property. The value that you type must match the selection in the Type list. For example, if you select Number in the Type list, you must type a number in the Value box. Values that don't match the property type are stored as text.
-
-
Click the File tab again to return to your document.
What do you want to do?
Learn more about the document properties
Document properties, also known as metadata, are details about a file that describe or identify it. Document properties include details such as title, author name, subject, and keywords that identify the document's topic or contents.
If you specify the relevant values for the document properties fields for your documents, you can easily organize and identify your documents later. You can also search for documents based on their properties. In Microsoft Office Word 2007, Microsoft Office Excel 2007, and Microsoft Office PowerPoint 2007, you can view or edit document properties easily while you work on your document content by using the Document Information Panel, which displays at the top of your document in your Office program.
There are five types of document properties:
-
Standard properties By default, Microsoft Office documents are associated with a set of standard properties, such as author, title, and subject. You can specify your own text values for these properties to make it easier to organize and identify your documents. For example, in Word, you can use the Keywords property (also called Tags) to add the keyword "customers" to your sales files. You can search for all sales files with that keyword.
-
Automatically updated properties These properties include both file system properties (for example, file size or the dates when a file was created or last changed) and statistics that are maintained for you by Office programs (for example, the number of words or characters in a document). You cannot specify or change the automatically updated properties.
You can use the automatically updated properties to identify or find documents. For example, you can search for all files created after August 3, 2005, or for all files that were last changed yesterday.
-
Custom properties You can define additional custom properties for your Office documents. You can assign a text, time, or numeric value to custom properties, and you can also assign them the values yes or no. You can choose from a list of suggested names or define your own.
-
Properties for your organization If your organization customized the Document Information Panel, the document properties that are associated with your document may be specific to your organization.
-
Document library properties These are properties that are associated with documents in a document library on a website or in a public folder. When you create a new document library, you can define one or more document library properties and set rules on their values. When people add documents to the document library, they are prompted to specify the values for each of these properties. For example, a document library that collects product ideas can prompt the person for properties such as Submitted By, Date, Category, and Description. When you open a document from a document library in Office Word 2007, Office Excel 2007, or Office PowerPoint 2007, you can edit and update these document library properties in the Document Information Panel.
View the document properties when you open or save a file
You can view the document properties for a file in the Open dialog box or Save As dialog box.
-
In the Open dialog box or Save As dialog box, select the document for which you want to view properties.
-
Click the arrow next to Views, and then do one of the following:
-
To view properties such as the size of the file and the date when the file was last changed, click Details.
-
To view all document properties, click Properties.
-
View the properties for the current document
- Which Office program are you using?
- Access
- Excel
- PowerPoint
- Publisher
- Word
-
Click the Microsoft Office Button
 , point to Manage, and then click Database Properties.
 -
In the File name Properties dialog box, click the tabs to select the properties that you want to view.
Use the Document Information Panel to view or change the document properties.
-
Click the Microsoft Office Button
, point to Prepare, and then click Properties. -
In the Document Information Panel, click the arrow next to Document Properties to select the set of properties that you want to view (for example, Advanced Properties).
Notes:
-
You can view custom properties by clicking Advanced Properties.
-
If your organization customized the Document Information Panel, or if the document for which you want to view properties is saved to a document library or a document management server, additional document property views may be available.
-
-
On the File menu, click Properties.
-
In the Publication Properties dialog box, click the tabs to select the properties that you want to view.
-
Click the Microsoft Office Button
, point to Prepare, and then click Properties. -
In the Document Information Panel, click the arrow next to Document Properties to select the set of properties that you want to view (for example, Advanced Properties).
Notes:
-
You can view custom properties by clicking Advanced Properties.
-
If your organization customized the Document Information Panel, or if the document for which you want to view properties is saved to a document library or a document management server, additional document property views may be available.
-
Change the properties for the current document
- Which Office program are you using?
- Access
- Excel
- PowerPoint
- Publisher
- Word
-
Click the Microsoft Office Button
, point to Manage, and then click Database Properties. -
In the File name Properties dialog box, on the Summary tab, type the values for standard properties, such as Title and Author.
Use the Document Information Panel to view or change the document properties.
-
Click the Microsoft Office Button
, point to Prepare, and then click Properties. -
In the Document Information Panel, click the arrow next to Document Properties to select the set of properties that you want to change, for example, Advanced Properties.
Note: If your organization customized the Document Information Panel, or if the document for which you want to change properties is saved to a document library or a document management server, additional document property views may be available.
-
In the Document Information Panel, type the information that you want in each of the property field boxes.
Note: Any property fields that are marked by a red asterisk are required fields, and you may need to complete them before you can save your document.
-
On the File menu, click Properties.
-
In the Publication Properties dialog box, on the Summary tab, type the values for standard properties, such as Title and Author.
Use the Document Information Panel to view or change the document properties.
-
Click the Microsoft Office Button
, point to Prepare, and then click Properties. -
In the Document Information Panel, click the arrow next to Document Properties to select the set of properties that you want to change, for example, Advanced Properties.
Note: If your organization customized the Document Information Panel, or if the document for which you want to change properties is saved to a document library or a document management server, additional document property views may be available.
-
In the Document Information Panel, type the information that you want in each of the property field boxes.
Note: Any property fields that are marked by a red asterisk are required fields, and you may need to complete them before you can save your document.
Create custom properties for a document
Custom properties are properties that you define for an Office document. You can assign a text, time, or numeric value to custom properties, and you can also assign them the values yes or no. You can choose from a list of suggested names or define your own.
- Which Office program are you using?
- Access
- Excel
- PowerPoint
- Publisher
- Word
-
Click the Microsoft Office Button
, point to Manage, and then click Database Properties. -
Click the Custom tab.
-
In the Name box, type a name for the custom property, or select a name from the list.
-
In the Type list, select the data type for the property that you want to add.
-
In the Value box, type a value for the property. The value that you type must match the selection in the Type list. For example, if you select Number in the Type list, you must type a number in the Value box. Values that don't match the property type are stored as text.
-
Click Add.
-
Click the Microsoft Office Button
, point to Prepare, and then click Properties. -
In the Document Information Panel, click the arrow next to Document Properties, and then click Advanced Properties.
-
In the Document Properties dialog box, click the Custom tab.
-
In the Name box, type a name for the custom property, or select a name from the list.
-
In the Type list, select the data type for the property that you want to add.
-
In the Value box, type a value for the property. The value that you type must match the selection in the Type list. For example, if you select Number in the Type list, you must type a number in the Value box. Values that don't match the property type are stored as text.
-
Click Add.
-
On the File menu, click Properties.
-
Click the Custom tab.
-
In the Name box, type a name for the custom property, or select a name from the list.
-
In the Type list, select the data type for the property that you want to add.
-
In the Value box, type a value for the property. The value that you type must match the selection in the Type list. For example, if you select Number in the Type list, you must type a number in the Value box. Values that don't match the property type are stored as text.
-
Click Add.
-
Click the Microsoft Office Button
, point to Prepare, and then click Properties. -
In the Document Information Panel, click the arrow next to Document Properties, and then click Advanced Properties.
-
In the Document Properties dialog box, click the Custom tab.
-
In the Name box, type a name for the custom property, or select a name from the list.
-
In the Type list, select the data type for the property that you want to add.
-
In the Value box, type a value for the property. The value that you type must match the selection in the Type list. For example, if you select Number in the Type list, you must type a number in the Value box. Values that don't match the property type are stored as text.
-
Click Add.
No comments:
Post a Comment