Group or ungroup shapes, pictures, or other objects
You can group shapes, pictures, or other objects. Grouping lets you rotate, flip, move, or resize all shapes or objects at the same time as though they were a single shape or object.
You can also change the attributes of all of the shapes in a group at one time, such as adding a shape fill or effect, or an effect to a picture. You can ungroup a group of shapes at any time and then regroup them later.
Click the headings below for more information
Group shapes, pictures, or other objects
-
Press and hold CTRL while you click the shapes, pictures, or other objects to group. You will need to select more than one shape, picture or object in order to enable the Group button.
Tips:
-
For help selecting a shape or picture, see Select a shape or other object.
-
If you want to group text and images in Word, the text needs to be contained in a text box. See Add, copy, or delete a text box.
Note that to group pictures in Word, the Wrap Text option must be set to something other than In line with Text for each picture you want to group. To change this option, right click each picture, click Wrap Text, and then pick anything but In line with Text.
-
-
Do one of the following:
Tips:
-
To group multiple SVG icons together you have to convert them to shapes first. For more information on converting them to shapes, see: Convert an SVG image to an Office shape.
-
After you make your group, you can still work with a single item in the group. Select the group, and then click the item to select it.
-
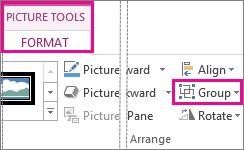
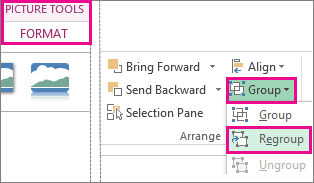
To group pictures, on the Picture Tools Format tab, click Group > Group.
Note: The Drawing Tools Format or Picture Tools Format tabs are contextual, which means that they only appear on the ribbon when you have a shape or a picture selected.
-
To group shapes and other objects, on the Drawing Tools Format tab, click Group > Group.

-
Ungroup shapes, pictures, or other objects
-
Select the group that you want to ungroup.
-
Do one of the following:
-
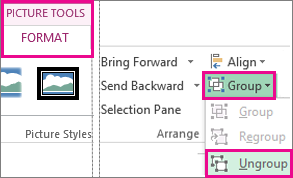
To ungroup pictures, on the Picture Tools Format tab, click Group > Ungroup.
-
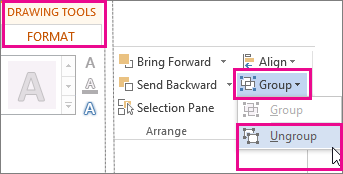
To ungroup shapes and objects, on the Drawing Tools Format tab, click Group > Ungroup.
-
Regroup pictures, shapes, or other objects
Notes:
-
The Regroup button is not available in Word 2013 and Word 2016. To regroup, select all of the shapes or pictures to regroup, and then click Group > Group.
-
If you converted a SmartArt graphic to individual shapes, you can't convert them back to a SmartArt graphic or regroup them.
For all apps except Word
-
Select any one of the shapes, pictures, or objects that were previously in a group.
-
Do one of the following:
-
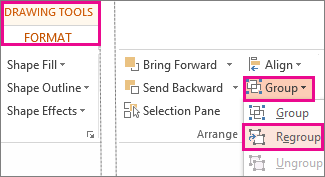
To regroup shapes and objects, on the Drawing Tools Format tab, click Group > Regroup.
-
To regroup pictures, on the Picture Tools Format tab, click Group > Regroup.
-
The Group button is unavailable
Here are some reasons why the Group button is grayed out and the things you can do to get it back.
-
Only one shape or picture is selected. Make sure you have multiple shapes or pictures selected. You can't use the Group tool with SVG icons, so those don't count.
-
To group SVG icons together you have to convert them to shapes first. For more information on converting them to shapes, see: Convert an SVG image to an Office shape.
-
Your selection includes a table, worksheet, or GIF image. The Group button will not be available if any of these objects is selected.
-
If you are using Word, and trying to group pictures, Wrap Text may be set to In line with Text. Right-click the pictures, choose Wrap Text andChange the layout option to anything but In line with Text for every single picture you want to group.
-
If you are using PowerPoint, you might have tried to group something with the title placeholder text ("Click to add title") or with the content placeholder ("Click to add text").
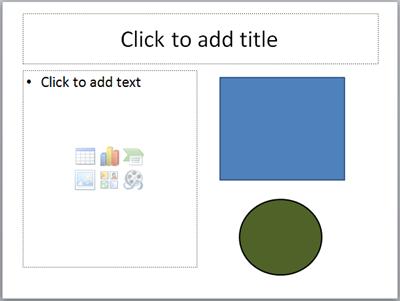
In the above example, the blue square and the green circle can be grouped together. But the shapes cannot be grouped with the placeholder text.
To get the Group button back, move the shape, picture, or object to another location on your slide outside of the placeholder text, or remove the placeholder from the things you want to group.
Note: If none of this enables the Group button for you, search the Answers forum or post your questions there.
Click the headings below for more information
Group shapes, pictures, or objects
-
Press and hold CTRL while you select the shapes, pictures, or objects that you want to group.
-
Do one of the following:
-
To group pictures: under Picture Tools, on the Format tab, in the Arrange group, click
 , and then click Group.
If you do not see the Drawing Tools or Picture Tools tabs, make sure that you selected a shape, picture, or other object. You might have to double-click the object to open the Format tab.
-
To group shapes and other objects: under Drawing Tools, on the Format tab, in the Arrange group, click
, and then click Group .
Tip: After you group items, you can continue to select any single item within the group. Select the group, and then click the individual item that you want to select.
-
Ungroup shapes, pictures, or objects
-
Select the group that you want to ungroup.
-
Do one of the following:
-
To ungroup shapes or other objects, under Drawing Tools, on the Format tab, in the Arrange group, click Group
, and then click Ungroup.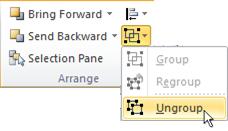
-
To ungroup pictures, under Picture Tools, on the Format tab, in the Arrange group, click
, and then click Ungroup. If you do not see the Drawing Tools, Picture Tools, or Format tabs, make sure that you selected a group of shapes, pictures, or other objects. You might have to double-click the object to open the Format tab.
-
Regroup shapes, pictures, or objects
-
Select any one of the shapes or objects that were previously in a group.
Note: If you converted a SmartArt graphic to individual shapes, it is not possible to convert them back to a SmartArt graphic or to regroup them.
-
Do one of the following:
-
To regroup shapes and objects: under Drawing Tools, on the Format tab, in the Arrange group, click
, and then click Regroup. -
To regroup pictures: under Picture Tools, on the Format tab, in the Arrange group, click
, and then click Regroup.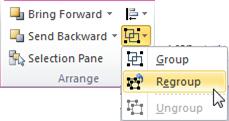
If you do not see the Drawing Tools, Picture Tools, or Format tabs, make sure that you selected a group of shapes, pictures, or other objects. You might have to double-click the object to open the Format tab.
-
The Group button is unavailable
If your selection includes a table, worksheet, or GIF image, the Group button will not be available. In PowerPoint, the Group button may not be available if the shape, picture or object has been inserted into a placeholder or you are trying to group a placeholder, as placeholders cannot be grouped with other shapes, pictures, objects.
-
Move the shape, picture, or object to another location on your slide outside of the placeholder or remove the placeholder from the objects that you want to group.
Click the headings below for more information
Group shapes or objects
-
Insert a drawing canvas. On the Insert tab, in the Illustrations group, click Shapes, and then click New Drawing Canvas.
-
Cut and paste the shapes or objects that you want to group onto the drawing canvas.
-
Select the shapes or other objects that you want to group.
For more information about selecting shapes, see Select a shape or other object.
-
Do one of the following:
-
For shapes without text, under Drawing Tools, on the Format tab, in the Arrange group, click
, and then click Group. -
For shapes with text, under Text Box Tools, on the Format tab, in the Arrange group, click Group
, and then click Group.If you do not see the Drawing Tools, Text Box Tools or Format tabs, make sure that you selected a shape or other object.
-
-
Drag the grouped shapes or objects off of the drawing canvas.
-
Select the drawing canvas, and then press DELETE.
Notes:
-
After you group shapes or other objects, you can continue to select any single shape or object within the group. Select the group, and then click the individual shape or object that you want to select.
-
You cannot group shapes and other objects across multiple programs.
-
Group pictures
-
Right-click each picture that you want to group, and on the shortcut menu, point to Text Wrapping.
-
Click Square or any option other than In Line with Text.
-
Insert a drawing canvas. On the Insert tab, in the Illustrations group, click Shapes, and then click New Drawing Canvas.
-
Cut and paste the pictures that you want to group onto the drawing canvas.
-
Select the pictures that you want to group.
For more information about selecting pictures, see Select a shape or other object.
-
Under Picture Tools, on the Format tab, in the Arrange group, click Group
, and then click Group.If you do not see the Picture Tools or Format tabs, make sure that you selected a picture or other object.
-
Drag the grouped pictures off the drawing canvas.
-
Select the drawing canvas, and then press DELETE.
Notes:
-
After you group pictures or other objects, you can continue to select any single picture or object within the group. Select the group, and then click the individual picture or object that you want to select.
-
You cannot group pictures and other objects across multiple programs.
-
Group a picture and text box
-
Right-click the picture that you want to group, and on the shortcut menu, point to Text Wrapping.
-
Click Square or any option other than In Line with Text.
-
Insert a drawing canvas. On the Insert tab, in the Illustrations group, click Shapes, and then click New Drawing Canvas.
-
Cut and paste the picture that you want to group onto the drawing canvas.
-
Cut and paste the text box that you want to group onto the drawing canvas.
-
Select the picture and the text box that you want to group.
For more information about selecting pictures and text boxes, see Select a shape or other object.
-
Under Picture Tools, on the Format tab, in the Arrange group, click Group
, and then click Group.If you do not see the Picture Tools or Format tabs, make sure that you selected a picture or other object.
-
Drag the grouped picture and text box off the drawing canvas.
-
Select the drawing canvas, and then press DELETE.
Notes:
-
After you group the picture and the text box, you can continue to select each individual object and modify it. Select the group, and then click the picture or text box that you want to select.
-
You cannot group pictures and other objects across multiple programs.
-
Add a caption to a picture
You can also add a caption to a picture in Office Word 2007 without using a text box. Do the following:
-
Right-click the picture, and on the shortcut menu, point to Insert Caption.
-
Select the options that you want. such as pre-existing text, the caption position, and optional numbering, and then click OK.
You can now select the caption and change the text and the text formatting.
Ungroup shapes, pictures, or objects
To ungroup a group of shapes, pictures, or other objects (for example, if you want to move a group but leave one shape behind or make extensive changes to one shape without changing the other shapes), do the following:
-
Insert a drawing canvas. On the Insert tab, in the Illustrations group, click Shapes, and then click New Drawing Canvas.
-
Drag the group that you want to ungroup onto the drawing canvas.
-
Do one of the following:
-
To ungroup shapes without text or other objects, under Drawing Tools, on the Format tab, in the Arrange group, click
, and then click Ungroup. -
For shapes with text, under Text Box Tools, on the Format tab, in the Arrange group, click Group
, and then click Group. -
To ungroup pictures, under Picture Tools, on the Format tab, in the Arrange group, click Group
, and then click Ungroup.
-
-
If you do not see the Drawing Tools, Text Box Tools, Picture Tools, or Format tabs, make sure that you selected a group of shapes, pictures, or other objects.
-
Drag the shapes, pictures, or objects off of the drawing canvas.
-
Select the drawing canvas and then press DELETE.
Convert a SmartArt graphic to individual shapes
If you want to give the shapes of your SmartArt graphic a complex look or get fine control over resizing and positioning of shapes in your SmartArt graphic, convert your SmartArt graphic to individual shapes.
Important: After you convert your SmartArt graphic to individual shapes, it is not possible to convert them back to a SmartArt graphic. When you convert a SmartArt graphic, you cannot automatically layout shapes, and you lose the design and formatting tools available on the SmartArt Tools tabs, including the Layouts, Change Colors, and SmartArt Styles galleries. However, you can still format the shapes by using the options on the Drawing Tools tab instead.
-
Select all of the shapes in your SmartArt graphic.
To select all of the shapes, click a shape, and then press CTRL+A.
-
On the Home tab, in the Clipboard group, click Copy.
-
To convert your SmartArt graphic to individual shapes, click a different area in your document, and then on the Home tab, in the Clipboard group, click Paste.
Note: When you convert to shapes from a SmartArt graphic, each individual shape becomes a grouped shape. So for every shape in your SmartArt graphic, two shapes are grouped when you paste — one shape is for the text, and the other shape is for the geometry. If the shape in your SmartArt graphic did not contain text, you may see a font or text size that is different from the other shapes when you enter text in the shape.
Regroup shapes or objects
-
Insert a drawing canvas. On the Insert tab, in the Illustrations group, click Shapes, and then click New Drawing Canvas.
-
Drag the shapes or objects that you want to regroup onto the drawing canvas.
-
Select any one of the shapes or objects that were previously in a group.
If you converted your SmartArt graphic to individual shapes, it is not possible to convert them back to a SmartArt graphic or to regroup them.
-
Do one of the following:
-
To regroup shapes without text or other objects, under Drawing Tools, on the Format tab, in the Arrange group, click
, and then click Regroup. -
To regroup shapes with text, under Text Box Tools, on the Format tab, in the Arrange group, click Group
, and then click Regroup .
-
-
If you do not see the Drawing Tools, Text Box Tools, or Format tabs, make sure that you selected a group of shapes, pictures, or other objects.
-
Drag the regrouped shapes or objects off of the drawing canvas.
-
Select the drawing canvas, and then press DELETE.
Regroup pictures
-
Insert a drawing canvas. On the Insert tab, in the Illustrations group, click Shapes, and then click New Drawing Canvas.
-
Drag the pictures or objects that you want to regroup onto the drawing canvas.
-
Select any one of the pictures or objects that were previously in a group.
-
Under Picture Tools, on the Format tab, in the Arrange group, click Group
, and then click Regroup.If you do not see the Picture Tools or Format tabs, make sure that you selected a picture or other object.
-
Drag the regrouped shapes or objects off of the drawing canvas.
-
Select the drawing canvas, and then press DELETE.
Group shapes, pictures, or other objects
-
Press and hold command while you use the mouse or touchpad to select the shapes, pictures, or other objects that you want to group.
-
Click the Shape Format tab or the Picture Format tab, and then click Group > Group.
Note: The Shape Format and Picture Format tabs are contextual, which means that they only appear on the ribbon when you have a shape or a picture selected.

Office may display one or both of these tabs, depending on the types of objects that are currently selected in a page.

If Group isn't visible on the ribbon,
 , click Arrange to display it.
After you make a group of objects, you can still work with an individual item in the group by selecting the group, and then clicking the item to select it.
Note: If the Group button is unavailable, verify that you have more than one object selected. If you can't select an additional object, verify that none of the objects that you want to add to the group has Word Wrap set to In Line with Text.
Ungroup shapes, pictures, or other objects
You might want to move a group but leave one shape or picture behind, or you might need to make extensive changes to one shape without changing the other shapes in the group. To do this, you first dissolve, or ungroup, the grouping of objects.
-
Select the group that has the object or objects that you want to separate from the others.
-
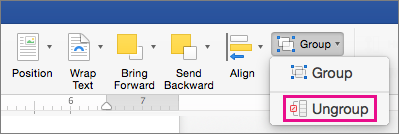
On the Shape Format tab or the Picture Format tab, click Group, and then click Ungroup.
If Group isn't visible on the ribbon,
, click Arrange to display it.Office dissolves the group, leaving the individual objects in their current location and selected.
Word-specific grouping feature
If text wrapping for an object is set to In Line with Text, you can't group it with other objects. By default, pictures have this setting, and you must change the setting to group a picture with other objects. To change the setting, Control + Click the picture or other object, point to Wrap Text, and then click a setting other than In Line with Text. To learn more about text wrapping, see Control text wrapping around objects.
If text wrapping is set correctly for your selected objects, but the Group button remains unavailable to you, search the Answers forum or post your questions there.
Regroup pictures, shapes, or other objects
Notes:
-
The Regroup button is not available in Word 2013 and Word 2016. To regroup, select all of the shapes or pictures to regroup, and then click Group > Group.
-
If you converted a SmartArt graphic to individual shapes, you can't convert them back to a SmartArt graphic or regroup them.
For all apps except Word
-
Select any one of the shapes, pictures, or objects that were previously in a group.
-
Do one of the following:
-
To regroup shapes and objects, on the Shape Format tab, click Group > Regroup.
-
To regroup pictures, on the Picture Format tab, click Group > Regroup.
-
The Group button is unavailable
Here are some reasons why the Group button is grayed out and the things you can do to get it back.
-
Only one shape or picture is selected. Make sure you have multiple shapes or pictures selected. You can't use the Group tool with SVG icons, so those don't count.
-
Your selection includes a table, worksheet, or GIF image. The Group button will not be available if any of these objects is selected.
-
If you are using Word, and trying to group pictures, Wrap Text may be set to In line with Text. Right-click the pictures, choose Wrap Text andChange the layout option to anything but In line with Text for every single picture you want to group.
-
If you are using PowerPoint, you might have tried to group something with the title placeholder text ("Click to add title") or with the content placeholder ("Click to add text").
In the above example, the blue square and the green circle can be grouped together. But the shapes cannot be grouped with the placeholder text.
To get the Group button back, move the shape, picture, or object to another location on your slide outside of the placeholder text, or remove the placeholder from the things you want to group.
Note: If none of this enables the Group button for you, search the Answers forum or post your questions there.
Microsoft Office Tutorials: Group Or Ungroup Shapes, Pictures, Or Other Objects >>>>> Download Now
ReplyDelete>>>>> Download Full
Microsoft Office Tutorials: Group Or Ungroup Shapes, Pictures, Or Other Objects >>>>> Download LINK
>>>>> Download Now
Microsoft Office Tutorials: Group Or Ungroup Shapes, Pictures, Or Other Objects >>>>> Download Full
>>>>> Download LINK HS