Create a map in Visio
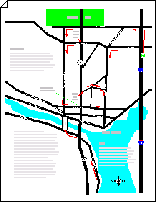
Use the Directional Map and Directional Map 3D templates to create drawings of simple maps.
Use directional map shapes, including clearly identifiable roadways, metro lines, and landmarks, to create easy-to-read maps and route directions.

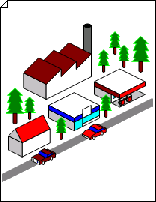
Use 3D directional maps to illustrate small geographic areas, such as villages or towns, using colorful three-dimensional shapes.

What do you want to do?
Create a directional map
-
On the File tab, select New.
-
Under Template Categories, click Maps and Floor Plans, select Direction Map, and then click Create.
-
Add road, railroad, and metro shapes to your map to establish the route structure:
Add road shapes
-
From Road Shapes, drag a road shape (such as Road round or Curve 1) onto your map, and then resize the shape as necessary.
-
To set the thickness of a road shape, right-click it, and then click a thickness setting (Thin, Standard, Thick, or Custom.)
If you choose Custom, you can drag a selection handle
 or control handle
  to change the road thickness.
 -
To change the direction of a road shape, on the Home tab, in the Arrange group, click Position, point to Rotate Shapes, and then click a rotate or flip command.
Tip: You can also change the direction of a shape by using the Rotation handle
 .
. -
From Road Shapes, drag other shapes, such as bridges, roundabouts and interchanges to your map.
-
Connect road shapes, using straight segments to connect curved roads and intersections. Glue an end point on a Road round or Road square shape to a connection point
 on another road shape.
Add metro shapes
-
From Metro Shapes, drag metro shapes onto your map.
-
To change the direction of a road shape, on the Home tab, in the Arrange group, click Position, point to Rotate Shapes, and then click a rotate or flip command.
You can also change the direction of a shape by using the Rotation handle .
. -
Use straight metro line segments to connect curved metro shapes. Glue the end point of a Metro line or Rounded metro shape to a connection point
 on another metro shape.
-
-
From Landmark Shapes, drag shapes onto your map to indicate natural features (such as trees and lakes) or buildings (such as schools and hospitals).
Tip: To widen or lengthen a shape, drag a side selection handle. To resize a shape proportionally, drag a corner selection handle.
-
Label your map.
Add text to a shape
Select the shape that you want to add text to, and then type.
Add a callout
-
In the Shapes pane, click More Shapes, point to Visio Extras, and select Callouts.
-
From Callouts, drag a callout shape onto your map.
Add a text block.
-
On the Home tab, in the Tools group, click the Text Block tool
 .
. -
Drag and draw a text block onto your map.
-
To enter text, select the text block and then type.
-
To change the width of the text block (and change the word wrapping), drag a side selection handle
 .
.
-
-
Add a scale indicator to your map.
-
From Landmark Shapes, drag the Scale shape onto your map.
-
To associate the scale with a specific distance, select the shape and then type to add a distance measurement.
-
-
You can change the relative thickness of all road and metro shapes in your map.
-
Make sure that no shapes are selected.
-
On the View tab, in the Show group, click Task Panes, and then select Shape Data.
-
In the Shape Data pane, for the Road Width and Metro Width, type a base width value.
This value will be applied to thin roads and thin metro lines. The width of standard and thick roads and metro lines will be based on multiples of this value.
-
Create a 3D map
-
On the File tab, select New.
-
Under Template Categories, click Maps and Floor Plans, select Directional Map 3D, and then click Create.
-
From Directional Map Shapes 3D, drag road shapes onto the drawing page. You can duplicate road shapes by selecting the shape, and then pressing CTRL+D. Repeat to create multiple road segments.
-
Align the shapes to create the road configuration you want.
Notes:
-
To nudge a shape into position, select the shape and then press the arrow key that represents the direction you want.
-
To create a longer road or a road grid that can be moved as a single unit, group multiple road shapes together.
-
-
Drag other shapes, such as bridges, buildings, and cars onto your map.
-
To rotate a selected shape, drag the Rotation handle
 .
. -
To add text to shapes, select a shape, and then type.
No comments:
Post a Comment