Create an Office 365 group in the admin center
Contributors: 
Last updated: 6 November, 2017
While users can create an Office 365 group from Outlook or other apps, as the global admin, you may need to create or delete groups, add or remove members, and customize how they work. The Office 365 admin center is the place to do this.
| | Are you looking for how to create an email group (distribution list) in Outlook? If so, see Create a contact group or distribution list in Outlook. |
Create an Office 365 group
-
Go to the Office 365 admin center.
Go to the Office 365 admin center.
-
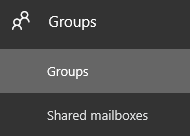
Choose Groups > Groups in the left navigation pane.

-
Choose Add a group.

-
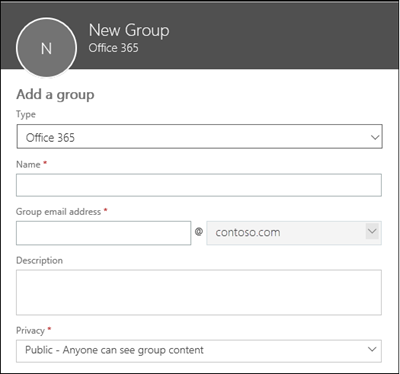
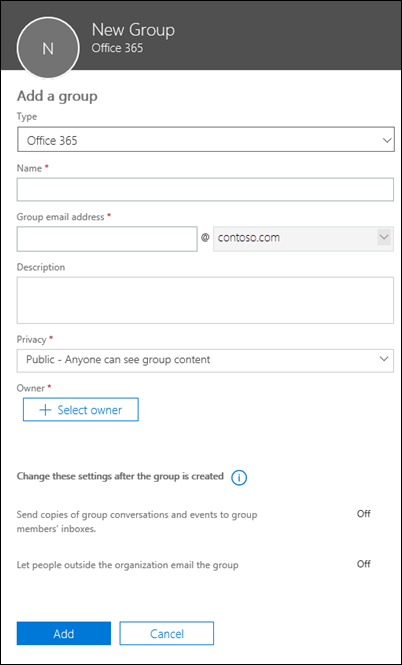
Choose the type of group you want to create, based on what you want to use it for. If you want an email address that customers can contact, such as info@contoso.com, choose Office 365 group. For a detailed comparison of the options and what to choose when, see Compare groups.
-
Assign a unique name and alias for the group.
-
Leave Send copies of group conversations set to On if you want members to receive messages and calendar items in their own inbox, in addition to the group mailbox.
-
If you're creating a group email address such as info@contoso.com, it's important you understand how this setting works. See How following a group works.
-
ALSO, after you create the group, you need to turn on Allow outside senders. See Let people outside the organization email the group.
-
-
Choose Select Owner and then choose the name of the person who will be designated to manage the group. Anyone who is a group owner will be able to delete email from the Group inbox. Other members won't be able to delete email from the Group inbox.
-
Choose Add.
Add members to an Office 365 group
-
Refresh your Office 365 admin center page so your new Office 365 group appears.
-
Select the group you want to add members to.
-
Next to Members, choose Edit.
-
Enter the names of the people you want to be members of the group and select their name from the list. Alternatively, you can let individuals add themselves or request approval to join later (see Join a group).
-
Choose Save to update the Office 365 Group.
The Office 365 group will appear in Outlook with members assigned to it.
Tip: Office 365 connected Yammer groups must be created in Yammer, but can be managed in the Office 365 admin center like other Office 365 groups. To learn more, see Yammer and Office 365 Groups.
Let people outside the organization email the group (such as info@contoso.com)
This option is great if you want to have a group email address such as info@contoso.com.
After you create the group, you set this option.
-
Go to the Office 365 admin center.
Go to the Office 365 admin center.
-
Choose Groups > Groups in the left navigation pane.

-
Check the box beside the group you want to edit.
-
Set the Let people outside the organization email the group toggle to On.
-
Choose Save.
How following group email works
It's important to understand how this setting works, especially if you're using a group inbox for a shared email address such as info@contoso.com.
-
When you use the admin center to create a group, by default users are set up to follow the group. It's the Send copies of group conversations and events to the group members' inboxes option.

-
However, if a user creates a group from Outlook, this isn't on by default; they have to choose Advanced Options > Send all group conversations.....

These settings mean group members will get a copy of the email sent to their Outlook Inbox. They can read and delete this copy of the email and not affect anyone else. In the Group inbox, a copy of the email still exists.
In Outlook, they can go to the Group inbox, and opt to stop following so a copy of the email no longer goes to their inbox. They can follow again, too. They'll still be able to access the group email by going to the Group inbox in Outlook.

Who can delete email from the Group Inbox?
The Group owner can delete any emails from the Group Inbox, regardless of whether they were the initial author.
A member can delete an email conversation from the Group Inbox if they initiated it, and only using Outlook on the web (right-click the email, then click Delete). They can't do it from the Outlook app (Outlook 2016).
Let's say the Group owner sends an email to the group, and then deletes it from the Group inbox. The copy that was sent to the members' inbox won't be deleted.
More customization options
-
If you want your users to be able to "Send as" or "Send on behalf of" a Group in Outlook, you need to enable it in the Exchange Admin Center. See Allow members to send as or send on behalf of an Office 365 Group.
-
If you want to allow people outside your organization (such as partners or consultants) to access groups, see Manage guest access to Office 365 groups.
Choose the domain to use when creating Office 365 Groups
Some organizations use separate email domains to segment different parts of their businesses. You can specify which domain should be used when your users create Office 365 groups.
If your organization needs users to create their groups in domains other than the default accepted domain of your organization, you can allow it by configuring email address policies (EAPs) using PowerShell.
For instructions, see Choose the domain to use when creating Office 365 Groups.
What you need to know about creating groups in the admin center
-
People in the following Office 365 admin roles can create and manage groups in the admin center: global admin, Exchange admin, user management admin.
-
You need an Exchange Online license at minimum (for example, if you don't have an Office 365 business license).
-
Office 365 Groups must be enabled for your tenant. It is by default, but some organizations disable it.
-
You can't be a delegated admin (for example, a consultant who is an admin on behalf of).
-
If you create a security group to manage who can create Office 365 groups, the global admin does not need to be a member. They will still be able to create groups from the admin center. However, they won't be able to create groups from the apps (such as Planner, Outlook). To learn more, see Manage who can create Office 365 Groups.
-
The Group ID is used to determine the alias (also known as the mailNickname) in Exchange. The mailNickname property must be unique across all Office 365 Groups within a tenant.
Articles about managing Office 365 Groups
-
Manage Office 365 Groups with PowerShell: this article introduces you to key cmdlets and provides examples
-
Why you should upgrade your distribution lists to groups in Outlook
-
Manage who can create Office 365 Groups in your organization
-
Create and manage distribution groups in the Exchange admin center
| |


 New to Office 365?
No comments:
Post a Comment