You can link to a Data Service, or Web Service as it can also be called, from Access. For example, you can create a Data Service connection to your enterprise Business Data Catalog and get business data into Access.
After you create a Data Service connection, you can link to it as you would any other external data source. If the Data Service accepts parameters, you can change the parameters when you create a linked table by using the Data Service connection.
Note, creating a new Data Service connection file, such as through Business Data Connectivity Services, is beyond the scope of this article. See Use external data with Access for more information about working with BDCM files and Access.
Overview
Access lets you link to external data that is available through a Data Service. You must already have the Data Service connection file, which is supplied by the Data Service provider. The general process of using Data Service data is as follows:
-
Obtain a Data Service data connection file.
-
Install the Data Service data connection by using the connection file.
-
Create a linked table by using the installed Data Service data connection.
Note that the linked tables that you create by using a Data Service connection are read-only.
Create a connection to a Data Service
-
The location of the Link to Data Services wizard differs slightly depending upon your version of Access. Choose the steps that match your Access version:
-
If you're using the latest version of the Microsoft 365 subscription version of Access, on the External Data tab, in the Import & Link group, click New Data Source > From Online Services > Data Services.
-
If you're using Access 2016, Access 2013 or Access 2010, on the External Data tab, in the Import & Link group, click More to drop down the list of options and then click Data Services.
-
-
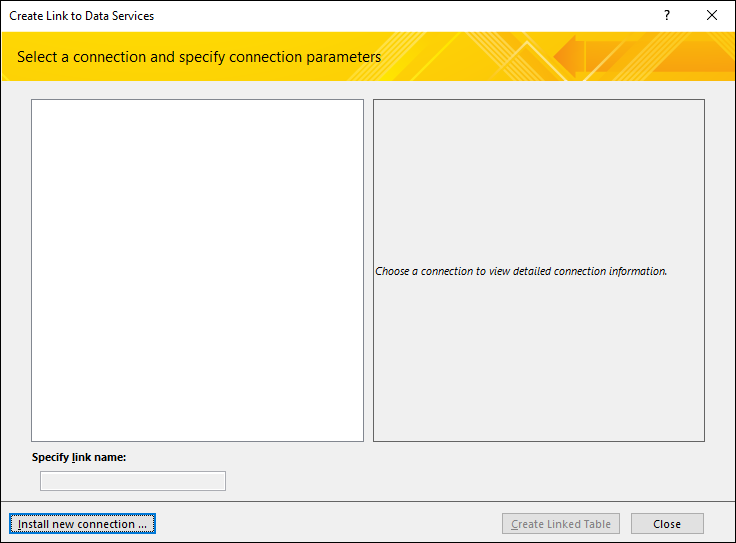
At the bottom of the Create Link to Data Services dialog box, click Install New Connection.

-
In the Select a connection definition file dialog box, browse to and select the XML file that contains the description of the Data Service.
Note: This file is provided by the Data or Web Service provider, or by your system administrator.
To enable the Data Services button, Microsoft .NET 3.5 or later must be installed.
Link to an existing Data Service connection
-
The location of the Link to Data Services wizard differs slightly depending upon your version of Access. Choose the steps that match your Access version:
-
If you're using the latest version of the Microsoft 365 subscription version of Access, on the External Data tab, in the Import & Link group, click New Data Source > From Online Services > Data Services.
-
If you're using Access 2016, Access 2013 or Access 2010, on the External Data tab, in the Import & Link group, click More to drop down the list of options and then click Data Services.
-
-
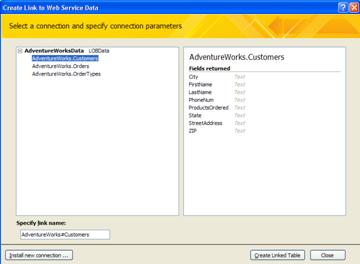
The Create Link to Data Services dialog box displays the tables of data that the Data Service provides. For example, if you connected to the AdventureWorks Web Service, you might see something like this:

-
In the Create Link to Data Service, click the table that you want to use.
-
Click Create Linked Table.
Specify a parameter value
Your Data Service connection file may support parameters. A parameter is an expression that you use to filter data.
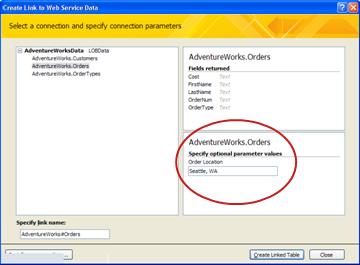
For example, the AdventureWorks Web Service data connection has an Orders table that can accept a value for Location, and use that value to limit the records that you can access by using the link.

You set the parameter value for a Data Service connection when you create the linked table.
-
Follow the first four steps in the preceding procedure, Link to an existing Data Service connection. Do not click Create Linked Table yet.
-
In the Create Link to Data Services dialog box, specify the parameter value in the appropriate box in the parameter section. The interface that you see will vary somewhat depending on the Data Service data connection file that you use. Some connections support multiple parameters.
-
When you are finished setting parameter values, click Create Linked Table.
No comments:
Post a Comment