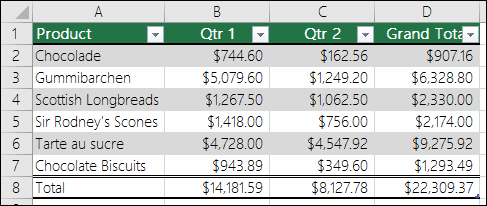
After you create an Excel table, you may only want the table style without the table functionality. To stop working with your data in a table without losing any table style formatting that you applied, you can convert the table to a regular range of data on the worksheet.

Important: In order to convert to a range, you must have an Excel table to start with. For more information, see Create or delete an Excel table.
-
Click anywhere in the table and then go to Table Tools > Design on the Ribbon.
-
In the Tools group, click Convert to Range.
-OR-
Right-click the table, then in the shortcut menu, click Table > Convert to Range.

Note: Table features are no longer available after you convert the table back to a range. For example, the row headers no longer include the sort and filter arrows, and structured references (references that use table names) that were used in formulas turn into regular cell references.
-
Click anywhere in the table and then click the Table tab.
-
Click Convert to Range.
-
Click Yes to confirm the action.
Note: Table features are no longer available after you convert the table back to a range. For example, the row headers no longer include the sort and filter arrows, and structured references (references that use table names) that were used in formulas turn into regular cell references.
Right-click the table, then in the shortcut menu, click Table > Convert to Range.
Note: Table features are no longer available after you convert the table back to a range. For example, the row headers no longer include the sort and filter arrows and the Table Design tab disappears.
Need more help?
You can always ask an expert in the Excel Tech Community, get support in the Answers community, or suggest a new feature or improvement on Excel User Voice.
No comments:
Post a Comment