Use video in a Lync Meeting
Enhance your meeting experience and keep people attentive by adding video to your Lync Meeting. Remember to set up and test your camera before the meeting to make sure it's all ready.
Click here for information about how to set up and test your camera.
Note: For an overview of other Lync Meeting room features, including your options for audio, presentations, participants, and layouts, see Introduction to Lync Meeting room or details about the meeting room for Office 365 users.
Starting video in your meeting
-
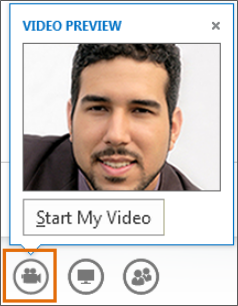
Pause on the camera icon and click Start My Video.
-
Your video starts streaming and is visible to everyone in the meeting.

-
To end video, pause on the camera icon and select an option:
-
Stop My Video ends your video, but you can still see other participants' videos.
-
Leave video ends all the videos for you, but you'll still have audio.
Use video controls and views
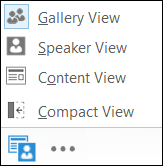
Click Pick a Layout in the meeting and choose an option:
-
Gallery View shows all of the participants' videos, and the meeting content.
-
Speaker View shows the presenters' videos, and the meeting content.
-
Content View shows only the meeting content.
-
Compact View shows the tiles of the participants in a compact window, and the meeting content.

To manage participants, right-click on their video or picture:
-
Mute, Unmute, Remove from the meeting.
-
Lock the Video Spotlight – turns off videos or pictures of everyone other than the person in the spotlight.
-
Pin to Gallery – Keeps a participant visible in the Gallery View until unpinned.
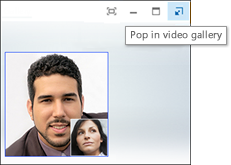
To see the video window outside of the meeting, click Pop out video gallery.
-
Click Full Screen View for a large view of the videos.
-
Click Pop in video gallery to go back to normal view.


Note: If you're using Lync in a remote environment, multi-view video won't be available. For more information, see Using Lync 2013 in a VDI environment. (VDI is not available for Office 365 users.)
No comments:
Post a Comment