Move a text box, WordArt, or shape
When you add pictures, shapes, or other objects to your Office documents, they automatically stack in individual layers as you add them. You can move individual shapes or other objects or groups of objects in a stack. For example, you can move objects up or down within a stack one layer at a time, or you can move them to the top or bottom of a stack in one move. You can overlap objects when you draw to create different effects.

Notes:
-
For information on aligning objects, see Align or arrange a picture, shape, text box, or WordArt.
-
For information about grouping objects, see Group or ungroup shapes, pictures, or other objects.
Move a picture, shape, text box, or WordArt
-
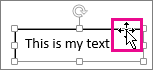
Click the border of the WordArt, text box, or shape that you want to move.
To move multiple text boxes or shapes, press and hold Ctrl while you click the borders.
-
When the cursor changes to the four headed arrow, drag it to the new location.
To move in small increments, press and hold Ctrl while pressing an arrow key. And to move the object horizontally or vertically only, press and hold Shift while you drag it.
Note: The incremental, or nudge, distance is a 1 pixel increment. What 1 screen pixel represents relative to the document area depends on the zoom percentage. When your document is zoomed in to 400%, 1 screen pixel is a relatively small nudge distance on the document. When your document is zoomed out to 25%, 1 screen pixel is a relatively large nudge distance on the document.
Depending on how far you're moving the WordArt, shape, or text box, it might be easier to cut and paste it. Right-click the object, and then click Cut (or, press Ctrl+X). Press Ctrl+V to paste it. You can also cut and paste it into a different document, or between programs, such as from a PowerPoint slide to an Excel worksheet.
Move a text box, WordArt, or shape forward or backward in a stack
-
Click the WordArt, shape, or text box that you want to move up or down in the stack.
-
On the Drawing Tools Format tab, click either Bring Forward or Send Backward.
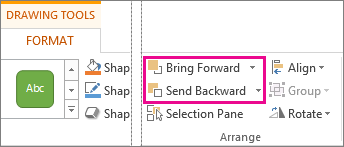
You'll have the choice of moving the object up one layer (Bring Forward) or to the top of the stack (Bring to Front). Send Backward has similar options: down one layer (Send Backward) or to the bottom of the pile (Send to Back).

Tips:
-
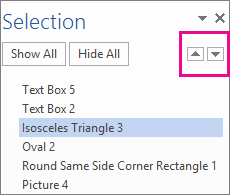
In Office 2016 and Office 2013, if you have a lot of WordArt, shapes, text boxes, or other objects, it may be easier to use up and down arrows in the Selection Pane to move objects. The Selection Pane is not available in Project or in Office 2010.
-
-
See also
Use Word Layout Options to move pictures in Word 2016 and Word 2013
-
Click the shape, text box, or WordArt that you want to move up or down in the stack. Try to click a part of the object that is not obscured by another object in the stack. If you can't select the object that you want, you may need to move other objects that are currently above it in the stack first.
-
Click the Format tab.

-
In the Arrange group, do one of the following:
-
To bring an object one step closer to the front, click the arrow next to Bring to Front, and then click Bring Forward.
-
To bring an object to the front, click the arrow next to Bring to Front, and then click Bring to Front.
-
To send an object one step toward the back, click the arrow next to Send to Back, and then click Send Backward.
-
To send an object to the back, click the arrow next to Send to Back, and then click Send to Back.
-
Tip: In Word, you also have the option of moving the object in front of or behind your text. After you click the arrow next to Bring to Front, click Bring in Front of Text. Conversely, to move the object behind your text, click the arrow next to Send to Back, and then click Send Behind Text.
No comments:
Post a Comment