Add, change, or delete borders from documents or pictures
Borders can add interest and emphasis to various parts of your document or email message. You can add borders to pages, text, tables and table cells, graphic objects, and pictures.
Click a heading below for more information
Add a border to a page
You can put a border around just one page if that page is at the beginning of a document or a section. If the page is in the middle of your document, first insert a section break.
-
On the Design tab, choose Page Borders.

-
In the Borders and Shading dialog box, design your border:
-
Under Setting, choose the border style you want.
-
Under Style, choose the line style you want.
-
In the Color list, choose a border color.
-
In the Width list, choose the line width you want.
-
If you want a clip-art border instead, in the Art list, choose a border graphic.

-
-
In the Apply to list, choose This section - First page only.

Tip: This setting also works if you're adding the border to the first page in your document.
-
In the Preview pane, click the border you want to delete.
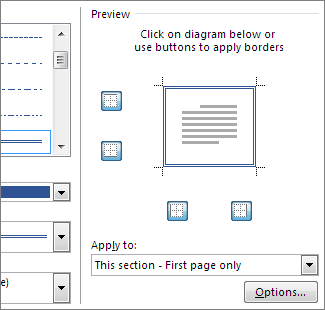
Tip: To change where the border appears on the page, choose Options and adjust the margin settings.
Remove a page border
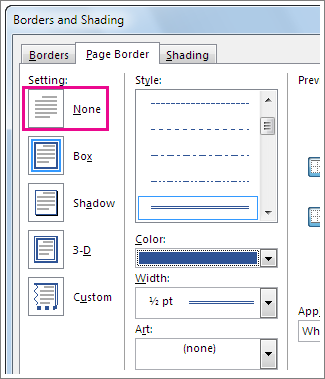
If you've added a page border in your document, you can remove it by changing the page border setting to None.
-
On the Design tab, choose Page Borders.

-
In the Borders and Shading dialog box, in the Apply to list, choose the page (or pages) you want to remove the border from.
-
Under Setting, choose None.
Change the color of a page border
To change the color of an existing page border go to the Design tab of the ribbon, click Page Borders and use the Color dropdown control to select another color. Click OK to apply your change.
Add a border to a table
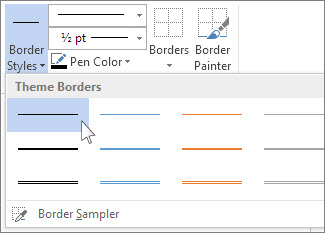
You can use the Border Styles gallery to add a border to your table.
-
Click inside your table, and then click the Table Move Handle to select the table.

Notes:
-
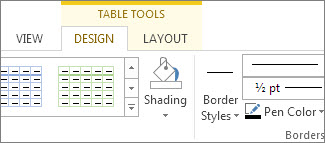
The Table Tools Design tab appears.
-
-
-
In the Borders group, choose the Border Styles list, and then choose a border theme.
-
In the Borders list, choose where you want to add borders.
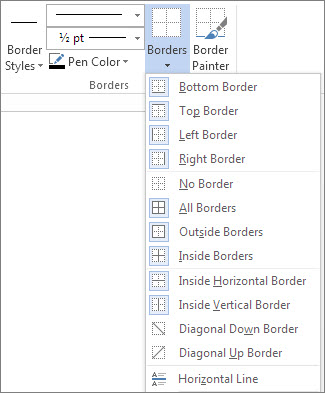
Tip: To change or add borders for part of your table, choose Border Painter and then click each border in the table that you want to change or add. Word applies the border style you've already chosen, and you don't need to select the table first.

Remove all the borders from a table
When you add a table to a document, it's automatically given a plain black border around the entire table and every cell within it. Even if you've added other borders to the table, you can remove all or some of the borders.
-
Click inside your table and the table move handle
 appears in the upper-left corner.
 -
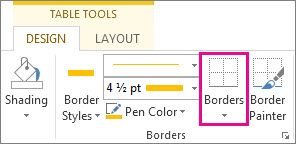
On the Table Tools Design tab, choose Borders.
-
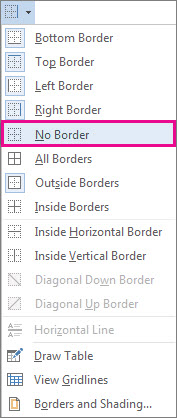
Click No Border:
Remove certain borders from a table or from certain cells
-
Select the cells whose borders you want to remove by dragging your mouse across them.
-
On the Table Tools Design tab, choose Borders, and then make your selection.

Remove a specific border (or more than one) from your table
-
Click inside your table.
-
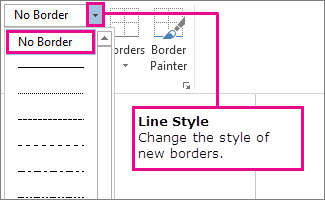
Click Table Tools > Design > Line Style > No Border. Your cursor becomes a paintbrush that you can drag along each border you want to erase.
Add a border to a picture
Adding borders to the pictures in your documents can make them stand out, and can give the document a more polished look. How plain or fancy the borders are is up to you.
The Picture Styles gallery offers many preset styles that make it easy for you to add a special sort of border with one click.
-
Choose the image that you want to add a border to.
-
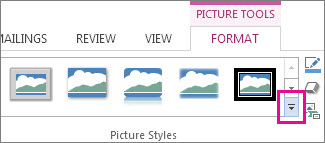
On the Picture Tools Format tab, in the Pictures Styles gallery, choose a style.
Tips:
-
Choose More to view additional styles in the gallery.
-
-
Customize your picture's border
If you'd rather completely customize your border, you can choose the border color, the border width, and line style.
-
Click the image that you want to add a customized border to.
-
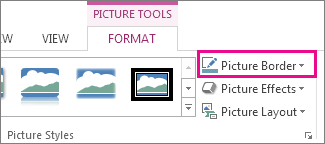
On the Picture Tools Format tab, choose Picture Border.
-
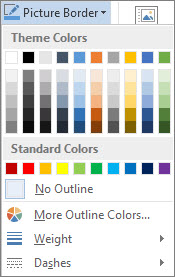
Choose a color.
-
Choose one of the following:
-
In the Weight list, choose a border width.
-
In the Dashes list, choose a line style.
-
Remove a border from a picture
The way you remove a picture border depends on whether it's a picture style or a custom border.
-
Choose the picture you want to remove a border from.
-
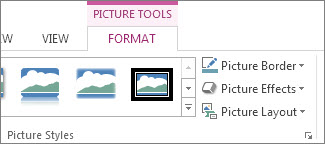
On the Picture Tools Format tab, do one of the following:
-
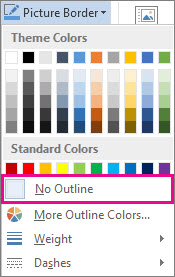
If the border is an outline, in the Picture Border list, choose No Outline.
-
If the border is a style and you know which style it is, In the Picture Effects list, choose the style that's applied, then choose No (style). For example, to remove a shadow, click Picture Effects > Shadow > No Shadow.
-
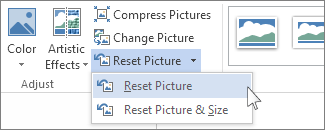
If you aren't sure what style is applied, you can reset the picture, but resetting also will remove any other changes you've made. In the Adjust group, choose Reset.
-
Remove a custom border
-
Choose the picture you want to remove a customer border from.
-
On the Picture Tools Format tab, in the Picture Border list, choose No Outline.
Add borders to text
Use the Borders button to add a border to text to set it apart or add emphasis. You can add borders to any side of the text or all sides to make a box.
-
Place your cursor or select the text where you want to add a border.
-
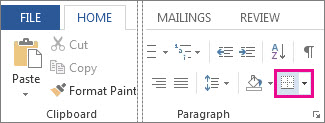
On the Home tab, in the Paragraph group, in the Borders list, choose a border option.
Button
Name
What it does

Bottom Border
Creates a border below the paragraph or table cell at the cursor's current location or below the selected paragraphs or cells. If you select a portion of text smaller than a paragraph, a box is created around the selection.

Top Border
Same as Bottom Border, but applies to the top.

Left Border
Same as Bottom Border, but applies to the left.

Right Border
Same as Bottom Border, but applies to the right.

No Border
Removes borders from the selection.

All Borders
Creates a box around each paragraph for the selected text. If no text is selected, Word creates a box around the paragraph at the cursor's current location. If you press Enter while typing in an All Borders text box, a new box appears for the new paragraph.

Outside Borders
Creates a box around the selected text. If no text is selected, Word creates a box around the paragraph at the cursor's current location. If you press Enter while typing in a paragraph with Outside Borders, the box expands to include the new paragraph.

Inside Borders
Creates borders between the selected paragraphs. If no text is selected or if only one paragraph is selected, nothing happens. If you press Enter while typing in a paragraph with Inside Borders, a new border appears.

Inside Horizontal Borders
For regular paragraphs, this does the same thing as Inside Borders. For a table, this adds borders between rows and not columns.

Inside Vertical Borders
In a table, this adds borders between columns and not rows. For regular paragraphs, this doesn't do anything.

Diagonal Down Border
In a table, this adds a diagonal line from the top left to the bottom right of each cell. For regular paragraphs, this doesn't do anything.

Diagonal Up Border
In a table, this adds a diagonal line from the bottom left to the top right of each cell. For regular paragraphs, this doesn't do anything.

Horizontal Line
Inserts a horizontal line as a graphic below the cursor's current location.

Draw Table
Draw a table using your cursor.

View Gridlines
Displays cell boundaries in tables that have no borders applied.

Borders and Shading
Choose border formatting options such as line thickness, color, and style.
Remove all borders from text
-
Select all the text inside the border.
-
On the Home, in the Paragraph group, open the Borders list.

-
Choose No Border.

Remove part of the border around text
-
Select all the text inside the border.
-
On the Home, in the Paragraph group, open the Borders list.

-
In the list of borders, click each border side you want to remove.
Note: If the border's around a single word, the whole border disappears.
What would you like to do?
What can I do with borders in Word?
You can add a border to any or all sides of each page in a document, to pages in a section, to the first page only, or to all pages except the first. You can add page borders in many line styles and colors as well as a variety of graphical borders.

You can set apart text from the rest of a document by adding borders.

You can add borders to a table or individual table cell.
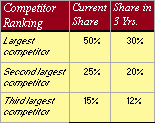
You can add borders to drawing objects and pictures. You can change or format the border of an object in the same way that you change or format a line.
Add a border to a page
-
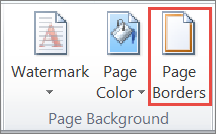
On the Page Layout tab, in the Page Background group, click Page Borders.

Make sure you're on the Page Border tab in the Borders and Shading dialog box.
-
Click one of the border options under Settings.
Note: To specify that the border appears on a particular side of a page, such as only at the top, click Custom under Setting. Under Preview, click where you want the border to appear.
-
Select the style, color, and width of the border.
Note: To specify an artistic border, such as trees, select an option in the Art box.
-
Do any of the following:
-
To specify a particular page or section for the border to appear in, click the option that you want under Apply to.
-
To specify the exact position of the border on the page, click Options, and then select the options that you want.
-
Note: You can see the page borders on your screen by viewing your document in Print Layout view.
Change a page border
-
On the Page Layout tab, in the Page Background group, click Page Borders.
Notes:
-
Make sure you're on the Page Border tab in the Borders and Shading dialog box.
-

-
-
Change any options that you want, and then click OK.
Note: You can see the page borders on your screen by viewing your document in Print Layout view.
Remove a border from a page
-
On the Page Layout tab, in the Page Background group, click Page Borders.

-
In the Borders and Shading dialog box, on the Page Border tab, under Setting, choose None.
Note: To remove the border from only one edge of the document—for example, to remove all but the top border—click the borders that you want to remove in the diagram under Preview.
Add a border to a picture, a table, or text
-
Select the picture, table, or text that you want to apply a border to.
To apply a border to specific table cells, select the cells, including the end-of-cell marks.

Note: Press Ctrl+* to turn on Show/Hide paragraph marks and view the end-of-cell marks.
-
On the Page Layout tab, in the Page Background group, click Page Borders.

-
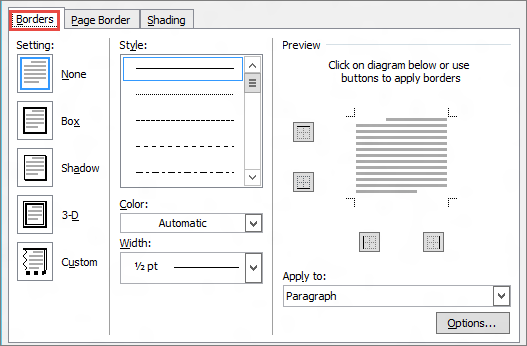
In the Borders and Shading dialog box, on the Borders tab, choose one of the border options under Settings.
-
Select the style, color, and width of the border.
-
Do any of the following:
-
To place borders only on particular sides of the selected area, click Custom under Setting. Under Preview, click the diagram's sides, or click the buttons to apply and remove borders.
-
To specify the exact position of a paragraph border relative to the text, click Paragraph under Apply to, click Options, and then select the options that you want.
-
To specify a cell or table that you want the border to appear in, click the option that you want under Apply to.
-
Change the border of a picture, a table, or text
-
Select the text, picture, or table whose border you want to change.
If you want to change a border on specific table cells, select the cells, including the end-of-cell marks.
Note: Press Ctrl+* to turn on Show/Hide paragraph marks and view the end-of-cell marks.
-
On the Page Layout tab, in the Page Background group, click Page Borders.

-
Click the Borders tab, and change any options that you want.
Remove a border from a picture, a table, or text
-
Select the text, picture, or table whose border you want to remove.
If you want to remove a border from specific table cells, select the cells, including the end-of-cell marks.
Note: Press Ctrl+* to turn on Show/Hide paragraph marks and view the end-of-cell marks.
-
On the Page Layout tab, in the Page Background group, click Page Borders.

-
Click the Borders tab.
-
Under Setting, click None.
Add a border to a drawing object
Note: To add a border to a drawing object, you must place the drawing object in a drawing canvas.
-
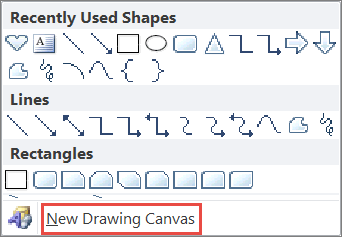
On the Insert tab, in the Illustrations group, click the Shapes list, and then click New Drawing Canvas.
-
Right-click the drawing canvas, and then click Format Drawing Canvas on the shortcut menu.
-
On the Colors and Lines tab, under Line, choose a color, line style, and line weight.
-
Add any drawing objects that you want to the drawing canvas.
Change a border for a drawing object
-
Right-click the drawing canvas with the border that you want to change, and then click Format Drawing Canvas on the shortcut menu.
-
On the Colors and Lines tab, under Line, change the color, line style, and line weight.
Remove a border from a drawing object
-
Select the object with a border you want to remove.
-
Right-click the drawing canvas, and then click Format Drawing Canvas on the shortcut menu.
-
Do one of the following:
-
For Word 2010, under Line Color, select No Line, and under Line Style, clear all selections.
-
For Word 2007, on the Colors and Lines tab, under Line, click No Color.
-
No comments:
Post a Comment