Change storage space for your subscription
If you start to run out of storage for your SharePoint Online site collections, you can add storage to your Office 365 subscription if your plan is eligible.
-
Sign in to Office 365 with your work or school account as a global admin. Learn how to sign in.
-
Select the app launcher icon
 in the upper-left and choose Admin.
 -
In the admin center, choose Admin centers > SharePoint.
-
On the Site collections menu, view the amount of storage used.
After you've determined how much storage you're using, you can add or remove storage space for your subscription. To find out how much it will cost to add storage space, follow the steps in this article, and review the pricing information before you purchase.
For information about setting site collection storage limits, see Manage site collection storage limits.
-
Sign in to Office 365 with your work or school account as a global admin. Learn how to sign in.
-
Select the app launcher icon
 in the upper-left and choose Admin.
 -
Choose Billing > Subscriptions.
-
On the Subscriptions page, choose the subscription that you want to add storage space to, then choose Add-ons.
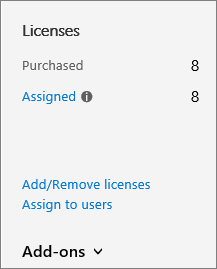
Notes:
-
If you don't see Add-ons, and your subscription was purchased through a partner, choose Volume Licensing Service Center (VLSC).
-

-
-
Choose one of the following:
-
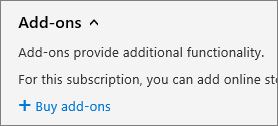
Choose Buy add-ons.
-
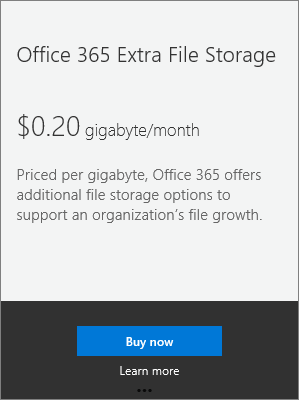
On the Purchase services page, mouse over or tap Office 365 Extra File Storage, then choose Buy now.
-
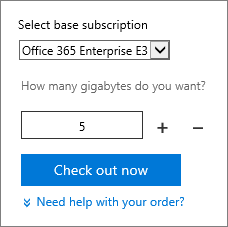
Enter the number of user licenses that you need and, if shown, select a base subscription. Choose Check out now.
-
On the How does this look? page, verify the number of gigabytes of storage you selected, review the pricing information, and then choose Next.
-
On the Complete order page, choose Place order.
-
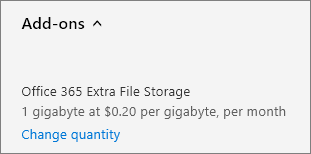
Choose Change quantity.
-
In the right pane, enter the total number of gigabytes that you need, then choose Submit.
For example, if you currently have 100 gigabytes of extra file storage and you need an additional 100 gigabytes, you would enter 200 in the box.
-
Choose Close
-
If you have purchased extra file storage via the Office 365 Extra File Storage add-on, you can use these steps to reduce the extra storage space to as low as 1 gigabyte. To remove all of the extra storage space, you need to call Office 365 support.
-
Sign in to Office 365 with your work or school account as a global admin. Learn how to sign in.
-
Select the app launcher icon
 in the upper-left and choose Admin.
 -
Choose Billing > Subscriptions.
-
On the Subscriptions page, choose Add-ons.

Notes:
-
If you don't see Add-ons, and your subscription was purchased through a partner, choose Volume Licensing Service Center (VLSC).
-

-
-
Under Office 365 Extra File Storage, choose Change quantity.

-
In the right pane, enter the total number of gigabytes that you need, then choose Submit.
For example, if you currently have 200 gigabytes of extra file storage but you only need 100 gigabytes, then you would enter 100 in the box.
-
Choose Close.
Is my plan eligible for Office 365 Extra File Storage?
Office 365 Extra File Storage is available for the following subscriptions:
-
Office 365 Enterprise E1
-
Office 365 Enterprise E2
-
Office 365 Enterprise E3
-
Office 365 Enterprise E4
-
Office 365 Enterprise E5
-
Office Online with SharePoint Plan 1
-
Office Online with SharePoint Plan 2
-
SharePoint Online Plan 1
-
SharePoint Online Plan 2
-
Office 365 Business Essentials
-
Office 365 Business Premium
| |
Still need help?


 New to Office 365?
No comments:
Post a Comment