Create and add an email signature in Outlook.com
Create a signature for your email messages that you can add automatically to all outgoing messages or manually to specific ones.
Create an email signature
-
Sign in to Outlook.com.
-
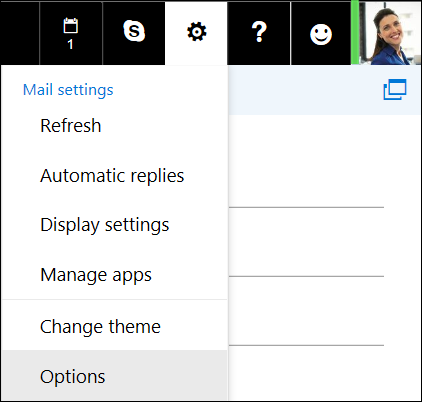
On the toolbar bar, choose Settings > Options.

-
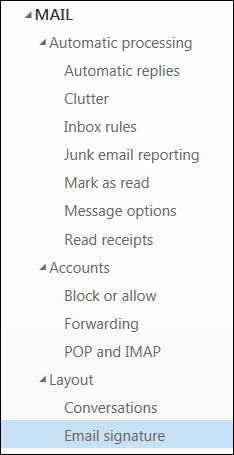
In the navigation pane, under Mail, choose Layout > Email signature.

-
In the text box, type your signature and use the available formatting options to change its appearance.
-
If you want your signature to appear at the bottom of all new email messages that you compose, select the Automatically include my signature on new messages I compose check box. If you want your signature to appear on messages that you forward or reply to, select the Automatically include my signature on messages I forward or reply to check box.
If you don't select this option, you can manually add your signature to a selected message. For details, see Manually add your signature to a new message.
-
Select Save when you're done.
Note: You can always return to the Email signature page and select or clear the check box for automatically including your signature.
Manually add your signature to a new message
If you've created a signature, but didn't choose to automatically add it to all outgoing messages, you can add it later when you write an email message.
-
Go to your mailbox and choose
 to create a new email message.
 -
Type your message, and then choose
 > Insert signature on the toolbar.
 -
When your email message is ready, choose Send.
Still need help?
Get help with Outlook.com:


No comments:
Post a Comment