Open a notebook in OneNote 2016 for Windows
When you first install OneNote 2016, you'll be prompted to create a notebook. Whenever you open OneNote, your notebook will automatically open. You can use one notebook for all your notes, or you can create more notebooks. If you have several notebooks, you can switch between them.
Switch between notebooks
-
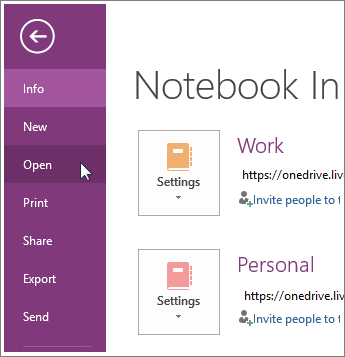
Click File > Open.

-
From the available options, do one of the following:
-
If the notebook you want is stored on OneDrive, you'll find it under Open from OneDrive. Simply click the notebook to open it.
-
If the notebook you want isn't stored in the same location as the notebook you currently have open, click one of the available locations under Open from other locations.
-
Multiple notebooks are a handy way to help you keep sets of notes separate. For example, if you work during the day but also take classes at night, you might keep two notebooks, called "Work" and "School." If you also share notes with your family, you could also keep an additional "Home" or "Family" notebook.
You can keep separate sets of notes in other ways. For example, if you're using OneNote to archive repetitive work information such as team status reports, project plans, or client contracts, you could create a separate notebook for each calendar year. That way, a single notebook never becomes unwieldy.
After you open a notebook, its name is placed in the Notebooks list, which you can view by clicking the down-arrow next to the current notebook title (just left of the section tabs at the top of your notes). Click a notebook name in the Notebook List to switch between notebooks.
Note: OneNote automatically saves your work in all of your notebooks. You can switch between multiple notebooks without having to worry about saving your changes. The next time you reopen a notebook, your latest changes will be there, no matter where the notebook is stored.
No comments:
Post a Comment