Text boxes and most shapes can include text in them. The text can be positioned horizontally or vertically, and it can appear on one line or wrap to multiple lines.
You can change the direction of the text, and you can also change the margins of text boxes and shapes for optimal spacing, or resize shapes for a better text fit.
Lines and connectors are shapes that can't have text in them.
Specify text direction in a shape or text box
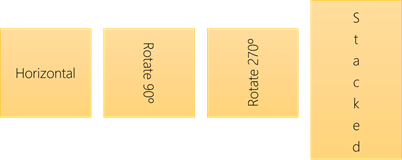
In a shape or text box, you can change the direction in which text is read. That is, you can pivot text 90 or 270 degrees so that it appears sideways.
-
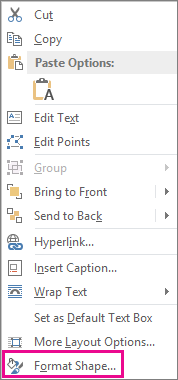
Right-click the edge of the shape or text box.
-
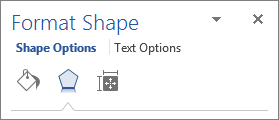
On the shortcut menu, select Format Shape.
-
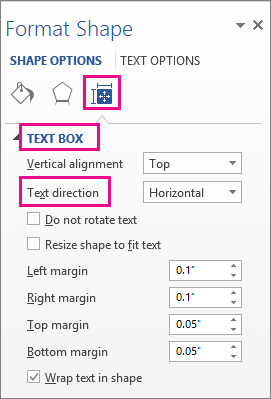
In the Format Shape pane, click Size/Layout & Properties
 .
. -
Under Text Box, select the option that you want in the Text direction list.
The Stacked option is available in PowerPoint and Excel, but not Word.
Rotate (mirror) text in a shape or text box
-
Insert a text box or shape in your document, and then type and format your text.
-
Right-click the box or shape and select Format Shape.
-
In the Format Shape pane, select Effects.
-
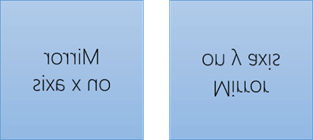
Under 3-D Rotation, in the X Rotation or Y Rotation box, enter 180.
-
(Optional) If your text box becomes filled with a color, you can remove the color in the Format Shape pane. Under Shape Options, click the Fill & Line tab
 , expand Fill, and select No fill.
 -
(Optional) To remove the text box outline, right-click the text box, click Outline in the mini toolbar that appears, and choose No Outline.
More positioning options
Select a heading below to open it and see the detailed instructions.
Position text horizontally in a shape or text box
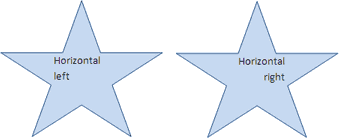
To change the horizontal alignment of a single paragraph or line:
-
Click in the paragraph or line of text that you want to modify.
-
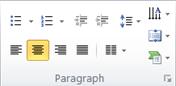
On the Home tab (or the Message tab in Outlook), click the horizontal alignment option that you want.
To change the horizontal alignment of all text in a shape or text box:
-
Click the border of the shape or text box to select it.
-
On the Home tab, (or the Message tab in Outlook), click the horizontal alignment option you want.
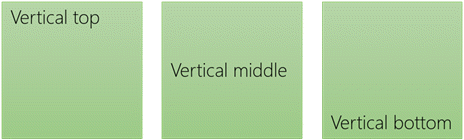
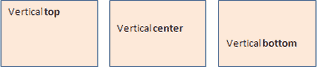
Position text vertically in a shape or text box
-
Right-click the border of the shape or text box.
-
On the shortcut menu, click Format Shape.
-
In the Format Shape pane, click Size/Layout & Properties
.
-
Select the option that you want in the Vertical alignment list.
Wrap text in a shape or text box
When text wraps, it automatically continues on a new line as it reaches the right border of the shape or text box.
-
Right-click the border of the shape or text box that contains the text you want to wrap.
-
On the shortcut menu, select Format Shape.
-
In the Format Shape pane, select Size/Layout & Properties
, and then select Wrap text in shape.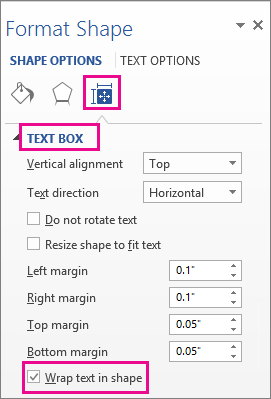
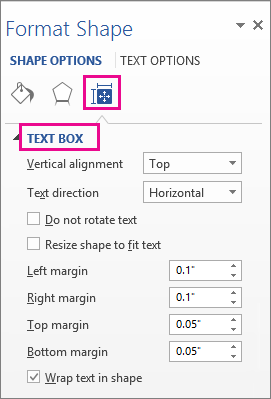
Change the margins between text and the edge of a shape or text box
The margin is the distance between the text and the outer border of the enclosing shape or text box.
-
Right-click the border of the shape or text box.
-
On the shortcut menu, select Format Shape.
-
In the Format Shape pane, click Size/Layout & Properties
. -
Specify a measurement in inches or millimeters (mm) for any of the following margins:
Margin
Description
Left margin
Distance between the left border of a shape and the leftmost text
Right margin
distance between the right border of a shape and the rightmost text
Top margin
distance between the top border of a shape and the uppermost text
Bottom margin
distance between the bottom border of a shape and the lowest text
Resize a shape to fit text
You can automatically increase the size of a shape or text box vertically so that the text fits inside it.
-
Right-click the border of the shape or text box.
-
On the shortcut menu, click Format Shape.
-
In the Format Shape pane, click Layout & Properties
, click Text Box, and then select Resize shape to fit text.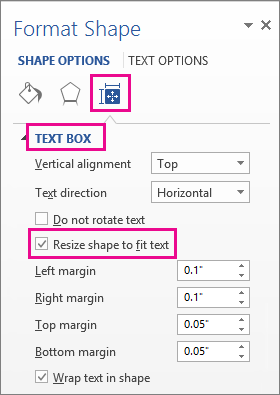
Tip: You can reduce the size of the text to fit it in the shape or text box by clicking Shrink text on overflow.
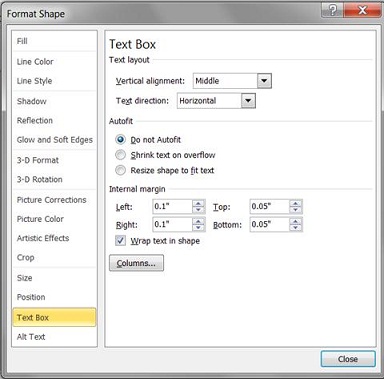
Specify text direction in a shape or text box
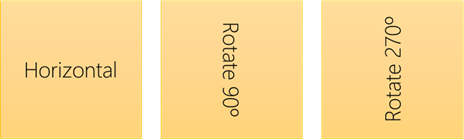
You can change direction of text in a shape or text box. For example, you can rotate text 90 or 270 degrees so that it appears sideways.
-
Right-click the edge of the shape or text box that contains the text.
-
On the shortcut menu, select Format Shape.
-
In the left pane of the dialog box, select Text Box.
-
Under Text layout, select the option that you want in the Text direction list.
Notes:
-
For additional information about the options in the Text Box pane of the Format Shape dialog box, click Help
 at the top of the dialog box.
-
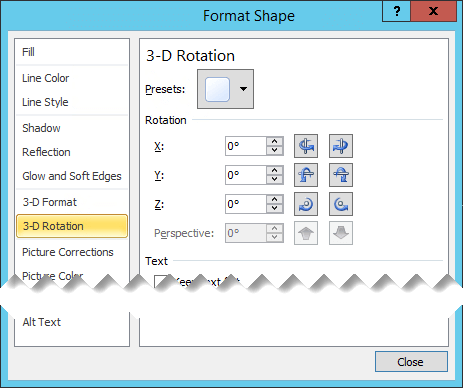
Rotate (mirror) text in a shape or text box
-
Insert a text box or shape in your document, and then type and format your text.
-
Right-click the box or shape and select Format Shape.
-
In the Format Shape dialog box, select 3-D Rotation on the left.
-
In the X box, enter 180.
More positioning options
Select a heading below to open it and see the detailed instructions.
Position text horizontally in a shape or text box
To change the horizontal alignment of a single paragraph or line:
-
Click in the paragraph or line of text that you want to modify.
-
On the Home tab (or the Message tab in Outlook), click the horizontal alignment option that you want.
To change the horizontal alignment of all text in a shape or text box:
-
Click the border of the shape or text box to select it.
-
On the Home tab, (or the Message tab in Outlook), click the horizontal alignment option that you want.
Position text vertically in a shape or text box
-
Right-click the border of the shape or text box.
-
On the shortcut menu, click Format Shape, and then click Text Box in the left pane.
-
Under Text layout, select the option that you want in the Vertical alignment list.
Resize a shape to fit text
You can automatically increase the size of a shape or text box vertically so that the text fits inside it.
-
Right-click the border of the shape or text box that you want to resize.
-
On the shortcut menu, click Format Shape, and then click Text box in the left pane.
-
Under Autofit, click Resize shape to fit text.
Tip: You can reduce the size of the text to fit it in the shape or text box by clicking Shrink text on overflow.
Change the margins between text and the edge of a shape or text box
The internal margin is the changeable distance between text and the outer border of a shape or text box.
-
Right-click the border of the shape or text box.
-
On the shortcut menu, click Format Shape, and then click Text Box in the left pane.
-
Under Internal Margin, do one or more of the following:
-
To specify the distance between the left border of a shape and the text, enter the new margin number in the Left box.
-
To specify the distance between the right border of a shape and the text, enter the new margin number in the Right box.
-
To specify the distance between the top border of a shape and the text, enter the new margin number in the Top box.
-
To specify the distance between the bottom border of a shape and the text, enter the new margin number in the Bottom box.
-
No comments:
Post a Comment