Organize your calendar with color categories
If you keep a lot of appointments and meetings on your Outlook calendar, adding color categories lets you scan and visually associate similar items. You might assign all personal items to the green category and all important items to the red category.
Note: Categories don't work for calendars in an IMAP account.
-
On the navigation bar, click Calendar.
-
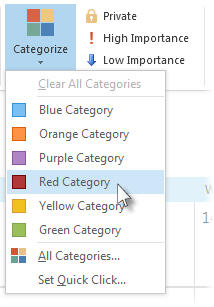
Click a calendar appointment, meeting, or event, and then click Categorize.

-
Click a category, or click All Categories to create one.

When you assign a color category, that color is used as the item's background color on the calendar grid.
Tip: You can change the name of any category. Click an appointment, meeting, email message, or contact, and then click Categorize > All Categories. Click a category, and then click Rename.
No comments:
Post a Comment