You use an image control to embed a picture, such as a bitmap, JPEG, or GIF and, for example, to display a company logo or clip art.
-
If the Developer tab is not available, display it.
Display the Developer tab
-
Click the File tab, click Options, and then click Customize Ribbon.
-
Under Main Tabs, select the Developer check box, and then click OK.
-
-
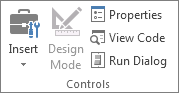
On the Developer tab, in the Controls group, click Insert, and then under ActiveX Controls, click Image
 .
.
-
Click the worksheet location where you want the upper-left corner of the image control to appear.
-
If it isn't already selected, go to the Developer tab, and in the Controls group, click Design Mode
 .
. -
In the same tab and group, click Properties
 .
.Tip: You can also right-click the control, and then click Properties.
The Properties dialog box appears. To add an image, click the Build button
 next to the Picture property box, and then use the Load Picture dialog box to locate and open an image.
For detailed information about each property, select the property, and then press F1 to display a Visual Basic Help topic. You can also type the property name in the Visual Basic Help Search box. The following section summarizes the properties that are available.
Summary of properties by functional categories
| If you want to specify | Use this property |
| General: | |
| Whether the control is loaded when the workbook is opened. (Ignored for ActiveX controls.) | AutoLoad (Excel) |
| Whether the control can receive the focus and respond to user-generated events. | Enabled (Form) |
| Whether the control can be edited. | Locked (Form) |
| The name of the control. | Name (Form) |
| The way the control is attached to the cells below it (free floating, move but do not size, or move and size). | Placement (Excel) |
| Whether the control can be printed. | PrintObject (Excel) |
| Whether the control is visible or hidden. | Visible (Form) |
| Size and Position: | |
| Whether the size of the control automatically adjusts to display all contents. | AutoSize (Form) |
| The height or width in points. | Height, Width (Form) |
| The distance between the control and the left or top edge of the worksheet. | Left, Top (Form) |
| Formatting: | |
| The background color. | BackColor (Form) |
| The background style (transparent or opaque). | BackStyle (Form) |
| The color of the border. | BorderColor (Form) |
| The type of border (none or single-line). | BorderStyle (Form) |
| Whether the control has a shadow. | Shadow (Excel) |
| The visual appearance of the border (flat, raised, sunken, etched, or bump). | SpecialEffect (Form) |
| Image: | |
| The bitmap to display in the control. | Picture (Form) |
| The location of a background picture (top left, top right, center, and so on). | PictureAlignment (Form) |
| How to display the background picture on the control (crop, stretch, or zoom). | PictureSizeMode (Form) |
| Whether you want to tile multiple copies of the picture in the control. | PictureTiling (Form) |
| Keyboard and Mouse: | |
| A custom mouse icon. | MouseIcon (Form) |
| The type of pointer that is displayed when the user positions the mouse over a particular object (for example, standard, arrow, I-beam). | MousePointer (Form) |
Coming across your webpage has been one of my highlights this January. This is what quality content looks like. The style, language and delivery meets every ECFMG CERTIFICATION REQUIREMENTS
ReplyDeleteI gotta make sure to bookmark this link and check out more of your content. Not everyday you learn HOW TO BECOME ECFMG CERTIFIED , so this was very timely. Keep up the good work dear.