When you remove a student from a Class Notebook, they will no longer have permission to view and edit the notebook's shared content. However, their work will remain in the notebook unless you choose to delete it while removing the student.
-
Sign in to Office.com with the log-in provided by your school.
Notes:
-
If you don't see the Class Notebook app right away, click on All Apps to find it.
-
If your Class Notebook was created in Microsoft Teams, remove students from your class team.This will update their membership in the Class Notebook as well.
-
-
Select Class Notebook, then Add/Remove Students.
-
A Class notebook wizard will display. Select the notebook you're updating.
-
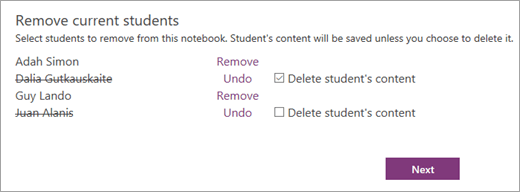
Remove student(s) by selecting their name. Select Undo if you choose a student by mistake. If you'd like to delete a student's work while removing them from your class, select the Delete student's content checkbox.
-
Select Next.
-
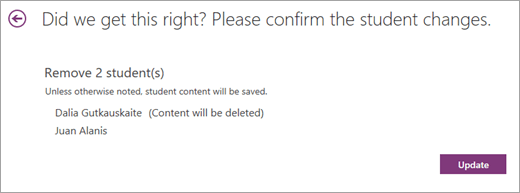
Confirm the list of students with access to your Class Notebook. If you need to make changes, select the back arrow to return to the previous screen.
-
Select Update.
Learn more
Visit the Getting Started page for more details about managing Class Notebook.
No comments:
Post a Comment