Microsoft offers 15 GB of email storage space per free Outlook.com account. Microsoft 365 subscribers get 50 GB of space.
Note: 50 GB is not available to Microsoft 365 trial subscribers. The increased storage only becomes available shortly after a paid subscription starts.
I get a "Quota Exceeded" or "Mailbox full" message
To see how much mailbox storage you've used and quickly clear up space, open your Settings  and search for Storage.
From the Settings > Storage page you should see a breakdown of how much space each folder in your mailbox is taking. Below, you should see a list of the folders represented in the breakdown with the option to permanently delete all items (or those older than 3, 6, or 12 months) in these folders to free up space.
If you are not a Microsoft 365 subscriber, you also have the option to upgrade to get 50 GB of space as well as other premium Outlook and Office features.

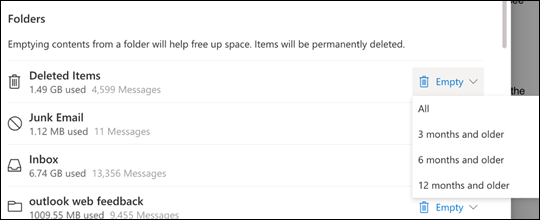
When deleting items from Inbox or other folders, items are sent to the Deleted Items folder by default. The Deleted Items folder does count against your mailbox storage quota until it is manually emptied or the emails are automatically deleted after 30 days, whichever happens first.
Note: Items in the Junk folder are automatically deleted after 10 days.
To permanently delete a message or messages, select or highlight the messages, press Shift and DEL on your keyboard.
Other ways to reduce your storage
To make room in your mailbox, try the following solutions.
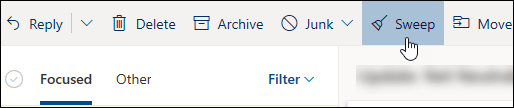
Use the Sweep button to quickly remove unwanted email from your inbox or archive folders. Sweep lets you automatically delete all incoming email from a particular sender, keep only the latest message from that sender, or delete email that's older than 10 days.
To sweep your inbox, choose a message you want to sweep, and select Sweep.
To learn more about Sweep, see Organize your inbox with Archive, Sweep, and other tools in Outlook.com.
Important: Items deleted using Sweep will not count toward reducing your storage quota until they are also deleted from the Deleted Items folder.
-
At the top of your message list, select Filter > Sort by > Size.
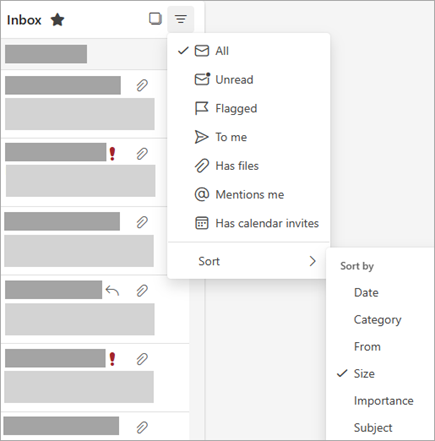
Note: If the message list sorts the smallest messages on top, click Filter > Sort by > Size again to put the largest messages on top.
-
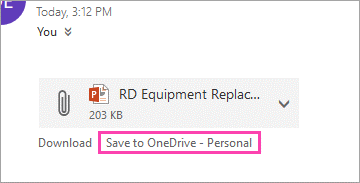
Select the message containing the attachments you want to upload to OneDrive.
-
Beneath the attachment, select Save to OneDrive.
-
Permanently delete the original email that contained the attachment by pressing Shift and DEL on your keyboard.
To delete the file or image, you must delete the message it's attached to:
-
For All images, find the corresponding message in your mailbox and delete it.
-
For Sent images, go to your Outlook.com Sent Items, find the corresponding message, then delete it.
-
After deleting the message, you also need to delete it from your Deleted Items folder. Go to Deleted Items, select the item or items to remove, then select Delete.
How else can I increase sending and storage limits?
You can increase sending and storage limits by upgrading your Outlook.com account with a Microsoft 365 subscription. This gives you:
-
Advanced email security
-
An ad-free inbox
-
A 50 GB mailbox per person
Note: 50 GB is not available to Microsoft 365 trial subscribers. The increased storage only becomes available shortly after a paid subscription starts.
-
Larger OneDrive storage, installable Office apps, and much, much more!
Related Topics
Need more help?
Note: You will need to sign in first to get support. If you can't sign in, go to Account support.
No comments:
Post a Comment