Sharing from SharePoint or OneDrive for Business? Go here.
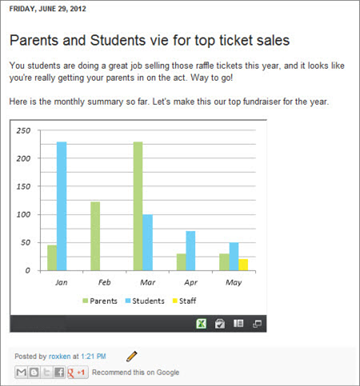
With your Excel workbook stored on OneDrive, you can embed it into your blog. Your readers can sort, filter, and calculate data, directly in your post. If you update the workbook in OneDrive, your readers will automatically see the latest in the embedded view.

First, store your workbook in OneDrive. Then, copy the embed code:
-
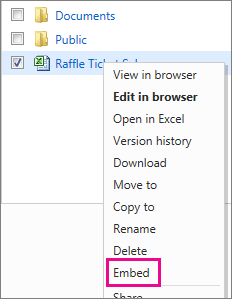
In OneDrive, right-click the workbook, and then click Embed.

-
Click Generate, and then click Customize how this embedded workbook will appear to others.
-
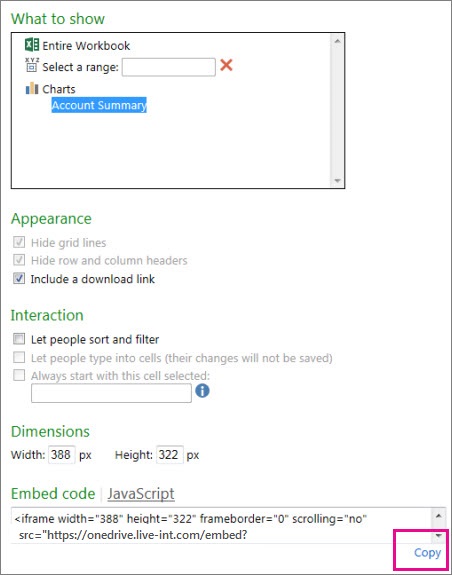
In the What to show box, click what you want to show in your blog. Show the entire workbook, or show a chart, a named range, PivotTable, or table. For information about named ranges and named items in Excel workbooks see Define and use names in formulas.
In the Appearance section, check the boxes for the options you want.
In the Interaction section, choose how you want to allow people to interact with the workbook. If you allow sorting and filtering, your blog readers will be able to sort, filter, and expand or collapse the tables or PivotTables in the workbook. If you allow typing, changes people make in the cells in your blog will not be saved in the original workbook. For example, if you embed a mortgage calculator, you might want to enable typing so that people can fill out the loan term, loan amount, and other variables.
If you want to specify a cell to be selected when the blog page opens, check the Always start with this cell selected box, and then click the cell you want in the preview.
In the Dimensions section, type a width and height for the viewer, in pixels. To see how the viewer will look at the dimensions you've specified, click View actual size, at the top of the preview.
Note: You can specify a minimum of 200 by 100 pixels and a maximum of 640 by 655 pixels. If you want to use dimensions outside those limits, you can change the code after you paste it into your blog.
When you are satisfied with the preview, click Copy. (If your browser prompts you to allow access to your Clipboard, click Allow access.)
Now, in your blog editor, begin writing your post. When you want to embed the workbook, switch to HTML editing and press Ctrl+V to paste the embed code.
Tip: Your blog editor might have a trick for switching to HTML editing. In general, use the long route for getting to the text editor. For example, in TypePad, go to Blogs, click the name of your blog, and then click Compose. In WordPress, go to your blog's dashboard and click Posts > Add New. Also in WordPress, don't worry that the embed code is an iframe. Ordinarily, WordPress doesn't allow iframes in posts, but it makes an exception for iframes that host Office for the web.
No comments:
Post a Comment