Your finger or a digital pen gives you freedom from a keypad when you're working on a touch device. In addition to drawing, writing and highlighting, Ink Editor lets you use natural gestures like circling to select and crossing out to delete.

Note: Pictures in this article are from Word for Microsoft 365, but Ink Editor is also available in Word Mobile. Use it on Windows touch devices and devices that work with digital pens such as Microsoft Surface running Windows 10 TH2 or higher operating system.
Edit with natural gestures
If your device is touch-enabled, the Draw tab is turned on automatically. Otherwise, turn it on by selecting File > Options > Customize Ribbon > Draw.
-
Choose Draw and select the Ink Editor pen.

(If you don't have a digital pen enabled device and have a touch device instead, choose Draw with Touch > Ink Editor pen.)
-
Do any of the following to edit your document using natural gestures:
Circle to select text
Draw a circle around the text you want to select. You can select words, sentences or paragraphs. Now you can apply formatting like font color, bold, or italic.
Cross out to delete text
Draw a line thorough the text to delete it. Delete large chunks of text by drawing a diagonal line or up-and-down squiggles.
Apply highlighting
Choose a highlighter pen from the Pens group and draw across text to highlight the text. To remove the highlight draw across the text again. You can either highlight freeform or select the highlighter and choose Snap to Text.
Join words
Draw a curve to join two words. Be sure both ends of the curve touch the words you want to join.
Split words
Draw a vertical line within a word to split it in two.
Insert a word
Draw a caret between two words to insert text. After you draw the caret, write the words you want to add. When you're done writing, the text is inserted where you drew the caret.
Make a new line
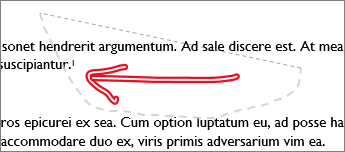
Draw a backwards L shape. Text after the shape moves to a new line.
Notes:
-
If you wish to keep a record of your ink edits, select the Ink Editor pen > Track Changes before you start reviewing your document.
-

Select Ink using the Lasso tool
In Word, you can use the Lasso tool to select one or more drawn objects. Most of your tools are in the Pens gallery.
-
Go to Draw > Lasso.

-
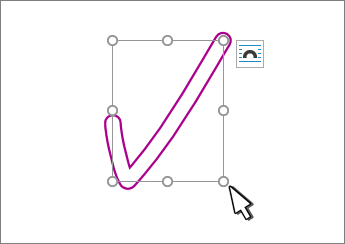
Click and drag the lasso around the drawing you want to select.

-
Do any of the following
-
Press Delete to remove the selected drawing.
-
Use your mouse or arrow keys to move the drawing.
-
Right-click the selected drawing and select Format Ink. Change color, transparency, and line width options from the Format Ink pane.
-
Right-click the selected drawing and select caption, text wrap, or Alt text options.
-
Click and drag a sizing handle to stretch, shrink, or resize the drawing.

-
See Also
Tell us what you think about Ink Editor and suggest improvements
If you have suggestions for new actions or gestures you'd like to see in Ink Editor, let us know by providing us feedback. See How do I give feedback on Microsoft Office? for more information.
Achieving academic success ( i loved this ) in college essays can be a challenging task. Most students are under pressure to achieve good grades and turn in assignments on time. However, there are some steps you can take to ensure that your work will stand out from the rest.
ReplyDelete