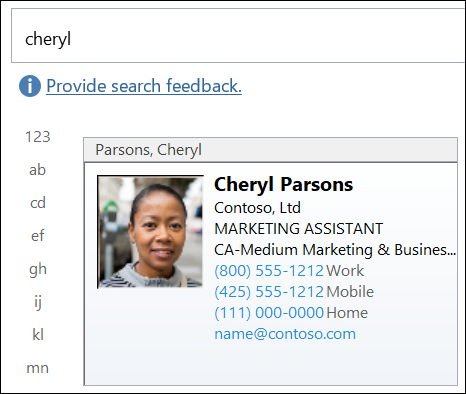
In Outlook, images can be added to a contact form or to an Electronic Business Card. This helps you put a face to a name or a quickly match a logo to a company contact.
If both the sender and the recipient use Outlook, a contact picture appears in e-mail messages when the sender includes a contact photo. The picture appears in the message header of the open message and in the header of the message.
To add, remove, or change a picture for a contact, switch to your Contacts folder and edit the contact.
For steps to change your own Outlook photo, see Change my photo.
Add a photo
Note: Photos you add are only visible on your computer.
-
On the Navigation Bar, click People.

-
Find the contact you want to edit. You can type the contact's name in the Search box at the top of your contacts folder to filter your contacts.

-
Double-click to open the contact.

-
Double-click the contact picture or the placeholder image that's shown for contacts without a picture.
Browse to select a picture for the contact, then click OK.
Tip: Outlook can use .jpg, .png, .gif, .bmp, or .tif file formats.

-
Save and close the contact.
Change a contact photo
-
On the Navigation Bar, click People.

-
Find the contact you want to edit. You can type the contact's name in the Search box at the top of your contacts folder to filter your contacts.

-
Double-click to open the contact.
-
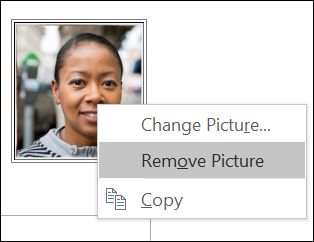
Right-click the current contact photo.
Select either Change Picture or Remove Picture.

-
Save and close the contact.
See also
Outlook 2007 accepts most standard graphics file formats, including .jpg, .png, .gif, .bmp, .tif, .exf, and .ico.
Add a picture
If both the sender and the recipient are using Office Outlook 2007, a contact picture is displayed in messages received if the sender uses a contact photo. The picture appears in the message header of the open message and in the header of the message in the Reading Pane. You can double-click the contact picture to open the contact or right-click it for other contact options.
Note: For the picture to display, the contact must also be saved in an Outlook Contact folder and that Contact folder must be designated as an Outlook Address Book. These are the default settings when creating contacts in Microsoft Outlook. If you don't see the picture included with a contact, check to see if the default settings have been changed.
Tip: Using high resolution images closely matching the 90 by 90 pixel size provides the best picture quality results.
My high-quality image is still blurry
| In some cases there are issues rendering images in Outlook, even when they are high resolution and properly sized. The cause is not known, but is under investigation. To help us improve the feature, send us details of your situation using the feedback buttons at the end of this Help article. Please include operating system, image details, and verify that you are using Outlook 2007. |
When you add an image to a contact in the contact form, the image is automatically sized to fit into the space reserved for the contact picture on the form, 90 pixels by 90 pixels.
-
In Contacts, do one of the following:
-
Open an existing contact.
-
On the toolbar, click New. This opens a blank contact form in which to add contact information and a picture.
-
-
On the Contact tab, in the Options group, click Picture, and then click Add Picture.
Tip: You can also click the space for the contact picture, and then browse to find an image.
-
Locate the picture that you want to add, and then double-click it.
Change a picture
-
In Contacts, open a contact.
-
On the Contact tab, in the Options group, click Picture, and then click Change Picture.
-
Locate the picture that you want to change, and then double-click it.
Remove a picture
-
In Contacts, open a contact.
-
On the Contact tab, in the Options group, click Picture, and then click Remove Picture.
Update the picture on the Electronic Business Card to match the contact picture
If an Electronic Business Card already has an image (besides the default Outlook image), such as a photo or a logo, associated with it, the image that you add to a contact in the contact form does not replace the image on the card. To update the picture on the card, click the Reset button in the Edit Business Card dialog box.
How do I open the Edit Business Card dialog box?
| Do one of the following:
|
Important: Resetting the business card also updates any other new contact information on the card. It also resets all the card's formatting to the default, except for the picture. The formatting includes font, background colors, text size, and alignment.

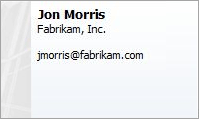
Electronic Business Card showing the default image, positioned on the left, and default formatting.
If you don't update the image on the Electronic Business Card, the new picture is displayed on the contact form, while you see the existing picture on the Electronic Business Card and in Business Cards view.
Use different images for the contact and the Electronic Business Card
If an Electronic Business Card already has an image that is not the default Outlook image — such as a photo or a logo — an image that you add to the contact form does not replace the image on the card.
For example, you receive an Electronic Business Card from Jon Morris of Contoso, Ltd. Jon's card has the Contoso logo on it, which you want to keep, yet you want to add a picture of Jon to his contact form so that you can recognize him the next time he is in town for a meeting.
If you add a picture to the contact form, you still see the original image on the Electronic Business Card and in Business Cards view unless you update the image on the business card in the Edit Business Card dialog box.
Important: Updating (resetting) the business card also updates any other new contact information on the card. It also resets all the card's formatting to the default (except for the picture). This includes font and background colors and text size and alignment. Take this into consideration when you are working with custom-designed cards.
To add an image only to the contact form:
-
In an open contact, on the Contact tab, in the Options group, click Picture, and then click Add Picture.
Tip: You can also click the space for the contact picture and browse to find an image.
-
Locate the picture that you want to add, and then double-click it.
The picture is automatically sized to fit the contact picture space.
-
Click Save and Close.
Note: Do not open the Electronic Business Card and update that view of the contact. Clicking the Reset button updates the card, replacing the card's image with the new contact picture.
No comments:
Post a Comment