Bookings can be scheduled and staffed in two different ways. The first way is by the customer using a standalone booking page or an embedded booking page that you integrate into your web site. The other way is for you or one of your employees to enter the bookings manually, such as when a customer calls for an appointment, for example, rather than requesting one through your web site. This article covers the manual scenario.
Note: Bookings is turned on by default for customers who have the Office 365 Business Premium, or Office 365 A3 and Office 365 A5 subscriptions. Bookings is also available to customers who have Office 365 Enterprise E3 and E5, but it is turned off by default. To turn it on, see Get access to the Office 365 business apps for enterprise subscriptions.
-
In Office 365, select the app launcher, and then select Bookings.

-
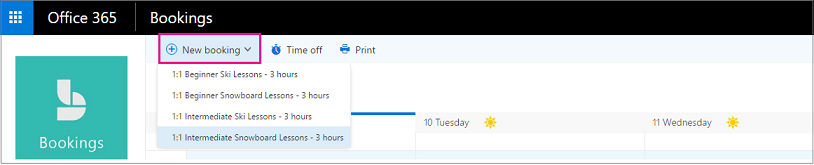
In the navigation pane, select Calendar > New booking.
-
Select the service to be provided. See Define your service offerings for service set-up instructions.
-
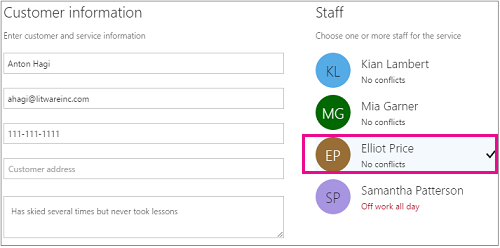
Enter the customer information, including name, email address, phone number, and other relevant details.
-
Select the staff member to provide the service. The list of staff members shown is based on what you set up on the services page.
-
Enter the service details, including date, time, location, and other relevant information. Once you enter a valid email address for the customer, the Save button will change to Send, and you'll see a note telling you that a confirmation will be sent to the customer. The customer confirmation includes an attachment for them to add to their calendar. Selected staff members will also receive meeting invitations with the appointment information so they can add it to their personal calendars.
-
Select Add an email reminder.
-
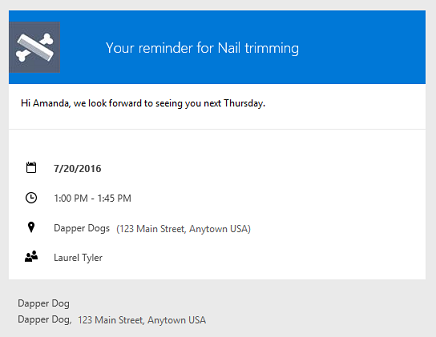
Specify when the reminder should be sent, where it should be sent (Customer, Staff, All attendees), and what the reminder message should be.
-
Select Save > Send.
Here's an example email of the reminder your customer will receive.
No comments:
Post a Comment