Change nameservers to set up Office 365 at ZGSJ
Follow these instructions if you want Office 365 operated by 21Vianet to manage your Office 365 DNS records for you. (If you prefer, you can manage all your DNS records at zgsj.)
Here's what you need to do:
Add a TXT record to verify that you own the domain
Before you use your domain with Office 365, we have to make sure that you own it. Your ability to log in to your account at your domain registrar and create the DNS record proves to Office 365 that you own the domain.
Note: This record is used only to verify that you own your domain; it doesn't affect anything else. You can delete it later, if you like.
-
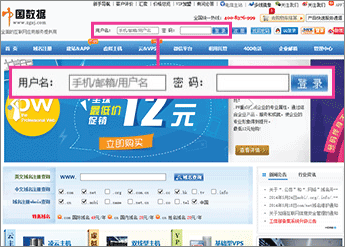
In your browser, go to the zgsj website and sign in.
-
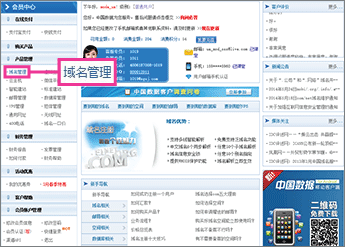
In the left pane, in the 产品管理 (product management) section, click 域名管理 (domain management).
-
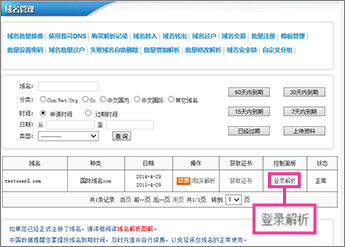
In the right pane, in the 控制面板 (control panel) column for the domain that you want to update, click 登录解析(sign in).
-
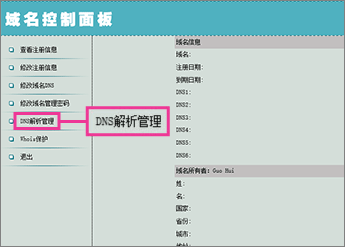
In the control panel for your domain, in the left pane, click DNS解析管理 (DNS management).
The DNS records page for your domain opens.
-
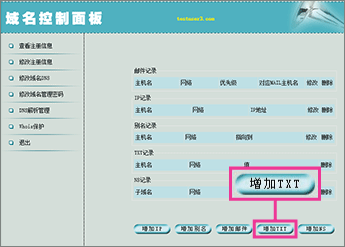
In the right pane, click 增加TXT (add a TXT record).
-
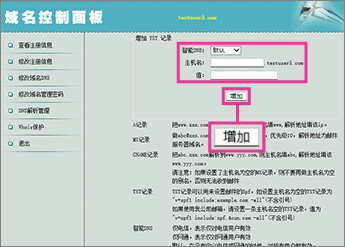
Make sure that the fields are set to precisely the following values for the empty record:
-
智能DNS (network): Use the default value.
-
主机名 (host name): Leave the box blank.
-
值 (value): Paste Destination or Points to Address value that you just copied.
-
-
Click 增加 (add).
-
In the confirmation dialog box, click OK.
Now that you've added the record at your domain registrar's site, you'll go back to Office 365 and request Office 365 to look for the record.
When Office 365 finds the correct TXT record, your domain is verified.
-
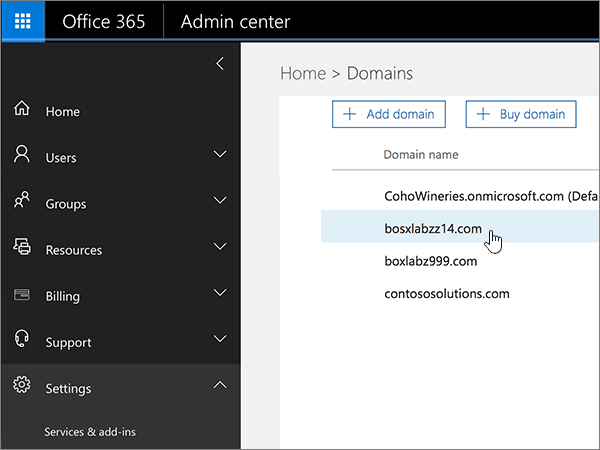
Choose Setup > Domains.
-
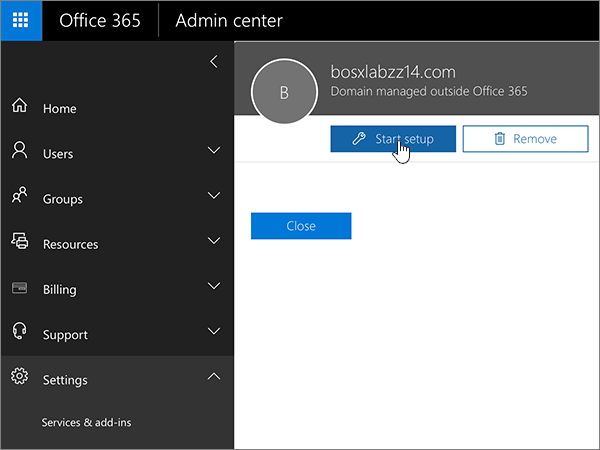
On the Manage domains page, in the Action column for the domain you are verifying, choose Start setup.
-
On the Add this TXT record to show you own domain_name page, choose Okay, I've added the record and then, in the confirmation dialog box, choose Finish.
Change your domain's nameserver records
To complete setting up your domain with Office 365, you change your domain's NS records at your domain registrar to point to the Office 365 operated by 21Vianet primary and secondary name servers. This sets up Office 365 to update the domain's DNS records for you. We'll add all records so that email, Lync, and your public website work with your domain, and you'll be all set.
Caution: When you change your domain's NS records to point to the Office 365 name servers, all the services that are currently associated with your domain are affected. For example, all email sent to your domain (like rob@your_domain.com) will start coming to Office 365 after you make this change.
-
In your browser, go to the zgsj website and sign in.
-
In the left pane, in the 产品管理 (product management) section, click 域名管理 (domain management).
-
In the right pane, in the 控制面板 (control panel) column for the domain that you want to update, click 登录解析(sign in).
-
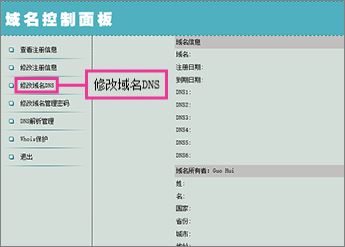
In the control panel for your domain, in the left pane, click 修改域名DNS (change name servers).
-
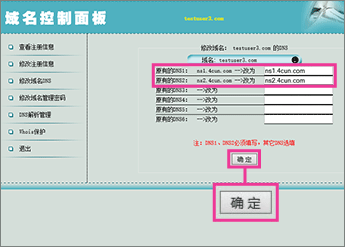
In the first box (primary name server), type or paste ns1.dns.partner.microsoftonline.cn.
-
In the second box (secondary name server), type or paste ns2.dns.partner.microsoftonline.cn.
-
Click 确定 (OK).
Note: Your nameserver record updates may take up to several hours to update across the Internet's DNS system. Then your Office 365 email and other services will be all set to work with your domain.
No comments:
Post a Comment