Add or remove members from Office 365 groups using the Office 365 admin center
Contributors: 
Last updated 14 November, 2017
In Office 365, Group members typically create their own Groups, add themselves to Groups they want to join, or are invited by Group owners. If Group ownership changes, or if you determine that a member should be added or removed, as the admin you can also make that change. What is an Office 365 Group?
Add a member to a Group in the Office 365 admin center
-
Sign in to Office 365 using your global admin or Exchange admin account. Browse to the Office 365 admin center.
-
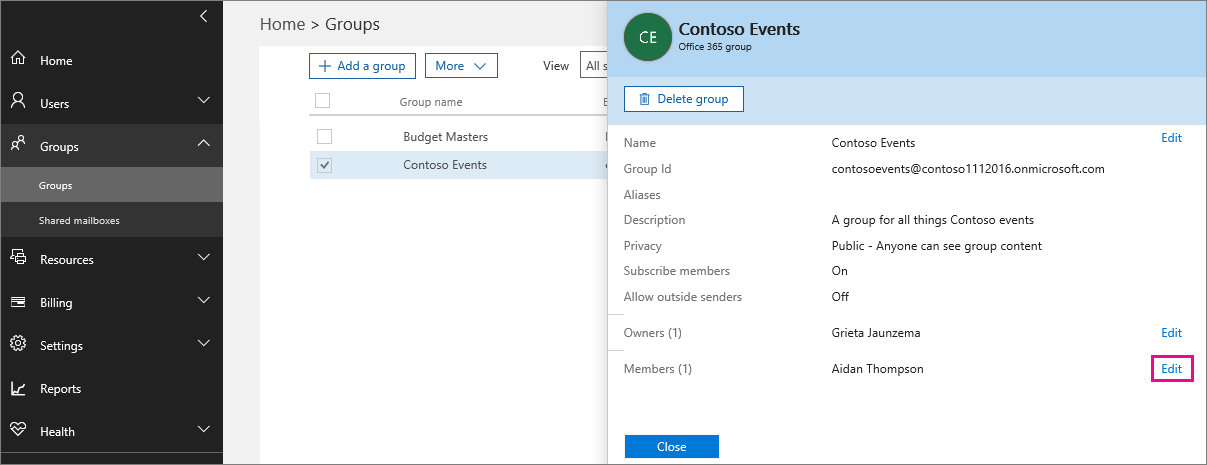
In the left navigation pane, choose Groups > Groups.
-
Select a Group.
-
In the details pane, next to Members, click Edit.

-
Search for or select the name of the member you want to add.
-
Click Save.
Remove a member from a Group in the Office 365 admin center
Note: When you remove a member from a private group, it takes 5 minutes for the person to be blocked from the group (after membership changes are fully replicated among domain controllers).
-
Browse to the Office 365 admin center.
-
In the left navigation pane, choose Groups > Groups.
-
Select a Group.
-
In the details pane, next to Members, click Edit.
-
Next to the member you want to remove, click Remove.
-
Click Save to remove the member.
Manage Group owner status
By default, the person who created the group is the group owner. Often a group will have multiple owners for backup support or other reasons. Members can be promoted to owner status and owners can be demoted to member status.
Promote a member to owner status in the Office 365 admin center
-
Navigate to the Office 365 admin center.
-
In the left navigation pane, choose Groups > Groups.
-
Select a Group.
-
In the Bulk actions pane at the right of the screen, click Edit owners.
-
Search for or select the name of the member you want to add.
-
Click Add next to the member's name.
-
Click Save.
Remove owner status in the Office 365 admin center
-
Navigate to the Office 365 admin center.
-
In the left navigation pane, choose Groups > Groups.
-
Select a Group.
-
In the details pane at the right of the screen, click Edit Owners.
-
Click Remove next to the owner's name.
-
Click Save.
More on managing membership
-
Manage groups dynamically in Azure Active Directory: see the section "How can I manage the membership of a group dynamically?"
-
To add hundreds or thousands of users to Office 365 groups, use the Add-UnifiedGroupLinks.
Articles about managing groups
-
Why you should upgrade your distribution lists to groups in Outlook
-
Manage who can create Office 365 Groups in your organization
-
Manage Office 365 Groups with PowerShell: this article introduces you to key cmdlets and provides examples
| |
 New to Office 365?
No comments:
Post a Comment