Share files in a site library
To make files easy to access and collaborate in a site document library, you may want to share specific documents or folders with people who don't otherwise have access to the site. You can decide who to share with, and whether people can edit or just view.

Share site library files or folders
-
Sign in to Office 365 with your work or school account.
-
Go the site library that has the document or folder you want to share.
-
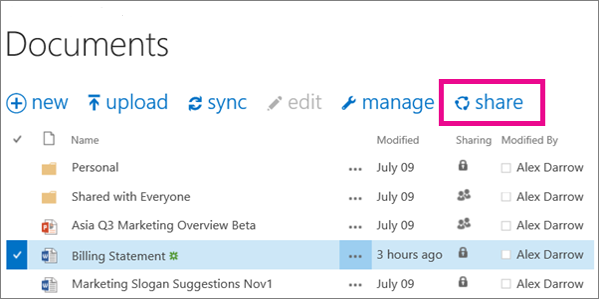
Select the file or folder you want to share, and then select Share.
-
In the Share dialog box on the Invite People tab, do one of the following:
-
Type the names or email addresses of people you want to share the document or folder with.
-
Type Everyone to make it widely available internally, and externally available (if your organization allows external sharing).
-
Type Everyone except external users to make it only available internally.
Security Note: Do not share sensitive information with Everyone or Everyone except external users. Enter only the names or email addresses of the users that should have access to the file.
-
-
Select a permission setting.
-
If you want, type a message to be included with an email that's sent to all the people you chose. The email includes a link to the shared document.
-
If you don't want to send an email, click Show Options, and then clear Send an email invitation.
Note: To help streamline collaboration, the Share dialog box can display who has access to a file and who is currently working with you on that file.
Want More?
Share documents or folders in Office 365
Document collaboration and co-authoring
Share your document in Word 2016 for Windows
No comments:
Post a Comment