Basic tasks in Project
| | A blank project file can be daunting, especially if you're new to project management. But with a few clicks, you can tap the power of Project to convert your to-do list into a full-fledged project for you to manage and share with your team and stakeholders. Here are a few starting points: |
Add tasks
-
Click View > Gantt Chart.
-
Type a name in the first empty Task Name field at the bottom of the task list, and press Enter.
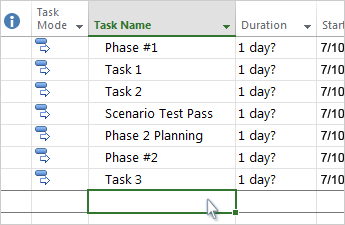
Want more? If adding tasks one at a time starts to take too long, you can also:
| |
Outline tasks
Indent and outdent tasks to show hierarchy — that is, to turn your task list into an outline of your project. An indented task becomes a subtask of the task above it, which becomes a summary task.
-
Click View > Gantt Chart.
-
In the Task Name column, click the task you want to indent.
-
Click Task > Indent Task
 . The task becomes a subtask.
 -
Click Outdent Task
 to move the task back to the level of the task above it. It's no longer a subtask.
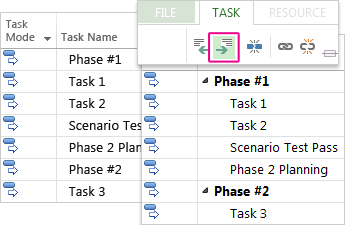
Want more? Use subtasks and summary tasks to show phases, easily navigate through a large project, and more.
| |
Link tasks
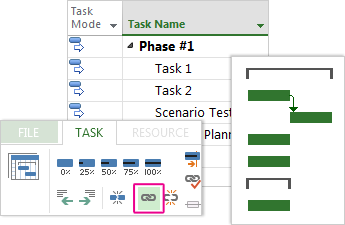
You can link any two tasks in a project to show their relationship (also called a task dependency). Dependencies drive the project schedule — once you link the tasks, every change you make to one affects the other, which affects the next one, and so on.
-
Click View > Gantt Chart.
-
Hold down Ctrl and click the two tasks you want to link (in the Task Name column).
-
Click Task > Link the Selected Tasks
 .
.
Want more? Project supports four kinds of task links to show different relationships. Want to change the link type or remove the link completely?
| |
Change your view
Project starts you off with the tried-and-true Gantt Chart, but you have dozens of other options for viewing your tasks and resources and how they're all connected. You can change any view to meet your specific needs.
-
Click the View tab.
-
In the Task Views group or Resource Views group, click the view that you want to use.
-
To see all the available views, click Gantt Chart > More Views, and then choose from the options in the More Views dialog box.
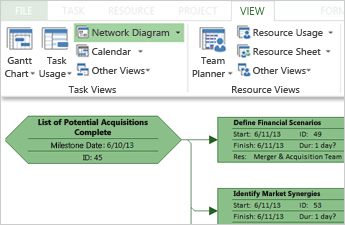
Want more? There's a lot more to learn here! Need some help choosing the right view of your project?
| |
Print your project
Printing a view or report in Project is similar to printing in other Office programs:
Click File > Print > Print.
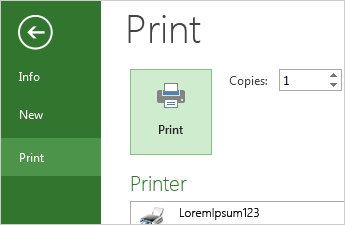
Want more? Getting only the specific project information you want to share with your stakeholders into your printout can involve some prep work before you hit the print button:
| |

No comments:
Post a Comment