Upload video, audio, or pictures to an Asset Library
An Asset Library is a type of document library that you can upload video, audio, or pictures and have additional functionality to support the storage and organization of rich media. To create an Asset Library, see Set up an Asset Library to store images, audios, and videos.
There are file size limits for uploading. See File size limits for more information.
Upload an image or an audio file to an Asset Library
-
Select the Asset library from the Quick Launch bar on the left, or click Settings
 , click Site contents and then select the Asset Library.
 -
Click +Newor +New document.
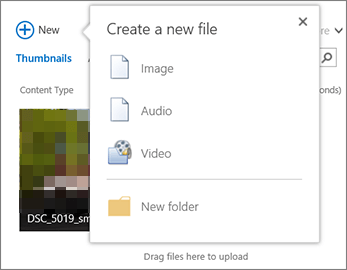
-
In the Add a document dialog box, click Browse or Choose File.
-
Find the file that you want, select it, and then click Open.
-
Click OK.
-
In the dialog box that opens, you can add metadata values such as Name, Keywords, or Copyright.
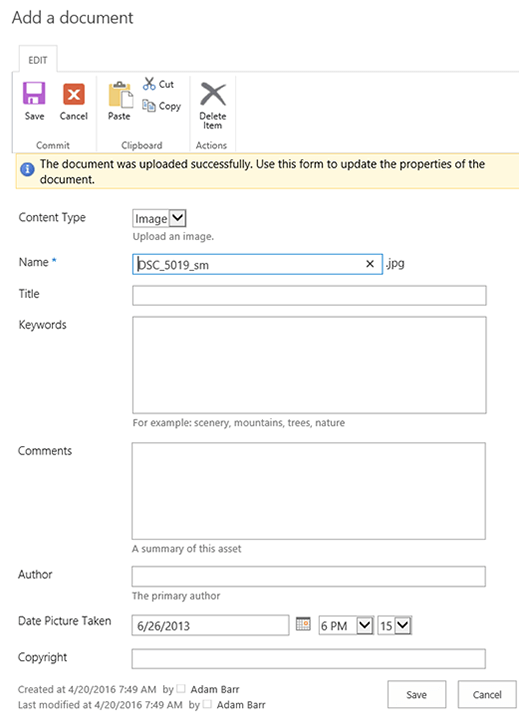
Upload, link to, or embed a video
-
Select the Asset library from the Quick Launch bar on the left, or click Settings
 , click Site contents and then select the Asset Library.
 -
Click +New and then select Video.

-
On the video option page, do one of the following:
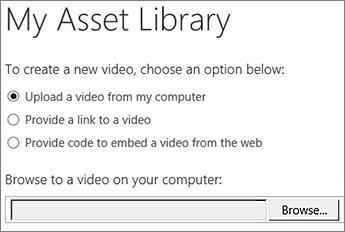
-
Check Upload a video from my computer, and then browse to the file that you want.
-
Check Provide a link to a video, and then paste the hyperlink to the video.
-
Check Provide an embed code to a video that lives on the web, and then type the name of the video and paste the embed code for it.
Note: The Length (seconds) column may be populated automatically for video files. This column is left blank for audio and image files.
-
-
Click OK.
-
The video properties dialog will open so you can add or change metadata values. You can also specify whether users will see a download or embed link for the video when they view it.
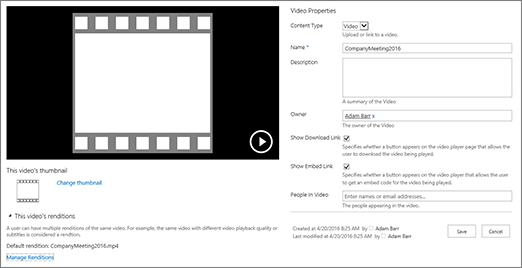
To change the thumbnail image for a video, see Capture or change a video thumbnail.
To get back to your library when in the preview screen, click the Asset Library name above the video.
Note: If your file has metadata associated with it, you may notice that some fields are pre-populated for you.
Deleting files from an Asset Library
-
Select each file that you want to delete by hovering over the file and then clicking the check box.
Note: Make sure the files that you want to delete are not checked out by refreshing the browser and noting the icon in the Type column. Files must be checked back in by the person who checked them out before you can delete them.
-
In the header, click Files and then click Delete Document.
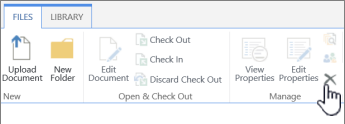
Alternately, to delete files one at a time do this:
-
Hover over the thumbnail of the file you want to delete and click the ellipses ...
-
In the pop-out dialog box, click the ellipses (...) again, and then click Delete.
-
Click OK to confirm the deletion.
You can also manage files by using the Open with Explorer command. From the Asset Library, click Library, and then click Open with explorer. Follow the prompts. Just close explorer when you're done, and refresh your Asset Library screen.
If you delete files by mistake, you may be able to restore your files to the site, depending on how your site was set up. See Empty the recycle bin or restore your files for more details.
View or edit properties of a file in an Asset Library
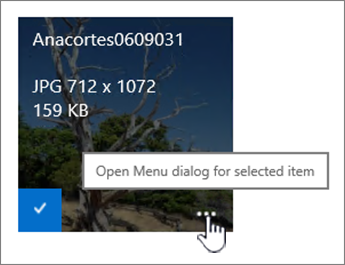
When you pause on a thumbnail in an Asset Library, an overlay scrolls up with more information, such as the file type and duration.
-
Navigate to the Asset Library where your file is located.
-
In Thumbnails view, hover the pointer over the thumbnail for the image, audio file or video.
-
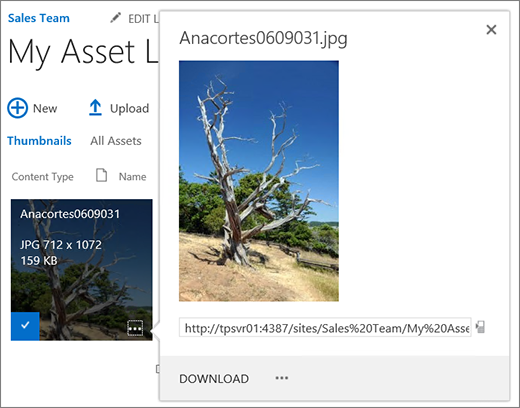
On the overlay that scrolls up, click the ellipses (…) to open a detail callout for the file.
-
On the detail callout for an audio or video file, you can choose to Play or Download the file. For an image file, you can choose Edit Renditions (if enabled) or Download. To open a menu with more options, click the ellipsis (…).
Note: Renditions are only available for SharePoint when publishing is enabled. You can enable publishing under Settings > Site Settings > Manage site features > SharePoint Server Publishing. The option will not appear otherwise.
-
To edit or view properties, click Properties.
Get notified with RSS for changes to the library
This is a way you can see what your team members are adding to an Asset Library. Viewers can also stream audio and video for podcasts.
-
Click the name or title of the library.
-
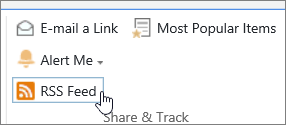
Click the Library tab at the top of the page, and then click RSS Feed.
-
When the feed for the Asset Library opens, click Subscribe to this RSS feed.

-
In Internet Explorer, you'll get a dialog to give the feed a different name, or create and add it to a folder.
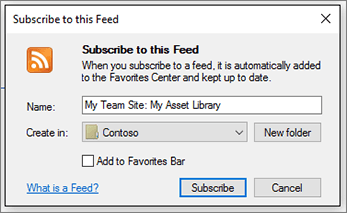
Once you subscribe, you can view your RSS feeds in Internet Explorer through the Favorite's dropdown.

Depending on the browser you're using, the experience of adding an RSS feed can vary. Other browsers may ask you which RSS reader or mail client you want to use.
File size limits
Tips:
-
If the file that you want to upload is very large, you might want to contact your administrator to see what the file size limit is for uploaded files on this site. The default file size threshold for most libraries is 250 MB (for SharePoint 2013 and SharePoint 2016, it's set to 10 GB, for SharePoint Online it's 15GB ), and many video files are larger than this limit. You may have to adjust this setting.
-
The maximum file size you can upload to a SharePoint Online site is 15 GB per file, for SharePoint Online, it's 10GB.
Versioning, metadata navigation, and workflow
You can set up these same features for an Asset Library as you can for a document library. For more information, see:
We're Listening!
Was this article helpful? If so, please let us know at the bottom of this page. If it wasn't helpful, let us know what was confusing or missing. We'll use your feedback to double-check the facts, add info, and update this article.
No comments:
Post a Comment