Restore items in the Recycle Bin of a SharePoint site
When you delete an item from a SharePoint document library or list, it isn't immediately removed from SharePoint. Deleted items go into the site recycle bin for a period of time. During that time, you can restore the items you deleted to their original location. If you're using SharePoint Online, you can even view and restore items that were deleted by someone else, as long as you have edit permissions on the item.
For info about emptying items from the site recycle bin, see Delete items or empty the Recycle Bin of a SharePoint site.
Notes:
-
If you delete files or folders that you're syncing, you can restore them from the Windows Recycle Bin on your PC. To put your Windows recycle bin on your desktop, see Show or hide the Recycle Bin.
-
To learn how to restore files in OneDrive, see Video: Restore deleted files
Updated December, 2017 thanks to customer feedback.
Restore items from the SharePoint Online site recycle bin
You can restore items you delete, and items other people delete (as long as you have permission to edit the items).
Note: Some functionality is introduced gradually to organizations that have opted in to the First Release program. This means that you may not yet see this feature or it may look different than what is described in the help articles.
-
Click Recycle bin in the left pane.

If you don't see Recycle bin in the left pane, follow these steps:
-
Click Settings
 , and then click Site contents.
 -
The Recycle Bin is on the far right of the command bar at the top.

-
-
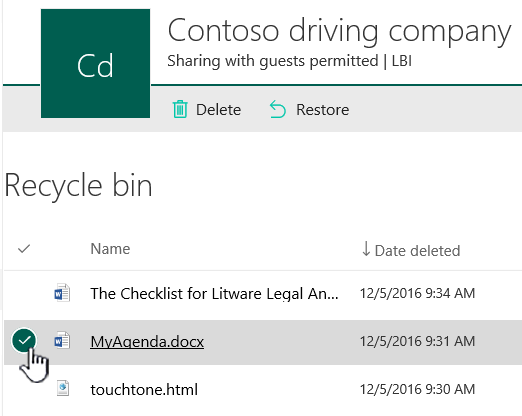
On the Recycle Bin page, click to the left of the items or files to select the ones you want to restore.

-
Click Restore.

Note: If you don't see the item you're looking for, it might have been permanently removed because it was deleted too long ago. If it was deleted recently, a site collection administrator might be able to restore it from the site collection recycle bin. If you're the site collection administrator, see Restore deleted items from the site collection recycle bin.
When you restore an item, it is restored to the same location that it was deleted from.
Restore items from the SharePoint 2016 or 2013 Recycle Bins
-
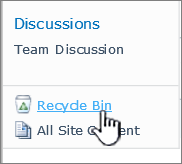
Click Recycle Bin in the Quick Launch bar on the left of the screen.

If you don't see the Recycle Bin on the Quick Launch bar, follow these steps:
-
Click Settings
 , and then click Site Content.
 -
The Recycle Bin is in the top right portion of the Site Content page.

Note: If you don't see a Recycle Bin The Recycle Bin might have been disabled. Talk with your farm or server administrator. If you're an administrator, see Configure SharePoint Recycle Bin Settings.
-
-
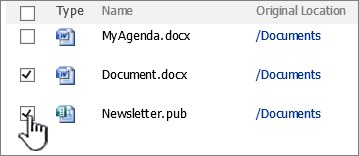
On the Recycle Bin page, click the box to the left of the items or files to select the ones you want to delete or restore.
-
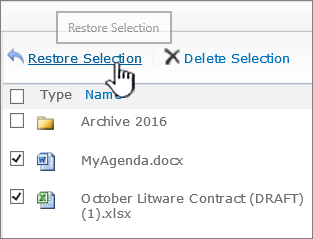
Click Restore Selection to recover the selected files.

-
Click OK in the confirmation dialog.
Note: If you don't see the item you're looking for, it may have exceeded the holding time limit and already deleted. If you have admin rights, see Restore deleted items from the site collection recycle bin. If not, contact your administrator who may be able to restore it.
When an item is restored, it is restored to the same location that it was deleted from.
Restore items from the SharePoint 2010 or 2007 Recycle Bin
-
Click Recycle Bin on the Quick Launch bar (you may need to scroll down).

Notes:
-
The Recycle Bin shows only the items that you have deleted. You cannot view items that were deleted by other users unless you are a site collection administrator.
-
If you don't see a Recycle Bin The Recycle Bin might have been disabled. Talk with your farm or server administrator. If you're an administrator, see Configure SharePoint Recycle Bin Settings.
-
-
Select the check box next to the item.

-
Click Restore Selection.

-
Click OK in the confirmation dialog.
Overview
You can restore a list, list item, library, file, or a version of a file to its original location, as long as you have not already deleted its parent. For example, you cannot restore a version of a file if the file itself has been deleted. That's because when you delete a file, you delete all versions of the file. Similarly, you cannot restore a file if the library to which it belonged has been deleted.
One way around the situation just described is to first restore the library and then restore the file to the library. Be aware, though, that when you restore a securable object, you restore the all of the contents of the securable object at the time it was deleted. A securable object is anything to which permissions can be assigned. In this case, we mean a list, list item, library, or a file. So in this example, when you restore a library, all of the files that the library contained are also restored.
The exception to the rule is with folders. If you restore an item that was originally located in a deleted folder, the folder is recreated in its original location and the item is restored in that folder. In this case, the entire contents of the folder is not restored.
Deleted items are retained in recycle bins for a certain period of time. For SharePoint Online, the retention time is 93 days. It begins when you delete the item from its original location. When you delete the item from the site recycle bin, it goes into the site collection recycle bin. It stays there for the remainder of the 93 days, and then is permanently deleted.
Leave us a comment
Was this article helpful? If so, please let us know at the bottom of this page. Let us know what was confusing or missing. Please include your version of SharePoint, OS, and browser. We'll use your feedback to double-check the facts, add info, and update this article.
No comments:
Post a Comment