Create DNS records at Xinnet for Office 365
Caution: The Xinnet website doesn't support SRV records, which means that several Skype for Business Online and Outlook Web App features won't work. No matter which Office 365 operated by 21Vianet plan you use, there are significant service limitations, and you may want to switch to a different DNS hosting provider.
If despite the service limitations, you choose to manage your own Office 365 DNS records at Xinnet, follow the steps in this article to verify your domain and set up DNS records for email, Lync, and so on. here's how to set them up.
These are the main records to add.
After you add these records at Xinnet, your domain will be set up to work with Office 365 services, though not with the Lync Online and Outlook Web App features mentioned above.
If you have a SharePoint Online Public Website, you can set it up to use your custom domain for the website URL address, like www.your_domain.com.
Note: Typically it takes about 15 minutes for DNS changes to take effect. However, it can occasionally take longer for a change you've made to update across the Internet's DNS system.
Add a TXT record for verification
Before you use your domain with Office 365, we have to make sure that you own it. Your ability to log in to your account at your domain registrar and create the DNS record proves to Office 365 that you own the domain.
Note: This record is used only to verify that you own your domain; it doesn't affect anything else. You can delete it later, if you like.
-
In your browser, go to the Xinnet website and sign in.

-
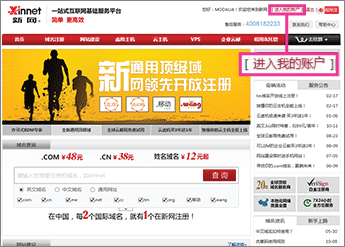
In the upper-right corner, click 进入我的账户 (access my account).
-
In the left navigation pane, click 我的产品 (my products).

-
In the 常规管理 (general management) section, click 域名管理 (domain management).
-
In the right pane, click the 我的域名 (my domains) tab.

-
Select the check box next to the domain that you want to update.

-
Click mydns解析设置 (DNS settings).
The DNS records page for your domain opens.
-
In the 文本记录 (TXT) section, click 添加新的文本记录 (add a TXT record).

-
Make sure that the fields are set to precisely the following values for the empty record:
-
文本记录 (TXT): Leave the box blank.
-
文本内容 (value): Paste Destination or Points to Address value from the table in Office 365, for example MS=msXXXXXXX. How do I find this?
-
TTL: Use the default value.

-
-
Click 提交 (submit).
Now that you've added the record at your domain registrar's site, you'll go back to Office 365 and request Office 365 to look for the record.
When Office 365 finds the correct TXT record, your domain is verified.
-
On the Domains page, choose the domain that you are verifying.

-
On the Setup page, choose Start setup.

-
On the Verify domain page, choose Verify.

Add an MX record to route email
-
In your browser, go to the Xinnet website and sign in.
-
In the upper-right corner, click 进入我的账户 (access my account).
-
In the left navigation pane, click 我的产品 (my products).
-
In the 常规管理 (general management) section, click 域名管理 (domain management).
-
In the right pane, click the 我的域名 (my domains) tab.
-
Select the check box next to the domain that you want to update.
-
Click mydns解析设置 (DNS settings).
The DNS records page for your domain opens.
-
In the 邮件交换记录 (MX) section, click 添加新的邮件记录 (add an MX record).

-
Make sure that the fields are set to precisely the following values for the empty record:
-
邮件交换记录 (MX): Leave the box blank.
-
目标主机 (target): Paste the Points to address value from Office 365: <domain-key>.mail.protection.partner.outlook.cn
Note: Get your <domain-key> from your Office 365 portal account.
How do I find this? -
优先级 (priority): 5
-
TTL: Use the default value.

-
-
Click 提交 (submit).
-
If you have any MX records for this domain that send email to someplace other than Office 365, remove them:
-
On the row of the obsolete record, click 删除 (remove).
-
In the confirmation dialog box, click OK.
-
Add the CNAME records required for Office 365
-
Add the email (Exchange) Autodiscover CNAME record.
-
In your browser, go to the Xinnet website and sign in.
-
In the upper-right corner, click 进入我的账户 (access my account).
-
In the left navigation pane, click 我的产品 (my products).
-
In the 常规管理 (general management) section, click 域名管理 (domain management).
-
In the right pane, click the 我的域名 (my domains) tab.
-
Select the check box next to the domain that you want to update.
-
Click mydns解析设置 (DNS settings).
The DNS records page for your domain opens.
-
On the DNS records page for your domain, in the 别名 (CNAME) section, click 添加新的别名 (add a CNAME record).

-
Make sure that the fields are set to precisely the following values for the empty record:
-
别名 (CNAME): autodiscover
-
别名主机 (points to): autodiscover.partner.outlook.cn
-
TTL: Use the default value.

-
-
Click 提交 (submit).
-
-
Add the Lync Autodiscover CNAME record.
-
On the DNS records page for your domain, in the 别名 (CNAME) section, click 添加新的别名 (add a CNAME record).
-
Make sure that the fields are set to precisely the following values for the empty record:
-
别名 (CNAME): lyncdiscover
-
别名主机 (points to): webdir.online.partner.lync.cn
-
TTL: Use the default value.
-
-
Click 提交 (submit).
-
-
Add the Lync SIP CNAME record.
-
On the DNS records page for your domain, in the 别名 (CNAME) section, click 添加新的别名 (add a CNAME record).
-
Make sure that the fields are set to precisely the following values for the empty record:
-
别名 (CNAME): sip
-
别名主机 (points to): sipdir.online.partner.lync.cn
-
TTL: Use the default value.
-
-
Click 提交 (submit).
-
-
Add the Office 365 MSOID CNAME record. This is an additional record that is required for Office 365.
-
On the DNS records page for your domain, in the 别名 (CNAME) section, click 添加新的别名 (add a CNAME record).
-
Make sure that the fields are set to precisely the following values for the empty record:
-
别名 (CNAME): msoid
-
别名主机 (points to): clientconfig.partner.microsoftonline-p.net.cn
-
TTL: Use the default value.
-
-
Click 提交 (submit).
-
Add TXT record to help prevent spam
-
In your browser, go to the Xinnet website and sign in.
-
In the upper-right corner, click 进入我的账户 (access my account).
-
In the left navigation pane, click 我的产品 (my products).
-
In the 常规管理 (general management) section, click 域名管理 (domain management).
-
In the right pane, click the 我的域名 (my domains) tab.
-
Select the check box next to the domain that you want to update.
-
Click mydns解析设置 (DNS settings).
The DNS records page for your domain opens.
-
In the 文本记录 (TXT) section, click 添加新的文本记录 (add a TXT record).
-
Make sure that the fields are set to precisely the following values for the empty record:
-
文本记录 (TXT): Leave the box blank.
-
文本内容 (value): v=spf1 include:spf.protection.partner.outlook.cn -all
-
TTL: Use the default value.
-
-
Click 提交 (submit).
No comments:
Post a Comment