Import or copy the Auto-Complete List to another computer
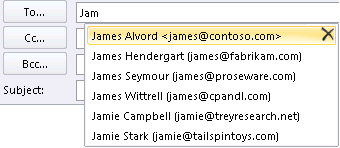
The Auto-Complete List is a feature that displays suggestions for names and email addresses as you begin to type them. These suggestions are possible matches from a list of names and email addresses from the email messages that you have sent.

In Microsoft Outlook 2010, the Auto-Complete List is no longer saved in a file with an extension of .nk2. The Auto-Complete List entries are now saved in your Microsoft Exchange Server mailbox or in the Outlook Data File (.pst) for your account. However, if you want to copy the Auto-Complete List (.nk2) from another computer that was using a POP3 email account or Outlook 2007, you must import the file.
Step 1: Copy the Auto-Complete file from the old computer
-
Because the default folder is hidden folder, the easiest way to open the folder is to use the command %APPDATA%\Microsoft\Outlook on the Start menu.
-
Windows 7 Click Start. Next to the Shut down button, in the Search programs and files box, type %APPDATA%\Microsoft\Outlook and then press Enter.

-
Windows Vista Click Start. Next to the Shut Down button, in the Search box, type %APPDATA%\Microsoft\Outlook and then press Enter.

-
Windows XP Click Start, click Run, type %APPDATA%\Microsoft\Outlook and then press Enter.

-
-
After you press Enter, the folder in which your Auto-Complete List file is saved opens.
Note: By default, file extensions are hidden in Windows. To change whether file extensions are shown, in Window Explorer on the Tools menu (in Windows 7 or Windows Vista, press the ALT key to see the Tools menu), click Folder Options. On the View tab select or clear the Hide extensions for known file types check box.
-
Copy the file to the new computer. The file is small and can be placed on a removable media such as a USB memory stick.
Step 2: Copy the Auto-Complete file to the new computer
-
On the new computer, in Control Panel, click or double-click Mail.
Mail appears in different Control Panel locations depending on the version of the Microsoft Windows operating system, the Control Panel view selected, and whether a 32- or 64-bit operating system or version of Outlook 2010 is installed.
The easiest way to locate Mail is to open Control Panel in Windows, and then in the Search box at the top of window, type Mail. In Control Panel for Windows XP, type Mail in the Address box.
Note: The Mail icon appears after Outlook starts for the first time.
-
Click Show Profiles.
-
Make a note of the name of the profile. You will need to change the .nk2 file name to match the name later.
-
Copy the .nk2 file to the new computer in the folder in which Outlook configurations are saved. Because this folder is hidden folder, the easiest way to open the folder is to use the command %APPDATA%\Microsoft\Outlook on the Start menu.
-
Windows 7 Click Start. Next to the Shut down button, in the Search programs and files box, type %APPDATA%\Microsoft\Outlook and then press Enter.
-
Windows Vista Click Start. Next to the Shut Down button, in the Search box, type %APPDATA%\Microsoft\Outlook and then press Enter.
-
Windows XP Click Start, click Run, type %APPDATA%\Microsoft\Outlook and then press Enter.
-
-
After the file is coped to the folder, right-click the file, click Rename, and change the name to match the profile name that appeared in step 3.
Step 3: Import the Auto-Complete List
You are now ready to start Outlook and import the file, but you must start Outlook with a special one-time command.
-
Do one of the following:
-
Windows 7 Click Start {picture}. Next to the Shut down button, in the Search programs and files box, type outlook /importnk2 and then press Enter.
-
Windows Vista Click Start {picture}. Next to the Shut Down button, in the Search box, type outlook /importnk2 and then press Enter.
-
Windows XP Click Start {picture}, click Run, type outlook /importnk2 and then press Enter.
-
The Auto-Complete List should now have the entries from your other computer when you compose a message and begin typing in the To, Cc, or Bcc boxes.
In Outlook 2007, you can copy the names and email addresses in the Auto-Complete List from one computer to another. For example, if you are upgrading to a new computer and don't want to lose all the information stored in the Auto-Complete List, you can copy the names and email addresses from your old computer to your new computer.
Important: You must exit Microsoft Outlook before starting the following procedure. The names will be included in the Auto-Complete List when you restart Outlook.
Copy the Auto-Complete file from the old computer
-
On your old computer, choose one of the following:
-
Windows Windows 7 and Vista Go to drive:\user\AppData\Local\Microsoft\Outlook.
-
Microsoft Windows XP Go to drive:\Documents and Settings\user\Application Data\Microsoft\Outlook.
Note: Depending on your file settings, this folder might be hidden.
To display hidden folders on WIndows 7 and Windows Vista
-
Click the Start button, and then click Control Panel.
-
Click Appearance and Personalization.
Note: If you are using Control Panel Classic View, double-click Folder Options, and then go to step d.
-
Click Folder Options.
-
On the View tab, under Advanced settings, under Files and Folders, under Hidden files and folders, select Show hidden files and folders.
To display hidden folders on Windows XP
-
Click the Start button, and then click Control Panel.
-
Click Folder Options.
-
Click the View tab, and then click the Show hidden files and folders option.
-
-
-
Right-click profile name.nk2, and then click Copy.
Tip: You can copy the file to removable media, such as a USB media stick, and then copy the file to the correct location on your new computer. Or you can attach the file to an email message and send the message to yourself. On the new computer, open the attachment in Outlook, and then save it in the correct location.
-
On the computer where you want to populate the Auto-Complete List, choose one of the following:
-
Windows 7 and Windows Vista Right-click anywhere in drive:\user\AppData\Local\Microsoft\Outlook and then click Paste to save profile name.nk2.
-
Microsoft Windows XP Right-click anywhere in drive:\Documents and Settings\user\Application Data\Microsoft\Outlook and then click Paste to save profile name.nk2.
-
-
If the Outlook user profile name is different on the computer where you are moving the .nk2 file, you must rename the file with the Outlook user profile name that is being used on the new computer, after you copy the file to the correct folder. For example, if you move Kim Akers.nk2 from the original computer with an Outlook user profile name of Kim Akers, and you copy the Kim Akers.nk2 file to the new computer, you must rename the file with the Outlook profile name that is being used on the new computer.
-
When prompted about replacing the existing file, click Yes.
-
Open Outlook to view the changes to the Auto-Complete List.
No comments:
Post a Comment