Create an Office 365 Group from the small business admin center
In Office 365, you can create an Office 365 group from Outlook, People, Calendar, or OneDrive for Business (see Create a group). Small business administrators can create an Office 365 group directly from the admin center.
Important: These steps apply to Office 365 Small Business administrators who have opted in to First Release. If you're using a different Office 365 plan, follow these steps to create a group.
Office 365 groups are similar to distribution groups in that its members receive email messages sent to the group. In addition, the Office 365 group provides a shared workspace for email, conversations, files, and calendar events so it serves as a designated place to collaborate on a project. All conversations are stored in the group; a dedicated calendar is available to the group; and dedicated OneDrive for Business storage is available for group documents. Learn more about Office 365 groups and see how they compare with distribution groups.
Tip: You can still create a distribution group, but you'll follow these steps in the Exchange Admin Center instead.
Create an Office 365 group
To create a new Office 365 group, follow these steps:
-
Sign in to Office 365 with your work or school account.
-
Select the app launcher icon
 and choose Admin.
 -
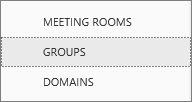
Choose Groups in the left navigation pane.

-
Choose the
 icon to create the group and enter the following information:
-
Group name This name appears in the address book, on the To: lines in email, as the name of the group in Outlook and OneDrive for Business, and on the Groups page in the admin center. It's required and should be user-friendly so people recognize what it is.
-
Email address Enter the email address for the group. This is also required. Email sent to this address goes to the group and all members of the group.
-
Privacy Choose Private to restrict the contents of the group to its members only and require the group owner to approve new members. Or, choose Public to let anyone view the contents of the group and allow others to join the group without approval.
-
Language Choose the language you want to use for group notifications, such as the footer that appears in group email messages.
-
Description This field is optional but it's useful to describe the group so members know the purpose of the group.
-
-
Choose Next to go to the next page.
-
Enter the names of designated group owners who can manage the group and then select their name from the list.
-
Enter the names of the individuals you want to be members of the group and select their name from the list. Alternatively, you can let individuals add themselves or request approval to join later (see Join a group in Outlook).
-
Leave the option Subscribe all members to group messages selected if you want members to receive messages and calendar items in their own inbox in addition to the group mailbox.
Tip: This is a useful option as messages appear in each member's inbox similar to a distribution list. This reminds them to check the latest group conversation, files, and calendar.
-
Choose Next to go to the next page.
-
View the group details and then choose Done to close the page.
Important: If you want external users in the group, you'll need to use an Office 365 distribution list instead. You can still create distribution lists in the Office 365 Exchange admin center (learn more).
Edit an Office 365 Group
Follow these steps to manage existing Office 365 Groups.
-
Sign in to Office 365 with your work or school account.
-
Select the app launcher icon
 and choose Admin.
 -
Choose Groups in the left navigation pane.

-
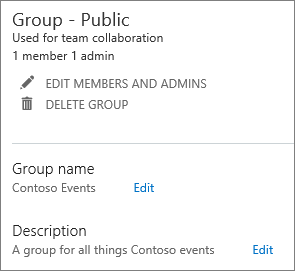
Check the box beside the group you want to edit then update one of the following:

-
Edit Members and Admins Select this and choose Add Member to add more members to the group or select an existing member and choose Remove from Group.
-
Edit Members and Admins Select this and choose Add Admin to add more admins to the group or select an existing admin's name and choose Remove Admin Status.
-
Delete Group Choose this to delete the group from Office 365. The group, its email conversations, calendar, and OneDrive for Business documents will be deleted along with the group. This action cannot be undone if you delete the group.
-
Group name Update the group name if needed. This name appears in the address book, on the To: lines in email, as the name of the group in Outlook and OneDrive for Business, and on the Groups page in the admin email address for the group.
-
Description Update the description to describe the group so members know the purpose of the group.
-
Repeat these steps for each group you want to update.
Learn more
To learn more, see Learn about Office 365 Groups
No comments:
Post a Comment