Create and print a presentation in Outline view
Outline view in PowerPoint displays your presentation as an outline made up of the titles and main text from each slide. Each title appears on the left side of the pane that contains the Outline tab, along with a slide icon and slide number. The main text is indented under the slide title. Graphic objects appear only as small notations on the slide icon in Outline view.
Working in Outline view is particularly handy if you want to make global edits, get an overview of your presentation, change the sequence of bullets or slides, or apply formatting changes.
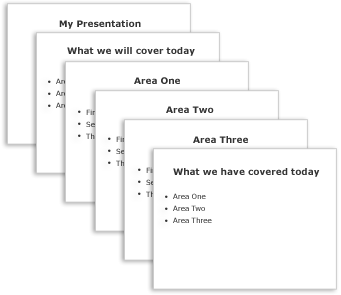
When you're creating your outline, think about how many slides you need. You probably want at least:
-
A main title slide
-
An introductory slide that lists the major points or areas in your presentation
-
One slide for each point or area that is listed on the introductory slide
-
A summary slide that repeats the list of major points or areas in your presentation
By using this basic structure, if you have three major points or areas to present, you can plan to have a minimum of six slides: a title slide, an introductory slide, one slide for each of the three major points or areas, and a concluding summary slide.

If you have a large amount of information to present in any of your main points or areas, you may want to create a sub-grouping of slides for that material by using the same basic outline structure.
Consider how much time each slide should be visible on the screen during your presentation. A good standard estimate is from two to five minutes per slide.
Create a presentation in Outline view
-
On the View tab, in the Presentation Views group, click Outline.
-
In the slide thumbnail pane, place the pointer, and then either paste your content or begin typing text.
The first text you type will be a title, indicated by boldface type. Press ENTER when you've completed the title.
PowerPoint uses the Enter key on the keyboard to start a new line in an outline. The new line is automatically at the same hierarchical level as the one you just typed. To change that hierarchical level:
-
Press the Tab key on the keyboard to move the current line downward one level in the outline hierarchy.
-
Press Shift+Tab to move the current line upward one level in the outline hierarchy.
-
View a presentation in Outline view
-
On the View tab, in the Presentation Views group, click Outline.
Print a presentation in Outline view
-
Open the presentation that you want to print.
-
Click File > Print.
-
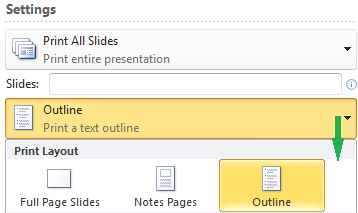
In the Print dialog box, under Settings, select the second box (which by default is set to Full Page Slides) to expand the list of options. Then, under Print Layout, select Outline.

You can choose a page orientation (Portrait or Landscape) in the Printer Properties dialog box.
-
Click Print.
(For more complete information on printing, see the article Print your PowerPoint slides or handouts.)
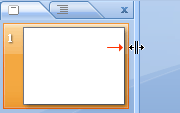
The Outline and Slides tabs change to display an icon when the pane becomes narrow. If the Outline tab is hidden, you can widen the pane by dragging the right border.

(In PowerPoint 2007, you can save your presentation as a web page. When you do that, the text on the Outline tab becomes a table of contents so that you can navigate through the slides.)
Create a presentation in Outline view
-
On the View tab, in the Presentation Views group, click Normal.
-
In the pane that contains the Outline and Slides tabs, click the Outline tab.
-
On the Outline tab, place the pointer, and then either paste your content or begin typing text.
The first text you type will be a title, indicated by boldface type. Press ENTER when you've completed the title.
PowerPoint uses the Enter key on the keyboard to start a new line in an outline. The new line is automatically at the same hierarchical level as the one you just typed. To change that hierarchical level:
-
Press the Tab key on the keyboard to move the current line downward one level in the outline hierarchy.
-
Press Shift+Tab to move the current line upward one level in the outline hierarchy.
-
View a presentation in Outline view
-
On the View tab, in the Presentation Views group, click Normal.
-
In the pane that contains the Outline and Slides tabs, click the Outline tab.
Print an outline in PowerPoint 2010
-
Open the presentation that you want to print.
-
Click File > Print.
-
In the Print dialog box, under Settings, select the second box (which by default is set to Full Page Slides) to expand the list of options. Then, under Print Layout, select Outline.

You can choose a page orientation (Portrait or Landscape) in the Printer Properties dialog box.
-
Click Print.
(For more complete information on printing, see the article Print your PowerPoint slides or handouts.)
Print an outline in PowerPoint 2007
-
Open the presentation that you want to print.
-
On the View tab, in the Presentation Views group, click Normal.
-
In the pane that contains the Outline and Slides tabs, click the Outline tab.
-
Click the Microsoft Office Button
 , point to the arrow next to Print, and then click Print Preview.
 -
In the Page Setup group, click the arrow under Print What, and then click Outline View.
-
To specify the page orientation, click the arrow under Orientation, and then click Landscape or Portrait.
-
Click Print.
No comments:
Post a Comment