Apply conditional formatting to a Data View
With conditional formatting, you can easily create a Data View that applies a style to a selected HTML tag or data value when the data meets criteria that you specify. You can also set conditions that change the visibility of an HTML tag or data value, so you can show or hide data altogether.
With Microsoft Office SharePoint Designer 2007, you can use XML Path Language, or XPath, to build expressions that specify conditions for when to apply conditional formatting. XPath is a language for locating and processing information in an XML document. Office SharePoint Designer 2007 makes it possible for both novices and advanced users to create XPath expressions that perform complex functions on XML data.
For example, Northwind Traders, a gourmet food distribution company, likes to have a minimum number of all their products in stock. When they track their inventory, they include the number of units in stock and the number of units that they want to keep in stock (the reorder level). When the number of units in stock falls below the reorder level, they place another order.
You suggest that the record for an item be highlighted when the number of items in stock falls below the reorder level. This way, you can quickly and easily see when an item needs to be reordered.
To create the sample data and Data View that are used in the following example, or to learn more about Data Views, see Create a Data View.
What do you want to do?
Apply conditional formatting
-
Open the page that contains the Data View to which you want to apply conditional formatting.
-
Right-click the Data View, and then click Conditional Formatting on the shortcut menu.
Tip: You can also click the Data View, click the arrow
 in the upper-right corner to show the Common Data View Tasks list, and then click Conditional Formatting. Click the arrow again to hide the list.
The Conditional Formatting task pane opens.
-
In the Data View, select any cell other than the header cell, such as the HTML tag, data value, or range of text in the field that you want to format.
In the example, a cell in the ReorderLevel column is selected because you want to highlight the data in that field.

Tip: To quickly select the entire cell, right-click inside the cell, point to Select on the shortcut menu, and then click Cell.
After you select the data that you want to format, the Create button in the Conditional Formatting task pane becomes available.
Note: If the Create button does not become available, the selection cannot have conditional formatting applied to it. The Create button becomes available only after you select a range that can have conditional formatting applied to it.

-
Click Create, and then click Apply Formatting.
Note: The Apply formatting option applies a style to a selected HTML tag or data value that meets certain criteria. The Show content option or Hide content option changes the visibility of a selected HTML tag or data value that meets certain criteria. For example, if you want to create and then display a New icon for newly added content, you create a condition that displays the icon if the content has been added within a specified number of days.
-
In the Condition Criteria dialog box, click anywhere in the first row to add a new clause, and then do the following:
-
Under Field Name, click the arrow, and then click the field that you want in the list. To follow the Northwind Traders example, click UnitsInStock (Number).
-
Under Comparison, click the arrow, and then click the comparison that you want. To follow the Northwind Traders example, click Less Than Or Equal.
-
Under Value, click the arrow, and then click More Fields. In the More Fields dialog box, click the field that you want, and then click OK. To follow the Northwind Traders example, click ReorderLevel.
Note: By using the AND and OR operators and adding additional clauses, you can create criteria that specify multiple conditions.
Now that you have created the condition, you can apply the formatting.
-
-
In the Condition Criteria dialog box, click OK.
-
In the Modify Style dialog box, choose options to create the style for your conditional formatting.
For example, to make specified products in the Northwind Traders Data View appear highlighted and in bold text, do the following:
-
Under Category, click Font. In the font-weight list, click bold.
-
Under Category, click Background. In the background-color list, click Yellow.
Because a Data View is a view of live data, you see the conditional formatting applied immediately in Design view. The ReorderLevel entries for Chang, Aniseed Syrup, and Chef Anton's Gumbo Mix appear in a bold font with a yellow background, because the units in stock for each of these items is less than the reorder level.

-
Manage existing conditions
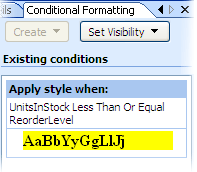
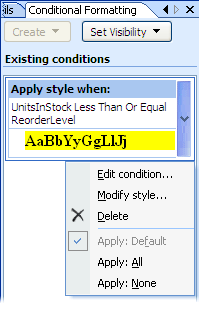
After you create a condition, it appears in the Conditional Formatting task pane, where you can view all conditions that are applied to a Data View. To view the condition criteria, you can click inside a cell in the ReorderLevel column, and the condition appears in the Conditional Formatting task pane.

Tip: If the Conditional Formatting task pane isn't visible, right-click the Data View, and then click Conditional Formatting.
By choosing the options in the task pane, you can quickly edit the existing conditions, modify their styles, or delete them.

Preview the condition
Even if no current data in the Data View meets the condition, you can still preview the effect of the conditional formatting.
No comments:
Post a Comment