Organize email by using inbox rules in Outlook.com or Outlook on the web
Use inbox rules to automatically perform specific actions on email that arrives in your inbox. For example, you can create rules that will change the importance level of messages as they come in, automatically move them to other folders, or even delete them based on certain criteria.
Notes:
-
Rules only run on your inbox. Rules don't run on other folders.
-
Outlook on the web does not support running new rules on existing messages. To do this, please use Outlook 2016 or Outlook 2013.
How do I create a new inbox rule?
-
Select Settings
 .
.
-
Select Options or Mail, which opens the Options panel on the left. Under Mail > Automatic processing, select Inbox and sweep rules.
-
Select Add
 under Inbox rules.
-
Type a name for the inbox rule in the Name box and then select a condition and action from their respective drop-down lists.
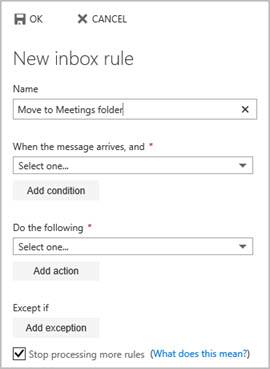
You can add additional conditions or actions by selecting Add condition or Add action.
-
Add exceptions to the inbox rule by selecting Add exception and then choosing one from the Add exception menu.
-
By default, the Stop processing more rules option is turned on. With this option on, when a message arrives in your inbox that meets the criteria for more than one rule, only the first rule will be applied. Without selecting this check box, all inbox rules that a message meets the criteria for are applied.

How do I edit an inbox rule?
You can edit any inbox rule by selecting it and choosing Edit  to open the rule so that you can change the conditions or actions of the rule.
How do I delete an inbox rule?
If you have an inbox rule that you no longer want, you can select it and then select Delete  to remove it. If you just want to turn the rule off for a while, remove the check mark next to the rule.
Set the order in which inbox rules are applied to incoming messages
Inbox rules are applied to incoming messages based on the order they're in within the Inbox rules list. You can arrange the order in which the rules you create are applied to messages coming into your inbox:
-
Select Settings
 .
.
-
Select Options or Mail, which opens the Options panel on the left. Under Mail > Automatic processing, select Inbox and sweep rules.
-
Under Inbox rules, select the rule you want to move and then select the up or down arrow
 to place the rule where you want it applied within the rules list.
Examples of how to use inbox rules
Set up an inbox rule to move mail based on some text in subject line
-
Select Settings
 .
.
-
Select Options or Mail, which opens the Options panel on the left. Under Mail > Automatic processing, select Inbox and sweep rules.
-
Select Add
 under Inbox rules.
-
Type a name for the inbox rule in the Name box.
-
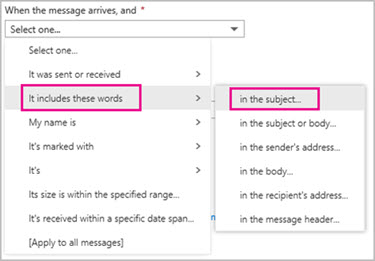
Under When the message arrives, and, select It includes these words, and then select in the subject.
-
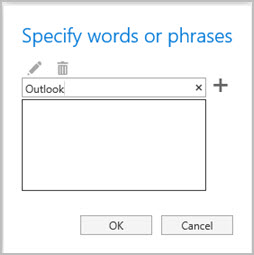
Specify a word or phrase that would be in the subject line of the message to move, select Add
 , and then select OK.
-
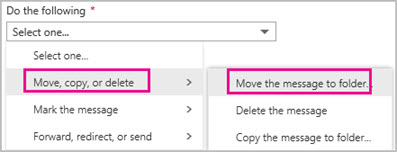
Under Do the following, select Move, copy, or delete, and then select Move the message to folder.
-
Select the folder to move the messages to and select OK.
-
Select OK at the top of the dialog box.
Set up an inbox rule to change the importance of emails based on sender
-
Select Settings
 .
.
-
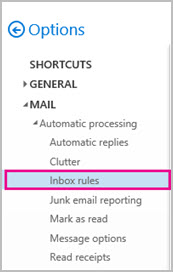
Select Options or Mail, which opens the Options panel on the left. Under Mail > Automatic processing, select Inbox and sweep rules.
-
Select Add
 under Inbox rules.
-
Type a name for the inbox rule in the Name box.
-
Under When the message arrives, and, select It was sent or received, and then select Received from.
-
Select the contact from the contact list and select Add
 .
. -
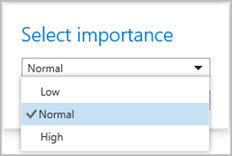
Under Do the following, select Mark the message and with importance.
-
Select the importance level and then select OK.
-
Select OK at the top of the dialog.
Still need help?
Get help with Outlook.com:
To contact support, go to Outlook.com and select  > Help.

Get help with Outlook on the web for business:


If you're using Office 365 operated by 21Vianet in China, see Contact Office 365 for business support - Admin Help.
Your blog was really nice and helpful, I think this is one of the best customer support review that is you provided to us. For any technical support call at 0800-090-3220 or visit Outlook Helpline Number UK
ReplyDelete