Welcome to Outlook.com
Note: Sign in to Outlook.com by using any Microsoft account, including email accounts ending in @outlook.com, @live.com, @hotmail.com, and @msn.com, or by using an Office 365 work or student accounts. Need help accessing your account? See I'm having trouble signing in to my Outlook.com account.
Use Outlook.com to access email, contacts, calendars, and tasks from anywhere. All you need is Internet access.
What you'll see in Mail
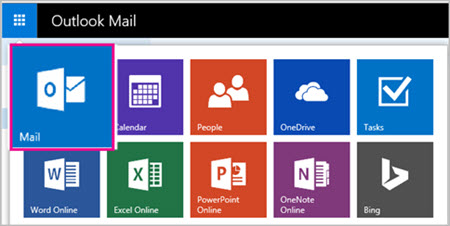
When you sign in to Outlook.com, you'll go straight to your Inbox.
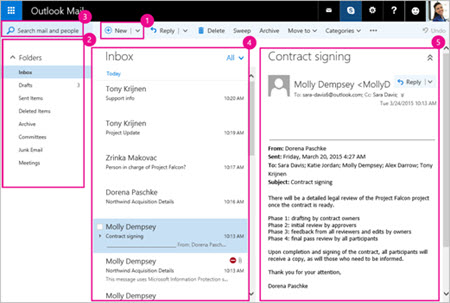
| Block | Description | Action(s) |
| 1 | Message | Create a new message by choosing |
| 2 | Folders list | The list includes the folders in your mailbox. It may include other folders, such as Favorites and Archive folders. Tips:
See Working with message folders in Outlook on the web in business to learn more about available folders. |
| 3 | Search box | In the Search Mail and People box, type who (name of a person) or what (a subject) you want to search for, and then choose |
| 4 | Message list | Messages in the current folder are listed. And there might be a visual alert that a message is unread, has an attachment, or is flagged. At the top of the message list, you can set how you want to view the list. Choose the Each message also has a mini toolbar |
| 5 | Reading pane | The message or conversation that you chose appears in the reading pane. Use the command bar above the reading pane to perform common actions such as deleting, archiving, sweeping, or moving emails. And you can choose More |
What you'll see in Calendar
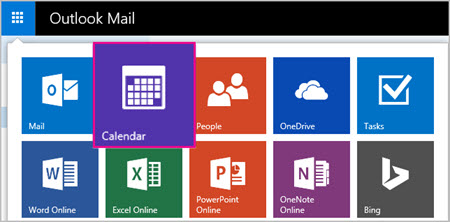
Keep track of appointments, meetings, or any other event from anywhere—as long as you have Internet access. Add, edit, or delete events by using daily, weekly, or monthly views. For more information about working with calendars in Outlook.com, go to Using the Calendar in Outlook on the Web.
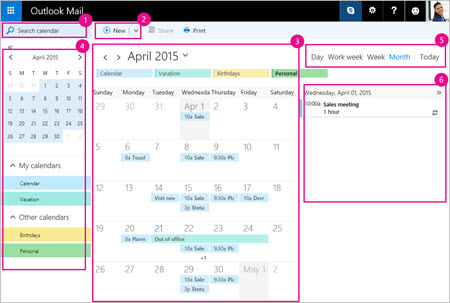
| Block | Description | Action(s) |
| 1 | Search Calendar | Begin typing the name of a person or an event to locate a meeting or appointment containing a particular contact or event title, and then choose |
| 2 | New event | Create a new event by choosing the |
| 3 | My calendars | Under My Calendar, Calendar is the default selection and displays the calendar in Month view. You can move forward In Month view, the current date is always highlighted—darkly shaded. But if you select another date in that view, it also is highlighted and lightly shaded. And you can add a calendar under My Calendar. Right-click My calendar > New calendar and create a new calendar to use, for example, for a specific project or to track personal appointments. If you decide you don't want the calendar you created, choose the calendar, right-click, and choose Delete > Yes. Or on the command bar, choose the Add calendar down arrow, and then choose a Birthday calendar, a Holiday calendar, or another calendar option. After you add a Birthday calendar, for example, its display can be turned on and turned off. Just choose My calendars, right-click, and choose your option. |
| 4 | Other calendars | You can view more than one calendar at a time. Add other people's calendars and select which to display. You also can create new calendars or new calendar groups. |
| 5 | View options | Choose your calendar view: Day, Work week, Week, Month, or Today. |
| 6 | Calendar pane | Select a specific day in the calendar, and any appointment or event scheduled for that day is listed in this area. You also can double-click a day or time slot and create a new appointment or event. |
Share or print a calendar
In Outlook.com, you can share a calendar or print a calendar. Start by choosing the action you want on the command bar.

To share a calendar
-
Choose Share, type the name of the person who you want to share the calendar with in the Share with box, and then choose Share.
-
Do one of the following:
-
If the person is matched automatically as someone in your contact list, their email address appears and you can choose it.
-
If the person whose name you typed isn't in your contact list, type their email address, and then choose Share
-
-
When you're done identifying all the persons you want to share the calendar with, choose Done.
Each person you choose to share your calendar with will receive your email invitation. The recipient has the option to choose the Add this calendar to view subject, location, availability, and notes link to get access to the calendar you want to share.
To print a calendar
-
Choose Print.
Note: Whatever calendar view you have onscreen is previewed.
-
Do one of the following:
-
If the calendar previewed is what you want to print, choose Print.
-
If you want a different calendar, in the View drop-down box, choose a new calendar view, and then choose Print.
-
Options—such as format—available in the Print dialog box might vary based on the chosen calendar view.
What you'll see in People
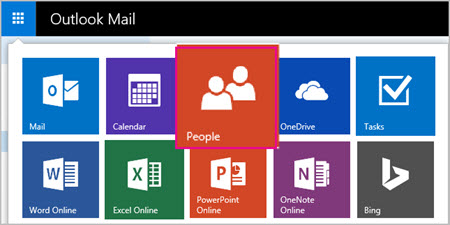
Store and manage all of your contacts in one place. Create new contacts or search for and edit existing ones. To learn more about managing contacts in Outlook.com, go to Use contacts in Outlook on the web.
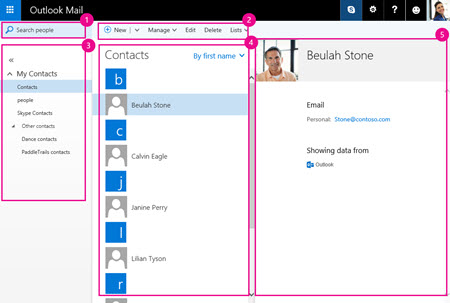
| Block | Description | Action(s) |
| 1 | Search People | Begin typing the name of a person you're searching for, and then choose |
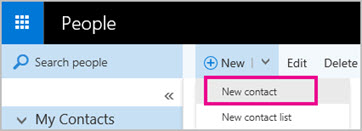
| 2 | Create, edit, or delete contacts | Use the command bar to access and carry out specific actions.
|
| 3 | My contacts | Displays folders you can use to manage your contacts. You can create new contact folders and rename or move existing ones.
|
| 4 | Contacts list | Displays contacts in the selected folder under My Contacts. How contacts are displayed depends on your choices. By default, Display is set to All, Display order to First last, and Sort order to First name. Choose the down arrow next to the current selection to change the options. There also are More options available. Choose a contact to view details in the contact details pane. |
| 5 | Contact card | Displays information about the contact chosen in the contacts list. Details include any information you might have added about the contact, including phone numbers, address, and any company association. You can connect to a social network with Outlook.com. If you do create a connection, you might be able to link to the contact lists from the social service you're linked to. |
What you'll see in Tasks
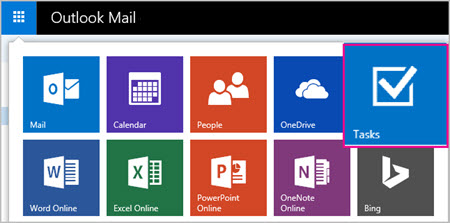
Keep track of things you need to get done, or view and track flagged messages in email that are associated with an action item. To learn more about managing tasks in Outlook.com, go to Using Tasks in Outlook on the web.
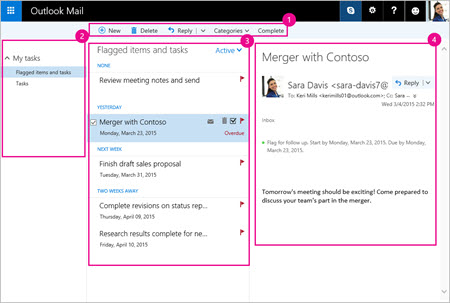
| Block | Description | Action(s) |
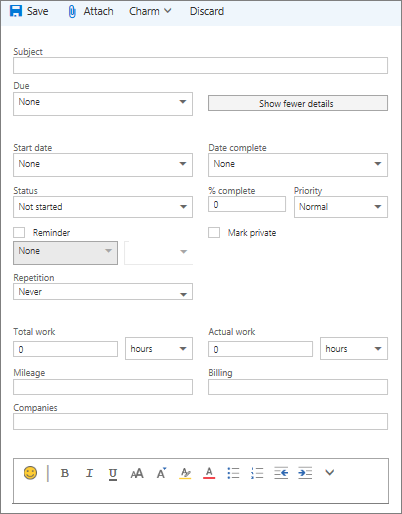
| 1 | Manage your tasks | You can use the command buttons to help you carry out actions to manage your tasks. You can create a new task or delete an existing one, assign a task to a category, attach a charm (an icon) to a task, or mark a task as complete. Choose |
| 2 | My tasks | The first time you expand the default My tasks folder, you'll find two built-in folders:
You can create new folders. Right-click My tasks > Create new folder, and then name the new folder. The new folder will appear below the Task folder. Any folder you create you can rename or delete. Right-click the folder to do either. |
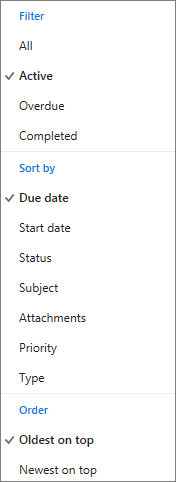
| 3 | Tasks list | Tasks that you've created are listed. You can use a filter—All, Active, Overdue, or Completed—to decide how tasks are presented in the Tasks list. Choose the down arrow next to the current Filter—All, Active, Overdue, or Complete. If you like, select a different Filter, and then choose Sort by and Order options. If your task is nearing the date you set for completion, you'll see a small clock symbol next to the task. And if you don't tackle a task by the date you set, you'll find the task labeled as Overdue. |
| 4 | Task detail | In Tasks, choose a task you created and view details about it. In the details pane, choose If you choose the down arrow next to Edit, you can Delete the task, Categorize it, add a Charm, or simply Open in a separate window. |
 .
. to show the Folders list, or choose Collapse
  to hide it.
  .
.  down arrow, and then choose an option under Filter, Sort by, or View as.
  . You can Delete a selected message, Mark as unread, Flag the message, or pin it to Keep this message at the top of your folder.
 to access additional actions—for example, an option to assign a message to a category or to Print a message. If you want to learn about printing, see
  or backward
  through calendar months.


 to create a new task and then in the task form, fill in details as needed.

 and change any detail you want about the task. Make sure you Save the changes you make.
No comments:
Post a Comment