Set or clear a print area on a worksheet
If you print a specific selection on a worksheet frequently, you can define a print area that includes just that selection. A print area is one or more ranges of cells that you designate to print when you don't want to print the entire worksheet. When you print a worksheet after defining a print area, only the print area is printed. You can add cells to expand the print area as needed, and you can clear the print area to print the entire worksheet.
A worksheet can have multiple print areas. Each print area will print as a separate page.
Note: The screen shots in this article were taken in Excel 2013. If you have a different version your view might be slightly different, but unless otherwise noted, the functionality is the same.
What do you want to do?
Set one or more print areas
-
On the worksheet, select the cells that you want to define as the print area.
Tip: To set multiple print areas, hold down the Ctrl key and click the areas you want to print. Each print area prints on its own page.
-
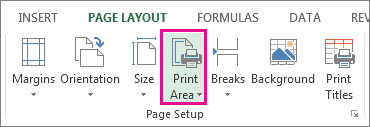
On the Page Layout tab, in the Page Setup group, click Print Area, and then click Set Print Area.

Note: The print area that you set is saved when you save the workbook.
To see all the print areas to make sure they're the ones you want, click View > Page Break Preview in the Workbook Views group. When you save your workbook, the print area is saved too.
Add cells to an existing print area
You can enlarge the print area by adding adjacent cells. If you add cells that aren't adjacent to the print area, Excel creates a new print area for those cells.
-
On the worksheet, select the cells that you want to add to the existing print area.
Note: If the cells that you want to add are not adjacent to the existing print area, an additional print area is created. Each print area in a worksheet is printed as a separate page. Only adjacent cells can be added to an existing print area.
-
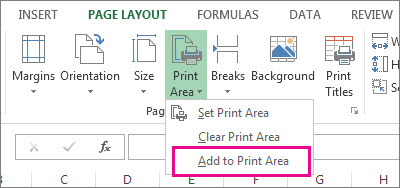
On the Page Layout tab, in the Page Setup group, click Print Area, and then click Add to Print Area.

When you save your workbook, the print area is saved as well.
Clear a print area
Note: If your worksheet contains multiple print areas, clearing a print area removes all the print areas on your worksheet.
-
Click anywhere on the worksheet for which you want to clear the print area.
-
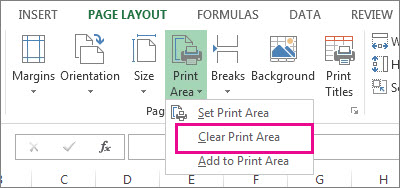
On the Page Layout tab, in the Page Setup group, click Clear Print Area.

Need more help?
You can always ask an expert in the Excel Tech Community, get support in the Answers community, or suggest a new feature or improvement on Excel User Voice.
Microsoft Office Tutorials: Set Or Clear A Print Area On A Worksheet >>>>> Download Now
ReplyDelete>>>>> Download Full
Microsoft Office Tutorials: Set Or Clear A Print Area On A Worksheet >>>>> Download LINK
>>>>> Download Now
Microsoft Office Tutorials: Set Or Clear A Print Area On A Worksheet >>>>> Download Full
>>>>> Download LINK jj