Find a conference room
When you create a meeting request, it is typical and convenient to include the meeting location for the meeting or event. You can use the Address Book to find a conference room.
Note: This feature requires you to use a Microsoft Exchange Server 2007 account. Most home and personal accounts do not use Microsoft Exchange. For more information about Microsoft Exchange accounts and how to determine which version of Exchange your account connects to, see the links in the See Also section.
-
On the File menu, point to New, and then click Meeting Request.
Keyboard shortcut To create a new meeting request, press CTRL+SHIFT+Q.
-
In the Subject box, type a description of the meeting or event.
-
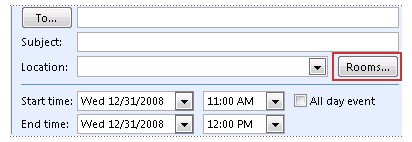
To open the Address Book to see which rooms are available, next to the Location box, click Rooms.

If you don't see the Rooms button, you might have:
-
Opened an appointment instead of a meeting request.
-
Clicked New on the toolbar instead of opening a meeting request on the File menu. By default, when in Calendar, clicking New on the File menu opens an appointment.
In both cases, the Rooms button is not displayed until you add at least one other person. It makes the appointment into a meeting request. To change an appointment to a meeting request, on the Appointment tab, in the Show group, click Scheduling Assistant.
-
-
Complete the meeting request and send it.
How?
-
In the Start time and End time lists, click the start time and end time for the meeting. If it is an all-day event, select the All day event check box.
An all-day event is a 24-hour event that lasts from midnight to midnight.
Note: By default, the current time-zone setting on your computer system is used to schedule meetings. If you want to schedule meetings based on an alternative time zone, on the Meeting tab, in the Options group, click Time Zones.
-
Type any information that you want to share with the recipients, attach any files, or create a Meeting Workspaces site.
For more information about Meeting Workspaces, see Introduction to Meeting Workspaces.
-
On the Meeting tab, in the Show group, click Scheduling Assistant.
The Scheduling Assistant helps find the best time for your meeting.
-
Click Add Attendees.
-
In the Select Attendees and Resources dialog box, in the Search box, type the name of a person or resource that you want to invite to the meeting, and then click Go.
-
Select the name from the results list. Click Required, Optional, or Resources; and then click OK.
Required and Optional attendees appear in the To box on the Meeting tab, and Resources appear in the Location box.
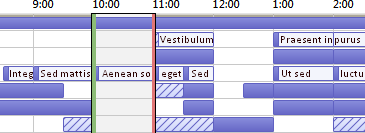
The Scheduling Assistant displays a free/busy grid that shows the availability of attendees. A green vertical line represents the start of the meeting. A red vertical line represents the end of the meeting.

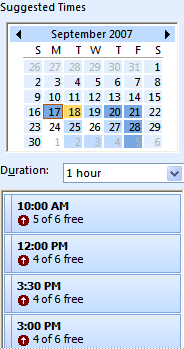
The Suggested Times pane locates the best time for your meeting, which is defined as the time when most attendees are available. The best meeting time appears at the top of the pane. To select any one of the suggested times, click the time suggestion in the Suggested Times pane. You can also manually select a time on the free/busy grid.

-
If you want to make the meeting recur, on the Meeting tab, in the Options group, click Recurrence, select the recurrence pattern, and then click OK.
When you add a recurrence pattern to a meeting request, the Meeting tab changes to Recurring Meeting.
-
On the Meeting tab, in the Show group, click Appointment.
-
Click Send.
-
ReplyDeleteThanks for sharing
height adjustable tables
computer table and chair
ergonomic chair suppliers
order office chairs online
office chair supplier
buy standing desk online
cafeteria table and chairs
conference room chairs
SitOnIt Office Chairs