With PowerPoint for the web, you create presentations in your web browser. They are stored in your OneDrive, and you can edit and share them online without needing other software.
Following are some basic steps for creating and showing a presentation. Select a heading below to open it and see the detailed instructions.
Edit a presentation in PowerPoint for the web
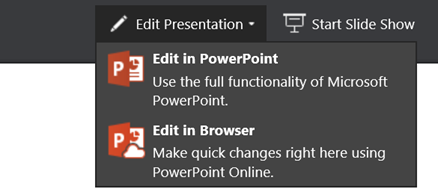
If you have a presentation open in view-only mode, you can choose Edit in Browser to make changes to it in your browser.
-
Select Edit Presentation.
-
Select Edit in Browser.
If you want to open the online folder where the presentation is stored, click OneDrive in the left upper corner.

When that folder opens, you can delete a document, open another document, or navigate to other folders.
Pick a theme
PowerPoint comes with themes—sets of professionally designed color schemes and slide layouts. Just pick a theme, and all your slides will follow that look.
-
On the Design tab, select a theme.

-
Every theme has four color variations you can choose from in the Variants group.

Pick a layout for your slides
Each slide layout has placeholders for text, pictures, charts, shapes, and more. Pick the layout that works best with the content you plan to present.
-
Select the slide whose layout you want to change.
-
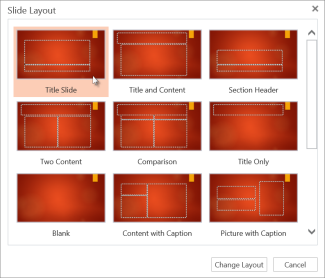
On the Home tab, click Layout in the Slides group.
-
Pick the slide layout you want, and then click Change layout.
-
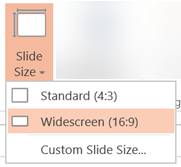
To change the size of slide, on View tab, click Slide Size to customize it.
Add text
To add text to your slide, click inside a text placeholder and start typing.
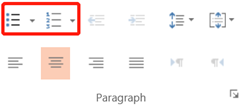
For text bullets, place your cursor in the line of text, and on the Home tab, select a bullet style in the Paragraph group.
Add a picture
-
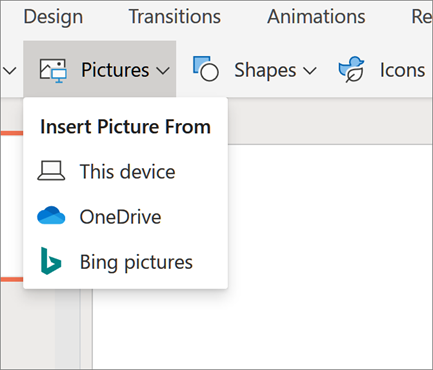
On the Insert tab, click Picture.
-
In the Open dialog box, browse to the picture you want, and then select Open.
Add transitions between slides
For smooth, animated shifts between slides, add transitions.
-
Select the slide you want to add a transition to.
-
On the Transitions tab, select a transition.

To open the complete gallery of Transition options, click the downward pointing arrow at the right end.
-
To apply the transition to all the slides in your presentation, on the Transitions tab select Apply To All.
Add an animation effect to an object
-
Select the object you want to add animation to.
-
On the Animations tab, select an animation.

-
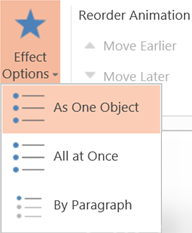
To apply an animation effect, click the downward pointing arrow on Effect Options and choose one.
Present your slide show
You can run your PowerPoint for the web presentation with an Internet connection and a web browser.
To start your slide show, on the Slide Show tab, select Play from Beginning or Play from Current Slide.

(If you've turned off the Simplified Ribbon, you don't have a Slide Show tab; instead use the View tab to start Slide Show.)
To navigate your slide show, point your mouse at the bottom-left corner of the slide. Five navigation buttons (including Previous and Next, on the left end) appear:

To go to any slide in the presentation, right-click the current slide, and select Go to Slide.
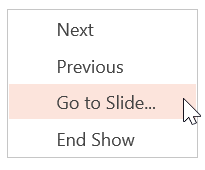
Enter the slide number you want to go to in the Slide box, and select OK.

Share your presentation online
As you work on your presentation in OneDrive, you might want to share it so other people can see it or work on it with you.
-
Select your presentation in OneDrive, and then click the Share tab.
-
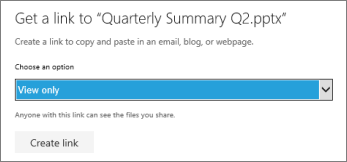
Under Share, click Get a link.
-
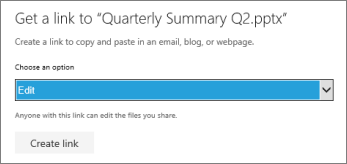
To share a view-only copy of your presentation, under Choose an option, click View only.
-
To let others view and edit a copy of your presentation, under Choose an option, click Edit.
-
-
Click Create link.
To shorten the link you share with others, click Shorten link.
-
Copy the link, and click Close.
-
Paste the URL into an email, chat session, or social networking site.
For more information about sharing presentations and co-authoring, see Co-author a presentation by using PowerPoint Online.
Print your slides
You can print your slides and use them as handouts, or you can add your speaker notes to them and use them as a visual aid when you present.
-
Select File > Print > Print.

PowerPoint for the web creates a printable PDF file and then opens the Print dialog box for your web browser.
-
Use your printer's options and settings to choose the print layout options you want and print your presentation.
No comments:
Post a Comment