A report is an excellent tool for gaining insights into your Accounts, Business Contacts, Leads, Opportunities, Business Projects, and marketing activities. You can open dozens of default reports in Business Contact Manager for Outlook, plus modify, save, update, and re-use an almost unlimited number of additional reports.
This article describes the report features in Business Contact Manager for Outlook, and how you can work with reports, customize them, and use them to launch other business activities.
What do you want to do?
Open and modify a report
Business Contact Manager for Outlook provides many pre-defined reports. If you don't see exactly what you need, you can open a report that is similar, and then modify it as necessary. You can also save your customized reports for later re-use.
Open a report
-
On the Ribbon, click the Reports tab. Available reports are grouped by their related workspaces: Contact Management, Sales, Marketing, or Business Projects. The Open group contains reports that you have modified and saved.

-
To open a pre-defined report, click the button for the type of report that you want to see, and then click the name of the report in the list.
-
To open a modified report that you have saved, click Saved Reports, click the report name in the Open Saved Reports dialog box, and then click Open.
Tip: If you're uncertain which group or category contains the report that you're looking for, See the list of standard reports.
For assistance with modifying a report, see Modify a report to make it more useful.
Modify a report
You have a great deal of control over the appearance of your reports in Business Contact Manager for Outlook.
In this section
Change the layout of a report
There are several ways to change the layout, or appearance, of a report. You can use these methods individually or in combination; the order of the changes that you make does not matter.
-
Use the Customize Report pane On the Ribbon, in the Layout group, click any of the options to open the Customize Report Pane:
-
Choose Column. If you want to change which columns are displayed, click this button, and then click the + (plus) sign to expand the list, and view all the items in it. The available options will vary with the report you are modifying. Select the check boxes for the columns that you want to display, and clear the check boxes for items that you don't want to see in the report.
-
Header and Footer. If you want to add a header or footer to the report, or add notes to the report, click this button, and then select the check boxes and enter information for the columns that you want to display. Clear the check boxes for columns that you don't want to see in the report.
-
Fonts. If you want to change how fonts and numbers are displayed, click Fonts. Click the options that you want to change and update them as needed. You can change the font in the report body, on the labels for rows and columns, and in the numeric fields for totals and subtotals.
-
-
Use the Sort and Filter controls On the Ribbon, in the Sort and Filter group, do any of the following:
-
Filter. You can limit the results displayed in the report by filtering the report. For information on filtering a report, see Filter records in Business Contact Manager.
-
Ascending or Descending. Click one of these options to change the sort order of records in the report. By default, lists are sorted in alphabetical order based on the primary field in the report. For example, in the report titled Business Contacts by Account, the list is sorted initially by the Account name. Under the Account name, each Business Contact linked to an Account is displayed in alphabetical order.
Tip: Names are displayed by the information in the Full Name field. If you include titles in the full name, the titles are included in the sort. For example, the full name Sr. Carlos Lacerda would be listed under S.
-
-
Reorder columns To change the order of columns in a report, simply click a column name and then drag it to where you want it.
-
Sort items in a secondary data field To reverse the order of text or numbers in a secondary field, click the name of the field in the report. For example, in the report titled Business Contacts by Account, you can click the column Business Contact Name to re-sort the names of the listed Business Contacts under each Account name in reverse alphabetical order. Click the column title again to restore the original order. Likewise, if you click the Address - ZIP column name, the list of Business Contacts under each Account name is resorted in reverse numerical order.
-
Collapse or expand groups in a secondary data field Click the - (minus) sign on any row of the report to collapse all of the sub-items and display only the first line of the report entry. For example, in the report titled Business Contacts by Account, you can click the - (minus) sign by an Account name to hide the list of linked Business Contacts. To indicate that a list is collapsed, the - (minus) sign changes to a + (plus) sign. This feature can be useful for reducing the size and complexity of the report. To expand a group, click the + plus sign.
Modify a report to make it more useful
There are several ways that you can modify your reports to make them more useful to yourself or co-workers.
-
Filter results After opening a report, use the Simple and Advanced filters to exclude specific records from the report. Filtering report results can be useful for a variety of tasks. For example, a report on Leads that is filtered by location is an excellent basis for a direct mail marketing campaign about an event that you are planning in the area. For more information about filtering, see Filter records in Business Contact Manager.
-
Change the appearance Update how your reports look with the information in Change the layout of a report
-
Data customizations Before you even open a report, you can make important changes to it, with customizations like user-defined fields, or changes to the default entries in various lists. Add user-defined fields to the Lead form, for example, to record the industry-specific information you need, and to generate reports from it. Change the options available in a list, and those options become columns of data in your next report.
Note: If a user-defined field that you have added to a report is deleted from your Business Contact Manager database, the saved report will not display the information from the deleted field. If you export a report with the information to Excel before the field is deleted, those reports are not affected.
Correct data errors in a report
As you look over a report, you may spot errors that you want to correct. For example, you may see that a Business Contact has been associated with the wrong Account. This kind of error cannot be corrected in the report, but must be corrected in the individual records involved.
To correct the error in this example, open the Business Contact record and on the General Page of the record, in the Linked Account field, enter the correct Account. If you then go back to the report and in the Actions group, click Refresh, the report will be correct.
Save, refresh, or print an open report
After you have reviewed a report, you might want to save any changes that you have made to it, update the data, or print the report. Start with an open report to complete any of these actions.
Save a modified report
There is no need to save a report that you haven't modified, since it is available from the Reports tab of the Ribbon. Saved reports are stored in the Business Contact Manager for Outlook database.
-
On the Ribbon, click the Reports tab, then click the type of report you want to open, and then click the report name to open it.
-
Customize the report as described in Open and modify a report.
-
On the Ribbon, in the Actions group, click Save As.
-
In the Save As dialog box that opens, type a name for the report and then click OK.
To open a customized report, click Saved Reports.
Tip: The report is saved in the same category as the report that you modified to create the saved report.
Refresh data in a report
Report data is refreshed whenever you open a saved report. You can also update it as needed.
-
On the Ribbon, click the Reports tab, then click the type of report you want to open, and then click the report name to open it.
-
On the Ribbon, in the Actions group, click Refresh.
Print a report
-
On the Ribbon, click the Reports tab, then click the type of report you want to open, and then click the report name to open it.
-
On the Ribbon, in the Actions group, click Print.
Create a chart from a report
You can create a chart from most of the reports in Business Contact Manager for Outlook, and from the custom reports that you have created from a report. Reports that can be displayed in chart form will display an active Chart button (  ), on the Ribbon. Reports that have no data cannot be viewed as charts.
-
Open the report that you want to see as a chart.
-
On the Ribbon, in the Show group, click Chart. If a chart is too wide to display on your monitor, a horizontal scroll bar will appear beneath the chart.
Tip: If you want to create more sophisticated charts, export the report data to Excel and use that program to create your chart. For more information about exporting report data to Excel, see Export a report to Excel or another program for analysis.
-
Use the controls in the Chart group on the Ribbon to customize your charts.
-
Labels Click Labels to add or remove Axis titles and a Legend.
-
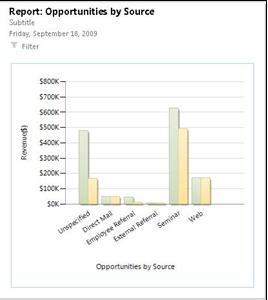
Values Click Values to select the data displayed in the report. For example, in the chart for Opportunities by Source, you can display Number of Opportunities or Revenue data.
-
Expected and Total Select these check boxes if you want the chart to display actual revenue, expected revenue, or both.
Note: These check boxes are not available on every chart.
Export a report to Excel or another program for analysis
You can easily export a Business Contact Manager for Outlook report to Microsoft Excel or another program for deeper analysis. To export the report data to a program other than Excel, start by exporting the data to Excel. Then in Excel, you can save the data in a file format that the other program can open. For example, an Excel file saved in Comma Separated Value (.csv) file format can be opened in a variety of programs.
Do one of the following:
Save the report as an Excel file on your computer
-
Open the report that you want to export to Excel.
-
On the Ribbon, in the Actions group, click Export to Excel. The report opens in Excel.
-
In Excel, click the Save button to open the Save As dialog box. Choose from more than 20 file formats for saving the report.
E-mail the report as an Excel file attachment
-
Open the report that you want to send as an e-mail attachment.
-
On the Ribbon, in the Actions group, click Send as Email. An Outlook e-mail message form opens with the report attached as an Excel file (.xlsx format).
-
Fill out the To and Subject lines, type a message (optional), and then click Send.
Launch a marketing activity from a report
You can use a report containing the addresses, phone numbers, or e-mail addresses of Accounts, Business Contacts, or Leads to launch a marketing activity in Business Contact Manager for Outlook.
-
Open the report that you want to use as the basis of a marketing activity.
-
Click CTRL+A to highlight all of the records in the list.
-
On the Ribbon, in the Communicate group, click New Call List, Mass E-mail, or Direct Mail Print, and then click All Recipients or Selected Recipients.
-
In the marketing activity form that opens, create the recipient list for the activity and the content.
For information on creating a call list, see Create and use Call Lists in Business Contact Manager. For information on creating other marketing activities, see Market your products and services in Business Contact Manager.
Open a report from a gadget
To open a report from a gadget, click the report icon on the gadget. Reports opened from gadgets behave just like reports opened from the Ribbon.
For more information about gadgets, see Use gadgets in Business Contact Manager.
See the list of standard reports
The following list of standard reports available in Business Contact Manager for Outlook are organized by record type.
Tip: Most reports can be converted into a chart, as described in Create a chart from a report.
Account Reports
-
Accounts by Assigned To
-
Accounts by City
-
Accounts by State/Province
-
Accounts by ZIP/Postal Code
-
Accounts by Territory
-
Accounts by Category
-
Accounts by Rating
-
Accounts by Payment Status
-
Accounts by Source
-
Account Activity Summary
-
Activity by Account
-
Neglected Accounts
-
Quick Accounts List
Business Contact Reports
-
Business Contacts by Account
-
Business Contacts by Assigned To
-
Business Contacts by City
-
Business Contacts by State/Province
-
Business Contacts by ZIP/Postal Code
-
Business Contacts by Category
-
Business Contacts by Rating
-
Business Contacts by Payment Status
-
Business Contacts by Source
-
Business Contacts by Anniversary
-
Business Contacts by Birthday
-
Business Contact Activity Summary
-
Activity by Business Contact
-
Neglected Business Contacts
-
Quick Business Contacts List
Lead Reports
-
Leads by Assigned To
-
Leads by Assigned To and Rating
-
Leads by Score
Opportunity Reports
-
Opportunities by Product or Service Item
-
Opportunities by Assigned To
-
Opportunities by Source
-
Opportunities by Account
-
Opportunities by Business Contact
-
Past Due Opportunities
-
Sales Funnel
-
Sales Pipeline
-
Activity by Opportunity
Other Sales Reports
-
Top Customers by Revenue: Accounts
-
Top Customers by Revenue: Business Contacts
-
Top Products: Best-Selling Products
-
Top Products: Most Profitable Products
-
Top Products: Highest Margin Products
-
Top Referrers: By Lead Volume
-
Top Referrers: By Total Sales
-
Dormant Customers: In past 30 days
-
Dormant Customers: In past 90 days
-
Dormant Customers: In past 180 days
-
Dormant Customers: In past 365 days
Marketing Reports
-
Opportunities by Marketing Activity
-
Business Contacts by Marketing Activity
-
Accounts by Marketing Activity
-
Marketing Activities by Campaign
-
Marketing Activities by Type
-
Phone Logs by Call List
Business Project Reports
-
Business Projects - All
-
Business Projects - Due Next
-
Business Projects - Overdue
-
Business Projects by Status
-
Business Projects by Due Date
-
Business Projects by Assigned To
-
Business Projects by Type
-
Business Projects by Priority
-
Business Projects by Account
-
Business Projects by Business Contact
-
Project Tasks – All
-
Project Tasks – Due Next
-
Project Tasks – Overdue
-
Project Tasks by Project
-
Project Tasks by Assigned To
No comments:
Post a Comment