Using Tasks in Outlook.com or Outlook on the web
Note: Sign in to Outlook on the web using any Microsoft account, including email accounts ending in @outlook.com, @live.com, @hotmail.com or @msn.com.
A task is an item that you create in Outlook on the web that you want to track until it's completed. Tasks can be created from an email that you've flagged for follow-up as an actionable item, or they can be to-do list entries that you add manually. Use tasks in Outlook on the web to create, edit, categorize, and manage tasks.
Important: Outlook on the web doesn't support assigning or sharing tasks. To assign or share tasks, use Outlook 2013.
What you'll see in Tasks
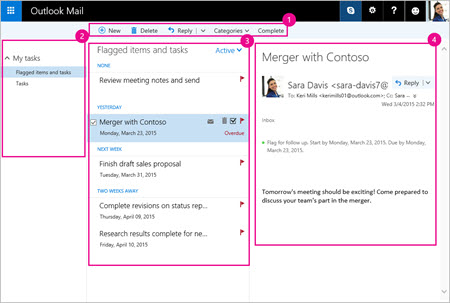
View the following image and the numbered items corresponding to each area to get an overview of the Tasks pane.
-
Create, delete, move, or categorize tasks. Mark tasks as complete as you finish them.
-
My tasks - Displays folders you can use to view and manage your tasks. Choose whether you want to view items you have flagged as important. You can create new task folders and rename or move existing ones. To add a folder, right-click My tasks and select Create new folder. To rename or delete folders, right-click the folder and select Rename or Delete.
-
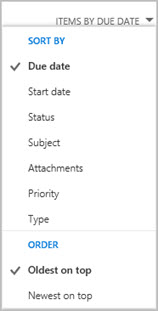
Tasks list - Filter and display tasks based on the status you have assigned to them. Use the Items by menu to sort tasks based on different criteria.
Use the command bar above the tasks list to delete, categorize, or mark complete a selected task. For emails, the Reply command is available here.

-
Task details - View details of the task selected in the tasks list. To edit task details such as status, priority, and percent complete, select
 .
.
Create tasks
-
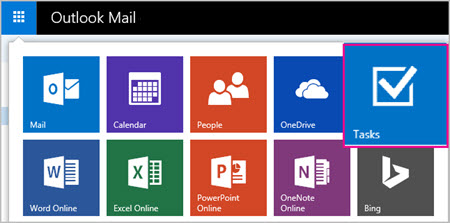
Select Tasks from the app launcher.
-
Select New.

-
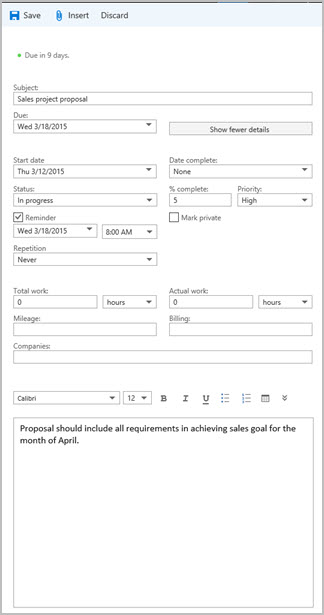
Type the subject, due date, and if you like, a note about the task.
-
Select Show more details to enter information like Start date, Date complete, and Status and to track progress on the task such as % completed or hours worked.
-
Use the Insert command to attach a file to the task.
-
Select Save.
Edit tasks
-
Select Tasks from the app launcher.
-
Select the task you want to edit and then select Edit
 in the Task pane.
 -
Make the edits to the task and select Save.
Categorize tasks
-
Select Tasks from the app launcher.
-
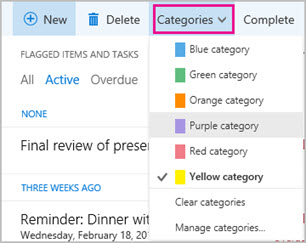
Select the task you want to categorize from the task list and select Categories.
Sort tasks
-
Select Tasks from the app launcher.
-
Select the Items by menu and choose how you want to sort the tasks in the task list.

-
Use the sort view to view tasks by Active, Overdue, or Completed.

Note: Outlook on the web does not support sorting tasks by category.
What if I want to know more?
Still need help?
Get help with Outlook.com:


No comments:
Post a Comment