Snap to guides to lay out a drawing
Use guides to align and arrange the shapes on your drawing. First, place guides and guide points on your drawing. Then, glue shapes to the guides or align shapes to the guide points.
Place guides and guide points on your drawing
-
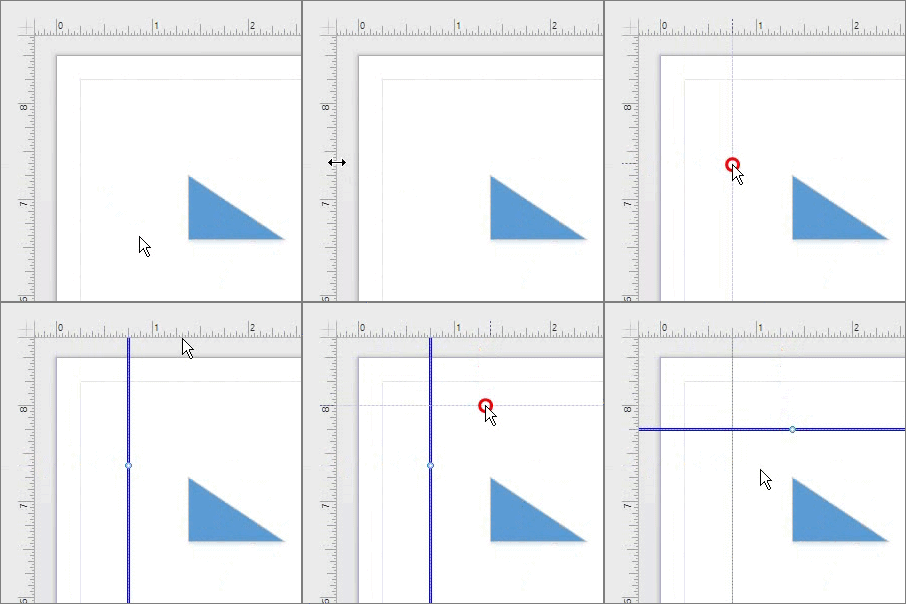
To place a guide, drag a guide from the horizontal or vertical ruler onto the drawing page, and then release the mouse button.
 Click on a ruler to drag a guide into your drawing.
 -
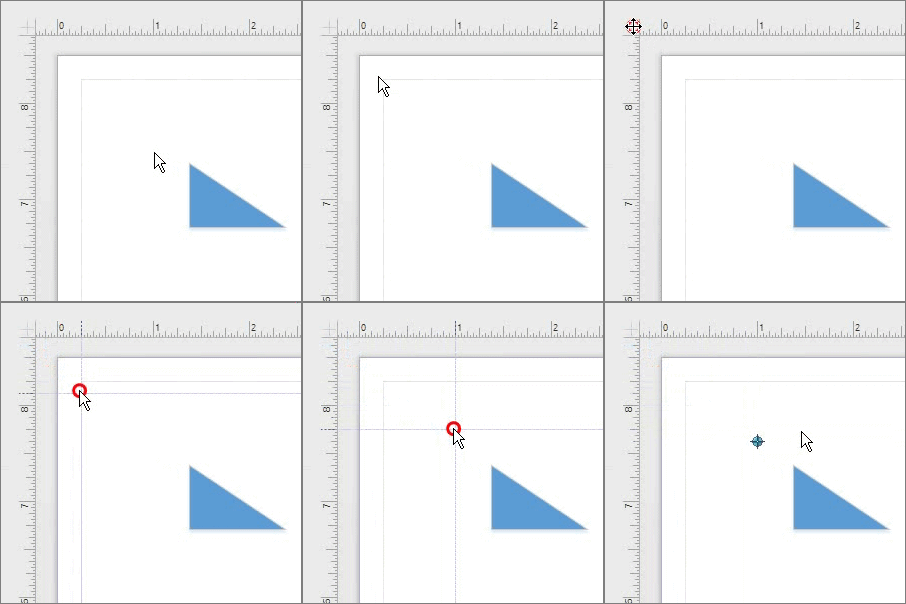
To place a guide point, drag the silhouetted cross symbol from the intersection of the two rulers onto the drawing page, and then release the mouse button. While being dragged, the guide point looks like two blue crossed lines.
 Click the crosshairs to drag a guide point into your drawing.
 -
To delete a guide or guide point, select it, and then press Delete.
-
To hide guides, on the View tab, in the Show group, clear the Guides check box.

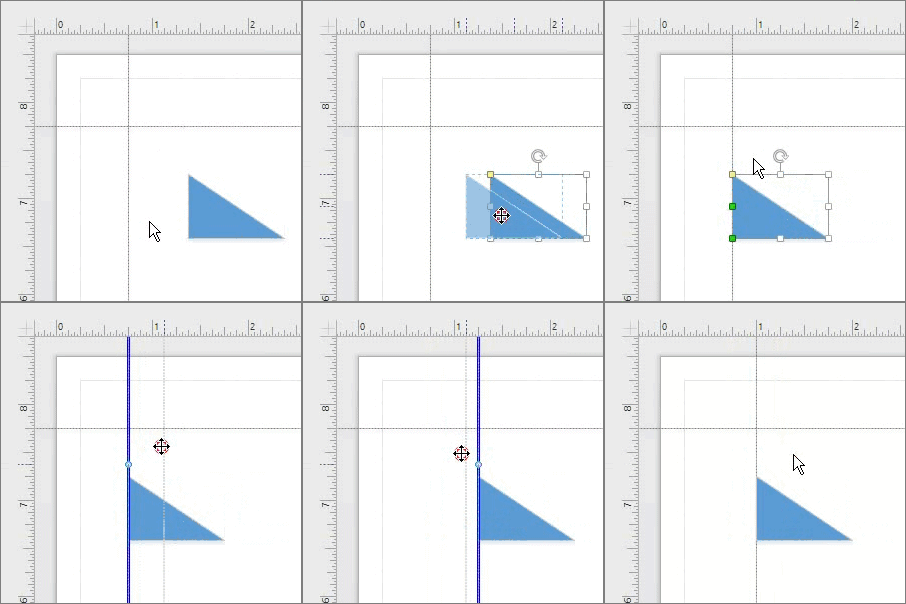
Glue a shape to a guide
Drag the shape to the guide. A connection point on the shape snaps to the guide.

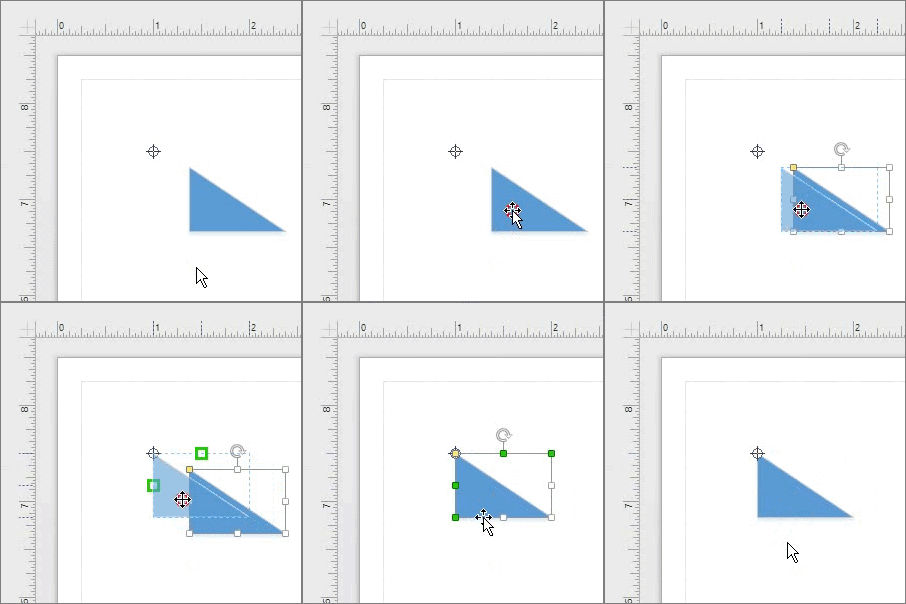
Align a shape to a guide point
Drag the shape so that the center, selection handles, or endpoints of the shape snap to the guide point.

No comments:
Post a Comment