Uninstall Skype for Business
Step 1: Stop Skype for Business from starting automatically
-
In Skype for Business, choose the tools icon and Tools > Options.

-
Choose Personal, then uncheck Automatically start the app when I log on to Windows and Start the app in the foreground. Then choose OK.

-
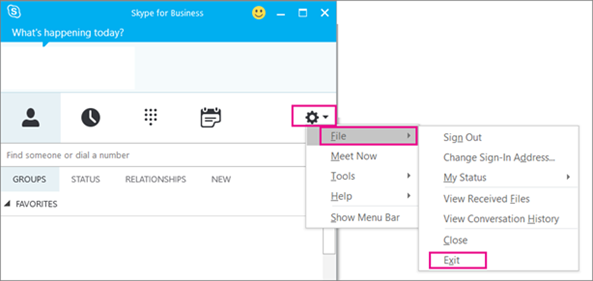
Choose File > Exit.

Skype for Business is still on your computer, but you'll no longer see it.
Step 2: Remove Skype for Business from your computer
IMPORTANT: If you are using Office 365 Skype for Business, you can't delete it from your computer without also uninstalling the rest of the Office suite. This because it's integrated with the other Office apps. The following instructions are for customers who have standalone versions of Skype for Business.
-
Go to Control Panel > Programs > Programs and Features > Uninstall or change a program.
-
Choose Skype for Business > Uninstall. If you don't see Skype for Business listed, then you're using a version that's integrated with other Office 365 apps. The only way to uninstall it is to remove all of Office from your computer.

-
At the Ready to uninstall? box, choose Uninstall.
-
When it's done uninstalling, choose Close.
Remove Skype for Business from your registry
If the above instructions don't work for you, then another option is to disable it in your registry. For instructions, see this post in the Skype community: Completely Uninstall Skype for Business.
You can uninstall Skype for Business on Mac so you don't see it on your Dock in a few easy steps.
To uninstall Skype for Business on Mac
-
To remove the Skype for Business icon
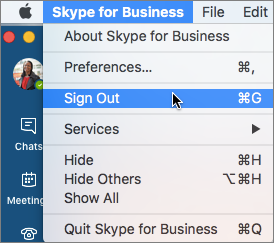
 from your Dock, sign out of Skype for Business on Mac.
-
Close the Skype for Business on Mac sign in page.
-
Press Control and click
 at the same time. Choose Quit.
 -
Open Finder > Applications. Scroll to Skype for Business. Drag and drop it into the Trash.
If this procedure doesn't solve the problem, use the more detailed procedure in How to do a clean uninstallation of Skype for Business on Mac.
No comments:
Post a Comment