Reference: Outlook 2007 Options dialog box
The Microsoft Office Outlook 2007 Options dialog box is where you can choose most of the Outlook settings.
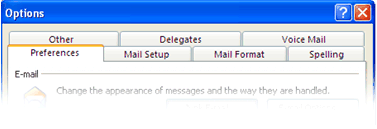
Preferences tab
E-mail section
-
Junk E-mail button Click to change options for identifying and managing unwanted e-mail messages.
Options tab
Set the level of junk e-mail protection. You can also delete suspected junk e-mail messages instead of moving them to the Junk E-mail folder, and you can disable links in e-mail messages that might connect to sites that are deemed unsafe.
Safe Senders tab
Enter the e-mail addresses and domain names of message senders whose messages are never treated as junk e-mail. You can also import or export a safe senders list file.
Safe Recipients tab
Enter the e-mail addresses and domain names of mailing lists that you belong to that are never treated as junk e-mail messages. You can also import or export a safe recipients list file.
Blocked Senders tab
Enter the e-mail addresses and domain names that are always treated as junk e-mail messages. You can also import or export a blocked senders list file.
International tab
Specify the e-mail messages that you want Outlook to block, based upon the top-level country domain code or the language character set in the sender's e-mail address.
-
E-mail Options button Click to change options for the message formats for replying and forwarding, for what happens after you move or delete an open item, and for when to send and receive messages.
Message Handling section
-
After moving or deleting an open item list box Click the option for what you want to happen after you move or delete an open message. For example, if you click open the next item, the next item in the Inbox opens when you delete a message.
-
Close original message on reply or forward check box Select this check box if you want the original message to close when you click Reply or Forward in an open message.
-
Save copies of messages in Sent Mail folder check box Select this check box if you want to save a copy of each message that you send in the Sent Items folder. Clear this check box if you do not want to save copies of the messages you send. If you save copies of your messages, you should archive the Sent Items folder to reduce the number of messages stored there.
-
Automatically save unsent messages check box Select this check box if you want to saves any messages that you have not sent in the Drafts folder. By default, Outlook saves unfinished messages every 3 minutes.
-
Remove extra line breaks in plain text messages check box Select this check box to automatically remove extra line breaks in plain text messages.
-
Advanced E-mail Options Click to access advanced options, such as where to save unfinished messages and whether to play a sound when messages arrive.
Save messages section
-
AutoSave items in list box Click the folder where you want to save drafts of messages. You can save drafts only in the Drafts, Inbox, Sent Mail, or Outbox folder.
-
AutoSave every check box Select this check box if you want Outlook to automatically save messages while you are working on them.
-
minutes text box Enter the number of minutes that you want to pass before Outlook saves an unsent message.
-
In folders other than the Inbox, save replies with original message check box Select this check box to save a copy of each reply in the Sent Items folder. If you reply to a message from a folder other than the Inbox, the reply is saved in the open folder.
-
Save forwarded messages check box Select this check box to save a copy of each forwarded message that you send.
When new items arrive in my Inbox section
-
Play a sound check box Select this check box to play a sound when a new message arrives. To choose the sound that you want, double-click Sounds and Audio Devices icon in Control Panel, click the Sounds tab, choose New Mail Notification under Program events, and then select a sound from the Sounds drop-down list.
-
Briefly change the mouse cursor check box Select this check box if you want the pointer to briefly appear as an e-mail symbol when a new message arrives.
-
Show an envelope icon in the notification area check box Select this check box if you want an envelope icon to be displayed in the notification area, at the far right of the taskbar, when a new message arrives.
-
Display a New Mail Desktop Alert (default Inbox only) check box Select this check box to display a Desktop Alert when a new item arrives.
-
Desktop Alert Settings Click options for the Desktop Alerts, such as duration and transparency.
Duration section
-
How long should the Desktop Alert appear? Select the visible duration of the Desktop Alert.
Transparency section
-
How transparent should the Desktop Alert be? Select the transparency level of the Desktop Alert.
-
When sending a message section
-
Set importance list box Click the importance level for all new messages.
-
Set sensitivity list box Click the sensitivity level for all new messages.
-
Messages expire after check box Click an expiration date for messages.
-
days text box Click the number of days after a message is sent when it will be marked as expired.
-
Allow comma as address separator check box Select this check box if you want to use commas in addition to semicolons to separate names in the To, Cc, and Bcc boxes of a message.
-
Automatic name checking check box Select this check box if you want Outlook to automatically check the names entered in the To, Cc, and Bcc boxes of messages. If an exact match is found, the name is underlined. If multiple names are found that match what you type, a wavy red line appears under the name. Right-click the name to see the other names that were found. If multiple names match what you type, and you have used the e-mail address before, the name that you chose previously from the list of found names appears with a dashed green underline to remind you that there are other choices.
-
Delete meeting request from Inbox when responding check box Select this check box if you want Outlook to remove a meeting request from the Inbox when you respond. If you accept the meeting request, the meeting is entered in your Calendar.
-
Suggest names while completing To, Cc, and Bcc fields check box When you select this check box, Outlook automatically checks any name entered in the To, Cc, and Bcc boxes to see if the name is recognized. If a name has been entered before, Outlook suggests the name while you are typing. If it is the name that you want, click the suggested name to select it.
-
Press CTRL+ENTER to send messages check box Select this check box if you want to send e-mail messages by pressing CTRL+ENTER.
-
-
Tracking Options button Click advanced options, such as where to save unfinished messages and whether to play a sound when messages arrive.
Options section
-
Process requests and responses on arrival check box Select this check box if you want Outlook to automatically process all message responses and requests.
-
Process receipts on arrival check box Select this check box if you want Outlook to automatically process receipts when they are received. Tracking information is added to the original message in Sent Items folder.
-
After processing, move receipts to check box Select this check box if you want Outlook to automatically move to the specified folder all receipts that notify you when messages are delivered, read, and recalled.
-
Delete blank voting and meeting responses after processing check box Select this check box if you want Outlook to automatically move to the Deleted Items folder all responses to your meeting requests that have no comments and all notifications that are returned when messages are delivered, read, or recalled. Meeting responses are placed on your Calendar, and the status from the notifications is placed on the Tracking tab of the original item in the Sent Items folder.
-
Read receipt check box Select this check box if you want Outlook to return a message to you to verify the date and time that a recipient opens a message.
-
Delivery receipt check box Select this check box if you want Outlook to return a message to you to verify the date and time that a recipient receives a message.
-
Always send a response Click this if you want Outlook to automatically return a receipt to the sender of the message if a read receipt is requested. The receipt verifies the date and time that you receive the message.
-
Never send a response Click this if you want Outlook to automatically ignore any request for a message receipt.
-
Ask me before sending a response Click this if you want Outlook to ask you whether you want to send a response to a read request.
-
On replies and forwards section
-
When replying to a message list box Click the format that you want for replies. The graphic to the right of the message shows how the original message appears to recipients of replies.
-
When forwarding a message list box Click the format that you want for forwarded messages. The graphic to the right of the message shows how the original message appears to recipients of forwarded messages.
-
Preface each line with Each line of your reply is preceded by the character typed. This distinguishes the text that you type from the text in the original message.
-
Mark my comments with check box Select this check box to mark your comments within the body of a message that you reply to or forward. When you enter text in the box to the left, Outlook automatically enters that text next to any text that you type in the body of a message that you have received.
Calendar section
-
Default reminder check box Select this check box to enable a reminder on new calendar items.
-
Default reminder list box Enter the number of minutes before appointments that you want to be reminded.
-
Calendar Options button Click to choose general settings for the Calendar, such as the days of the work week, time zones, and holidays.
Tasks section
-
Reminder time list box Enter the time of day when you want to be reminded of tasks that are due that day.
-
Task Options button Click to change options for Tasks, such as selecting the color for overdue tasks and completed tasks.
Contacts and Notes section
-
Contact Options Click options to choose the naming and filing preferences for your new contacts.
-
Journal Options button Click to change options for Journal, such as what type of items and contacts to automatically record and what happens when you double-click a journal entry.
-
Note Options button Click to change options for Notes, such as the default color, size, and font.
Search section
-
Search Options button Click to choose which data files to index, how search results appear, and the default search parameters.
Mobile section
-
Notifications button Click to choose options for mobile messages.
-
Mobile Options button Click to choose options for mobile accounts.
Mail setup tab
E-mail Accounts section
-
E-mail Accounts button Click to open the Account Settings dialog box where you can change the e-mail accounts and directories.
Send/Receive section
-
Send immediately when connected check box Select this check box if you want Outlook to perform a send/receive action as soon as it is connected.
-
Send/Receive button Click to open the Send/Receive Groups dialog box. You can place accounts into a new group that you create or add the accounts to an existing group or groups.
Data Files section
-
Data Files button Click to open the Data Files dialog box. You can change the local information settings, open Outlook folders, and change the offline settings.
Dial-up section
-
Warn before switching an existing dial-up connection Click this if you want a warning message before Outlook switches to a connection other than the existing dial-up connection.
-
Always use an existing dial-up connection Click this if you want Outlook to use only the existing dial-up connection and not switch to a different one.
-
Automatically dial during a background Send/Receive check box Select this check box if you want Outlook to dial automatically when it performs a background Send/Receive. Outlook will send and receive mail messages without opening a dialog box and allow you to continue using Outlook features during the Send/Receive action.
-
Hang up when finished with a manual Send/Receive check box Select this check box if you want Outlook to automatically disconnect after you finish a manual Send/Receive action.
Mail format tab
Message format section
-
Compose in this message format list box Click the format that you want the messages in Outlook to be composed in.
-
Internet Format button Click the options for HTML, Outlook Rich Text Format, and plain text messages.
-
International Options button Choose whether to use English in message headers, and choose the type of encoding for outgoing messages and unmarked received messages.
HTML format
-
Reduce the file size of the message by removing formatting information that is not necessary to display the e-mail message check box Select this check box if you want information that is not necessary to preserve the appearance of a message to be removed. This reduces the amount of space needed to save messages.
-
Rely on CSS for font formatting check box Select this check box if you want to use cascading style sheets (CSS) to format fonts.
-
Save smart tags in e-mail check box Select this check box if you want smart tags to be saved with messages.
Stationery and Fonts section
-
Stationery and Fonts button Click to select the fonts that are used for new or modified stationery templates and for new, replied to, and forwarded messages.
Signatures section
-
Signatures button Click to create, edit, or choose signatures for messages.
Editor options section
-
Editor Options button Click to change settings in the Editor Options dialog box.
Spelling tab
General options section
-
Always check spelling before sending check box Select this check box if you want spelling to be checked automatically when you click the Send command.
-
Ignore original message text in reply or forward check box Select this check box if you don't want the original text of a message to be checked for spelling when you reply to or forward the message.
-
Spelling and AutoCorrection button Click to open the Editor Options dialog box, where you can change the options for how Outlook corrects and formats the contents of your e-mail messages.
Other tab
General section
-
Empty the Deleted Items folder upon exiting check box Select this check box if you want all items in the Deleted Items folder to be deleted automatically each time you exit Outlook.
-
Make Outlook the default program for E-mail, Contacts, and Calendar check box Select this check box to designate Outlook as the default program when another program needs access to e-mail, Contacts, or a Calendar program.
-
Advanced Options button Click this button to access general settings for Outlook and the appearance of items.
AutoArchive section
-
AutoArchive button Click to choose settings for the AutoArchive feature.
Outlook Panes section
-
Navigation Pane button Click to choose settings for the Navigation Pane.
-
Reading Pane button Click to choose settings for the Reading Pane.
-
To-Do Bar button Click to choose settings for the To-Do Bar.
Person Names section
-
Display online status next to a person name check box Select this check box if you want to turn on the Person Names online presence indicator. When you click the Person Names indicator, you can perform additional actions, including sending instant messages.
-
Display online status in the To and Cc fields only when mouse pointer rests on a person name check box Select this check box if you want the Person Names online presence indicator to be shown only when the pointer rests on a person's name in the To and Cc boxes. When you click the Person Names indicator, you can perform additional actions, including sending instant messages.
Delegates tab
Delegates section
-
Add button Click to add other names as delegates.
-
Remove button Click to remove a selected name as a delegate.
-
Permissions button Click to specify the permissions that are granted to a delegate.
-
Properties button Click to specify the properties for Delegate Access.
-
Deliver meeting requests addressed to me and responses to meeting requests where I am the organizer to Choose how you want meeting requests and responses delivered.
Voice Mail tab
This feature requires you to use a Microsoft Exchange Server 2007 account. Most home and personal accounts do not use Microsoft Exchange. For more information about Microsoft Exchange accounts and how to determine which version of Exchange your account connects to, see the links in the See Also section. The Voice Mail tab appears only if your organization is using the Exchange 2007 integrated voice mail system.
Telephone Access section
-
Telephone Access Numbers text box Enter the telephone number that you use to access the voice mail system. Enter the phone number as you would dial it from a phone inside your organization. This is usually an extension number and not a complete phone number.
-
Reset PIN button Click this option to reset your personal identification number (PIN) for voice mail and to send the new PIN to your Outlook Inbox.
-
Change Folder button Click this option to change the Outlook mail folder that contains the e-mail messages you want read to you when you call the voice mail system from a telephone.
Voice Mail section
-
Play on Phone number text box Enter the telephone number that you want the voice mail system to call to play back your voice mail. Enter the phone number as you would dial it from a phone inside your organization. This is usually an extension number and not a complete phone number.
-
Voice mail greeting option Choose whether you want your normal voice mail greeting to be played to incoming calls.
-
Out of Office voice mail greeting option Choose whether you want your out-of-office voice mail greeting to be played to incoming calls.
-
Call button Choose whether you want the voice mail system to call your phone to enable you to record or play your voice mail greetings.
-
Send an e-mail message to my Inbox when I miss a phone call check box Select this check box if you want an e-mail message to be sent to your Inbox with call information when you don't answer an incoming call.
No comments:
Post a Comment