Add or delete your group photo in Outlook on the web
A photo is a fun way to represent the mission or personality of your Office 365 group. It also differentiates your group from others so you can find it quickly among the list of groups you belong to.
Add a custom photo
The easiest way to add a photo is through Outlook on the web (Office 365). Changing the group photo from Outlook 2016 is not supported at this time.
-
Open Outlook on the web.
-
In the navigation pane, under Groups, select your group.
-
In the group header, select the current picture.
-
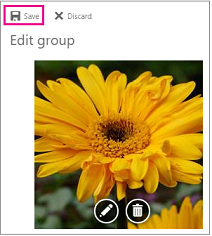
In Edit group, select Change photo.
Note: If you don't see Change photo, your administrator might have turned off this feature.

-
In Edit group, click Save.

Delete a photo
When you're ready for a different look or just want to revert back to the default image, it's easy to delete the current photo.
-
Open Outlook on the web.
-
In the navigation pane, under Groups, select your group.
-
In the group header, select the current picture.
-
In Edit group, select Delete photo.
Note: If you don't see Delete photo, your administrator might have turned off this feature.

-
The default photo will be displayed. Click Save.
You can use the services of the service that offers the best fake id because here you can always make good documents with high quality and on time! This service helps me when I need to make any documents in a short time!
ReplyDelete