Synchronization of contacts between your Outlook account and your Apple iPhone or iPod touch requires Apple iTunes. You can configure which items are synchronized during a one-time set up process.
After the initial setup, each time that you connect your iPhone or iPod touch to your computer, the changes made on your computer or device are synchronized.
Note: As a best practice, make sure that software on your computer and your Apple device is current. Also, be prudent and back up both your Outlook account and your Apple device before you begin.
Export your Outlook data
Outlook 2016 and Outlook 2013
-
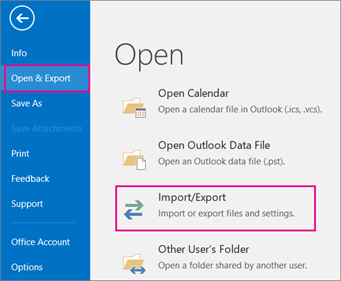
On the File tab, choose Open & Export > Import/Export.
-
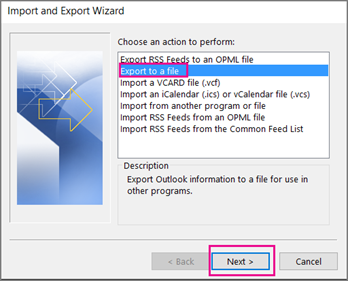
In the Import and Export Wizard, choose Export to a file > Next.
-
Under Create a file of type, choose Outlook Data File (.pst) > Next.
-
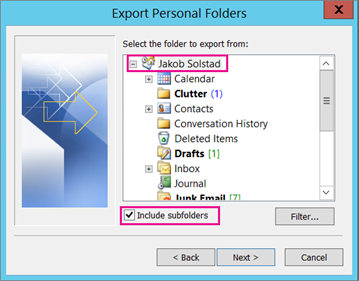
Under Select the folder to export from, choose the folder to export and only information in that folder is exported.
-
Select the Include subfolders check box to make sure everything—Calendar, Contacts, and Inbox—in the account will be exported, and then choose Next.
-
Under Save exported file as, click Browse to select where to save the Outlook Data File (.pst), type a file name, and then click OK to continue.
Note: If you've used export before, the previous folder location and file name appear. Type a different file name, and then click OK.
-
If you are exporting to an existing Outlook Data File (.pst), under Options, specify what to do when exporting items that already exist in the file.
-
Click Finish.
Outlook begins the export immediately unless a new Outlook Data File (.pst) is created or a password-protected file is used.
-
If you're creating an Outlook Data File (.pst), an optional password can help protect the file. When the Create Outlook Data File dialog box appears, type the password in the Password and Verify Password boxes, and then click OK. In the Outlook Data File Password dialog box, type the password, and then click OK.
-
If you're exporting to an existing Outlook Data File (.pst) that is password protected, in the Outlook Data File Password dialog box, type the password, and then click OK.
Now that your Outlook data is in a .pst file, it's portable. You can save the .pst file to OneDrive or to a USB storage device, for example, and then download it to another computer or another device of your choice. See import your email, contacts, and calendar to Outlook to learn more.
Outlook 2010
-
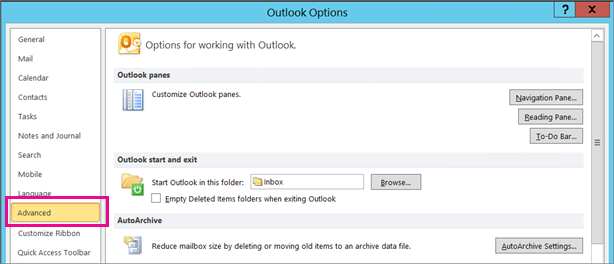
On the File tab, choose Options > Advanced.
-
Under the Export section, choose Export.

-
Click Export to a file >Next.
-
Click Outlook Data File (.pst) > Next.
-
Under Select the folder to export from, choose the folder to export and only information in that folder is exported.
-
Select the Include subfolders check box to make sure everything—Calendar, Contacts, and Inbox—in the account will be exported, and then choose Next.
-
Click Browse to select where you want to save the Outlook Data File (.pst) and to enter a file name, and then click OK to continue.
Note: If you have previously used the export feature, the previous folder location and file name appear. Make sure that you change the file name if you want to create a new file instead of using the existing file.
-
If you're exporting to an existing Outlook Data File (.pst), under Options, specify what to do when exporting items that already exist in the file.
-
Click Finish.
The export begins immediately unless a new Outlook Data File (.pst) is created or the export is to an existing file that is password protected.
-
If you are creating a new Outlook Data File (.pst), an optional password can help protect the file. When the Create Outlook Data File dialog box appears, enter the password in the Password and Verify Password boxes, and then click OK. In the Outlook Data File Password dialog box, enter the password, and then click OK.
-
If you are exporting to an existing Outlook Data File (.pst) that is password protected, in the Outlook Data File Password dialog box, enter the password, and then click OK.
Now that your Outlook data is in a .pst file, it's portable. You can save the .pst file to OneDrive or to a USB storage device, for example, and then download it to another computer or another device of your choice. See import your email, contacts, and calendar to Outlook to learn more.
Outlook 2007
-
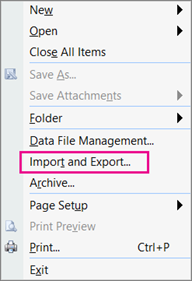
On the File tab, choose Import and Export.
-
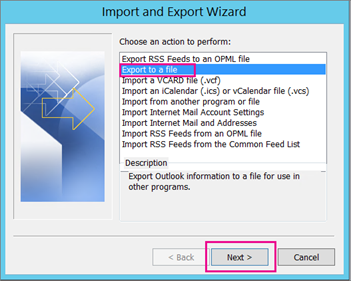
Under Choose an action to perform, choose Export to a file > Next.
-
Click Personal File Folder (.pst) >Next.
-
Choose the folder to export and only information in that folder is exported.
-
Select the Include subfolders check box to make sure everything—Calendar, Contacts, and Inbox—in the account will be exported, and then choose Next.
-
Click Browse to select where you want to save the Outlook Data File (.pst) and to enter a file name. Click OK to continue.
Note: If you have previously used the export feature, the previous folder location and file name appear. Make sure that you change the file name if you want to create a new file instead of using the existing file.
-
If you're exporting to an existing Outlook Data File (.pst), under Options, specify what to do when exporting items that already exist in the file.
-
Click Finish.
The export begins immediately unless you're creating a new Outlook Data File (.pst) or you're exporting is to an existing .pst file that is password protected. In those cases, you'll get this dialog box:

Choose OK if you don't want to password protect your file. Otherwise:
-
If you want to password protect your .pst file: enter the password in the Password and Verify Password boxes, and then click OK. In the Outlook Data File Password dialog box, enter the password, and then click OK.
-
If you are exporting to an existing Personal File Folder (.pst) that is password protected, in the Outlook Data File Password dialog box, enter the password, and then click OK.
Sync your Outlook Data File (.pst) with your iOS device
-
Connect your iPhone or iPod touch to your computer using the cable provided with your device or by placing the iPhone or iPod touch in the Apple Universal Dock.
iTunes opens automatically when connected to your computer.
-
In iTunes, in the source list, under Devices, click the entry for your iPhone or iPod touch.
-
Click the Info tab.
-
Under Contacts, click Sync contacts from, and then click Outlook.
-
Do one of the following:
-
To synchronize all contacts, click All contacts.
-
To limit the contacts that are synchronized, click Selected groups, and then click the groups you want to synchronize.
Note: To select multiple groups, press Ctrl as you click each group name.
-
-
Click Apply.
Note: If you are using a Microsoft Exchange Server account and have more than 500 contacts, all contacts might not synchronize unless you use Cached Exchange Mode. To turn on Cached Exchange Mode, see Turn on or off Cached Exchange Mode.
Outlook synchronization support for iPhone, iPod touch, and iTunes is provided by Apple support.
No comments:
Post a Comment