Target content to specific audiences
List or document library items in SharePoint can be targeted to appear only to people who are members of a particular group or audience. An audience can be identified by using SharePoint groups, distribution lists, or security groups or by using a rules-based system to create a global audience.
Updated January 3, 2017 thanks to customer feedback.
Overview
By using target audiences, you can display content such as list or library items, navigation links, and other content to specific groups of people. This is useful when you want to present information that is relevant only to a particular group of people. For example, you can add content to a document library that is only visible to the legal department.
Any item in a SharePoint list or library can be targeted to specific audiences. To do this, you use the Content Query Web Part. Other types of Web Part and their content also can be targeted to audiences.
In addition, you can target site navigation links to audiences. Targeting the links simplifies the users' experience, because they see only the navigation links that are relevant to them.
To identify a target audience, you can use one or more of the following:
-
SharePoint groups
-
Distribution lists
-
Security groups
-
Global audiences
Global audiences are rules-based audiences that are maintained by SharePoint administrators.
Anyone with at least Contributor permissions can specify a target audience, as long as the name of the audience is known. You can search for an audience by its name, alias, or description by clicking Browse  in the Target Audiences list.
Target list or library items to an audience
The following procedure shows you an example of how to target all of the items from a specific list where the list type is a document library. The Content Query Web Part also allows you to show all of the items from a site and its subsites or to show items from all sites in a site collection. You can then build a query to include the audience targeting that you set on the items in the sites or site collection.
Targeting items from a list or library to a specific audience requires three steps:
Step 1: Enable audience targeting on the list or library
When you enable audience targeting on a list or library, you can target each item in the list or library to an audience.
Note: If the SharePoint list or library already is enabled for audience targeting, the Target Audiences column appears.
-
Click the list or library that contains the item you want to target.
-
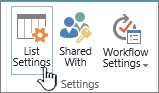
For SharePoint Online, click Settings, and click List Settings or Document Library Settings.
 or
or 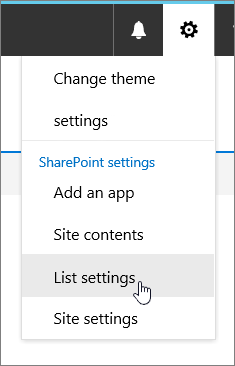
For SharePoint 2016, 2013, 2010, or 2007, on the list or library toolbar, click Settings, and then click List Settings or Document Library Settings.
 or
or 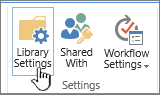
-
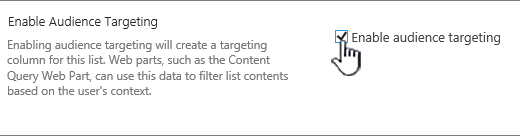
Under General Settings, click Audience targeting settings.

-
Select the Enable audience targeting check box.
Step 2: Specify the target audience on the items
After you enable the list or library for audience targeting, you can set individual items in the list or library to be displayed to one or more audiences.
-
For SharePoint Online, click to the left of the item you want to change audiences, click the details
 icon, and then click Edit All by properties.
For SharePoint 2016, 2013, 2010, and 2007, click the arrow or ellipses (...) next to the name of an item in the list or library, and then click Edit Properties or Properties. Some versions of SharePoint, you may need to click another set of ellipses (...).
-
In the Target Audiences list, add one or more audiences.
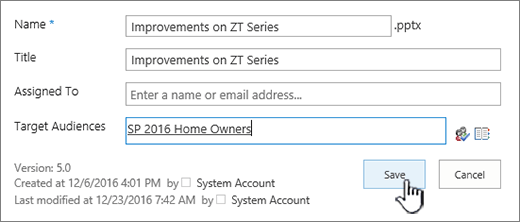
Note: If content approval or workflow is enabled on the list or library, the item may need to go through the approval process.
-
Click Save.
Step 3: Display the item in a Web Part for SharePoint 2016, 2013, 2010, or 2007
To display a SharePoint list or library item to a specific audience, you can use the Content Query Web Part. The Content Query Web Part allows you to build a query that can filter list and library items.
Note: For SharePoint Online, Web Parts may not be visible.
This example shows you how to display all of the items from a specific list to a target audience. The list type is document library.
-
On the page where you want to display the item, click
 or Settings
  , and then click Edit Page.
 -
For SharePoint 2010, 2013, and 2016, click the Insert tab, and then click Web Part
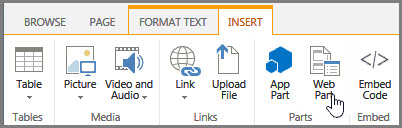
In SharePoint 2007, click Add a Web Part, and then under Default, click Content Query Web Part.
Under Content Rollup, click Content Query.

Note: If Content Query doesn't exist, check with your SharePoint admin.
-
Click Add.
-
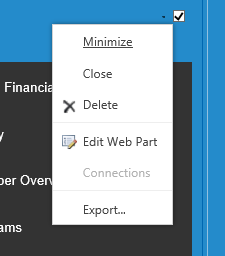
For SharePoint 2010, 2013, and 2016, click the down arrow
 on the right of the web part, and then click Edit Web Part on the menu.
In SharePoint 2007, click Edit, or and then click Modify Shared Web Part to open the tool pane for the Web Part.
-
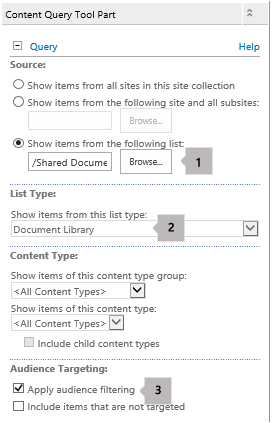
Under Query in the tool pane, do the following
-
Click Show items from the following list and then specify the location of the list.
Note: In this example, we specify a particular list. You can broaden the scope to include items in lists from more than one site by clicking one of the other options.
-
Under the required List Type, choose the type of list that the item is a member of. In this example, click Document Library. Only items in the list type that you choose are processed by the query.
-
Under Audience Targeting, do the following.
To
Do this
Display the list items to the target audience that you specified in Step 2: Specify the target audience on the items, when the current user is a member of the audience.
Select the Apply Audience Filtering check box. This is required for the query to work properly.
Also display the items in the list that do not have a target audience specified. These items are displayed to everyone.
Select the Include items that are not targeted check box. This is optional.
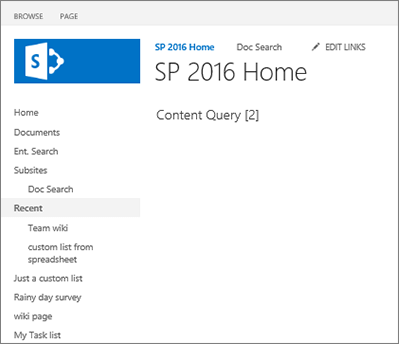
When the page is rendered, the content in the Web Part appears only to current users who are members of the audiences you specified.
-
Target a Web Part to an audience
SharePoint Web Parts can be targeted to appear only to people who are members of a particular group or audience. This way you can create customized pages for specific groups.
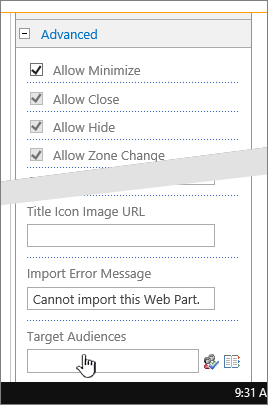
Note: As with all Web Parts, the Content Query Web Part has a Target Audiences list in the Advanced section of the tool pane. This setting determines whether the Web Part itself is visible to the current user. If not, none of the other settings apply.
An audience can be identified by using a SharePoint group, a distribution list, a security group, or a global audience.
-
On the page where you want to display the item, click
or Settings , and then click Edit Page. -
For SharePoint 2010, 2013, and 2016, click the down arrow
on the right of the web part, and then click Edit Web Part. In SharePoint 2007, click Edit, or and then click Modify Shared Web Part to open the tool pane for the Web Part.
-
Under Advanced, add one or more audience names to the Target Audiences list.
When the page is rendered, the Web Part appears only to the people who are members of the audiences you specified.
Target a navigation link to an audience
A navigation link on a SharePoint server can be targeted so that it appears only to people who are members of a particular group or audience. You need to have at least Design permission in order to modify the site navigation settings.
-
On the page where you want to display the item, click
or Settings , click Site Settings and then click Navigation under Look and Feel, or click Modify Navigation. -
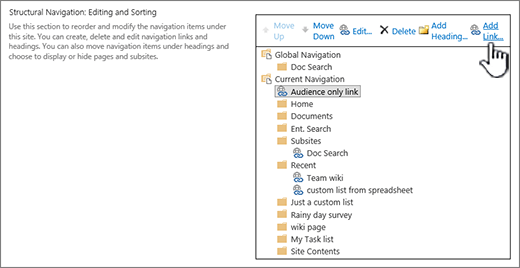
On the Site Navigation Settings page under Structural Navigation: Editing and sorting, click Add Link.
-
In the Navigation Link dialog box, type the Title and URL of the link, and then add one or more audience names to the Audiences list.

For the URL, you can copy one into the clipboard by right clicking the link, and then clicking Copy Shortcut. If you don't have that option in your browser, navigate to the page you want to link to, and copy the address bar.
When the page is rendered, the navigation link appears only to the people who are members of the audiences you specified.

Leave us a comment
Was this article helpful? If so, please let us know at the bottom of this page. If it wasn't helpful, let us know what was confusing or missing. Please include your version of SharePoint, OS, and browser. We'll use your feedback to double-check the facts, add info, and update this article.
No comments:
Post a Comment