Close a notebook in OneNote for Windows
Important:
-
We're no longer developing new features for OneNote 2016. If you want to take advantage of the latest that OneNote has to offer, consider switching to OneNote for Windows 10. For more information, see What's the difference between OneNote for Windows 10 and OneNote 2016?
-
If you're not quite ready to make the switch, you can keep using OneNote 2016 for a while longer. Learn more about the future of OneNote.
If you have only one notebook, you don't need to close it when you're done working. Just close OneNote and your notes are saved automatically.
If you have multiple notebooks, or work with shared notebooks, you can switch between notebooks, or collapse them, to make it easier to navigate.
-
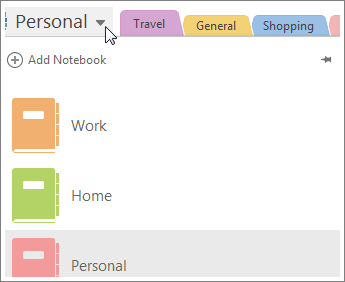
Click the name of the notebook you're currently working in. A list of available notebooks will appear.
-
Click the notebook you want to switch to.
Remove a notebook from the list
When you're done with a notebook for good, say at the end of a semester or when a project is finished, you can remove it from your list of notebooks.
-
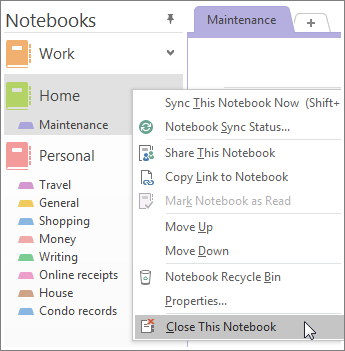
Click the name of the notebook you're currently working in to see the list of available notebooks.
-
Right-click the notebook you want to close, and click Close This Notebook.
Tip: When you remove a notebook from the list, it's not deleted. To get it back, click File > Open and choose the notebook you want to reopen from the Recently Used Notebooks list. If you want to, you can permanently delete a notebook.
No comments:
Post a Comment