Create and save a PowerPoint template
When you create a presentation and then save it as a PowerPoint template (.potx) file, you can share it with your colleagues and reuse it again. To create a template, you'll need to modify a slide master and a set of slide layouts.
There are thousands of free PowerPoint templates you can search for online when you open PowerPoint. You can find templates at Office.com that you can use or revise to meet your needs.
Click a heading below to open the section and see the instructions:
Create a PowerPoint template
You'll need to use the desktop version of PowerPoint 2016 or PowerPoint 2013 (not PowerPoint Online) to follow these steps.
-
Open a blank presentation, and then on the View tab, in the Master Views group, choose Slide Master.
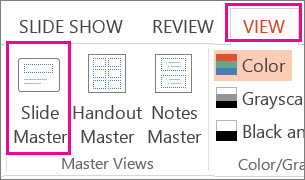
The slide master is the largest slide image at the top of the slide thumbnail list, to the left of your slides. Associated slide layouts are positioned beneath the slide master.

-
To make changes to the slide master or slide layouts, on the Slide Master tab, do any of the following:
-
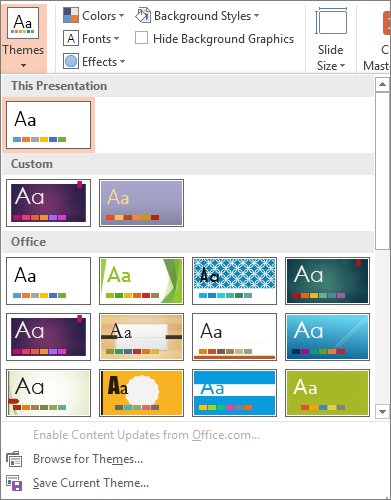
To add a colorful theme with special fonts and effects, click Themes, and choose a theme from the gallery. Use the scrollbar on the right to see more themes.
-
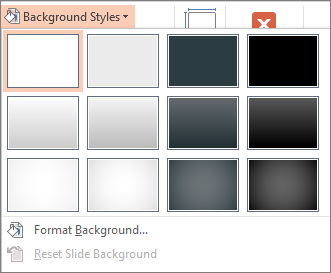
To change the background, click Background Styles, and choose a background.
-
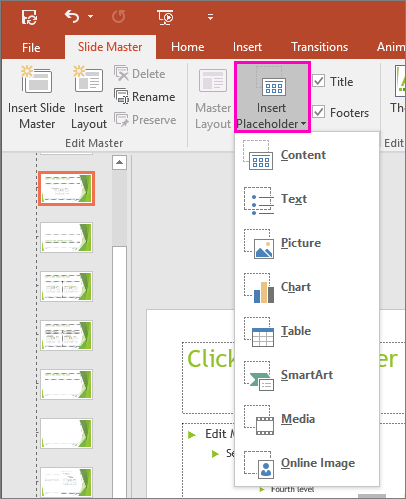
To add a placeholder (to hold text, a picture, chart, video, sound, and other objects), in the thumbnail pane, select the slide layout that you want to hold the placeholder, and do the following:
-
Click Insert Placeholder, and select the type of placeholder you want to add.
-
On the slide master or slide layout, click and drag to draw the placeholder size.
Tip: To resize a placeholder, drag the corner of one of its borders.
-
-
To move a placeholder around on a slide master or slide layout, select the edge and then drag it into a new position.

-
To remove an unwanted placeholder in a slide master or slide layout, select it in the slide thumbnail pane, and then select the border of the placeholder on the slide and press Delete.
-
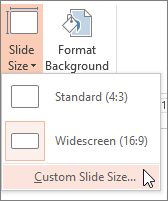
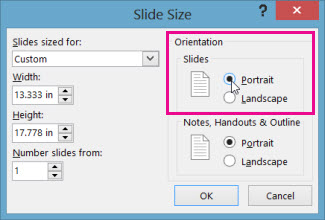
To set the page orientation for all of the slides in your presentation, click Slide Size > Custom Slide Size.
Under Orientation, choose Portrait or Landscape.
-
Save your presentation as a PowerPoint template (.potx)
-
On the File tab, click Save As (or Save a Copy, if you are using Office 365).
-
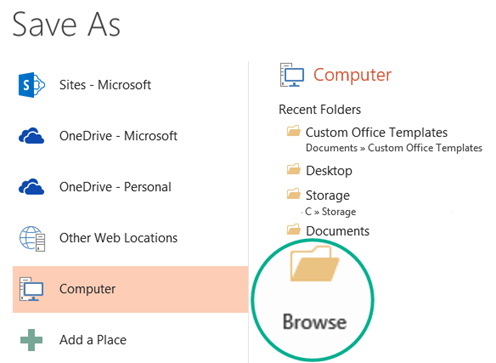
Under Save, click Browse to open the Save As dialog box.
-
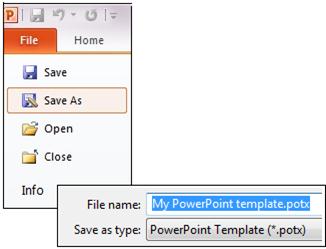
In the Save As dialog box, in the Save as type list, choose PowerPoint Template.
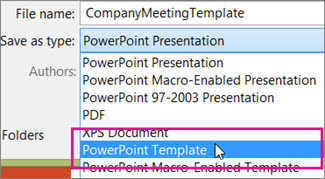
When you choose the "template" type, PowerPoint automatically switches the storage location to the appropriate folder, the Custom Office Templates folder.
-
In the Save As dialog box, in the File name box, type a file name for your template, or do nothing to accept the suggested file name.
-
Select Save.
-
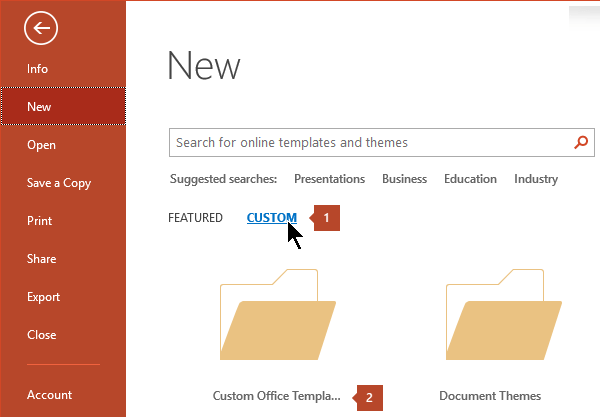
To use your template for a new presentation, click File > New. Then click Custom > Custom Office Templates, and then double-click the template you saved.
Apply a template to a new presentation
See Also
Provide instructions for users of your template
Create your own theme in PowerPoint
Save a slide design (theme) as a template
When you create a presentation, and then save it as a PowerPoint Template (.potx) file, you can share it with your colleagues and reuse it more than once.
On the File tab, click Save As, in the File name box, name your template, and then in the Save as type box, select PowerPoint Template (*.potx).
Click a heading below to open the section and see the instructions:
Create a PowerPoint template
To begin creating the template that you'll use in your presentation, do the following:
-
Open a blank presentation, and then on the View tab, in the Master Views group, click Slide Master.
Tip: In Slide Master view, in the slide thumbnail pane, the slide master represents the larger slide image, and the associated layouts are smaller, positioned beneath it.
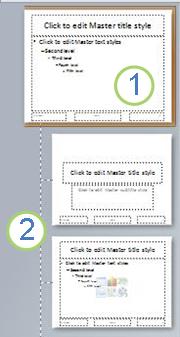
1. Slide master
2. Associated layouts
-
To customize the slide master and associated layouts, do one or more of the following:
-
To remove an unwanted, default placeholder from a layout, in the slide thumbnail pane, click the slide layout that contains the placeholder, click the border of the placeholder in the presentation window, and then press DELETE.
-
To add a text placeholder, in the slide thumbnail pane, click the slide layout that you want to contain the placeholder, and then do the following:
-
On the Slide Master tab, in the Master Layout group, click Insert Placeholder, and then click Text.
-
Click a location on the slide master, and then drag to draw the placeholder.
Tip: To resize a placeholder, drag the corner of one of its borders.
-
Type descriptive text that prompts the users of your template to enter specific information. To add custom prompt text, see Add a text placeholder with custom prompt text.
-
-
To add other types of placeholders that contain content such as pictures, clip art, screen shots, SmartArt graphics, charts, movies, sounds, and tables, on the Slide Master tab, in the Master Layout group, click Insert Placeholder, and then click the type of placeholder that you want to add.
-
To add character by using color and a background, do one of the following:
-
To apply a theme (to include color, formatting, effects, in a layout) to your presentation, on the Slide Master tab, in the Edit Theme group, click Themes, and then select a theme.
-
To change the background, on the Slide Master tab, in the Background group, click Background Styles, and then select a background.
-
-
To set the page orientation for all of the slides in your presentation, on the Slide Master tab, in the Page Setup group, click Slide Orientation, and then click either Portrait or Landscape.
-
Save your presentation as a PowerPoint template (.potx)
-
To save your template, click the File tab, and then click Save As.
-
In the File name box, type a file name, or do nothing to accept the suggested file name.
-
In the Save as type list, click PowerPoint Template (.potx).
When you choose the "template" type, PowerPoint automatically switches the storage location to the appropriate folder, the \Program Files\Microsoft Office\Templates\ folder.
-
Select Save.
-
To use your template for a new presentation, click File > New. Then click My templates. In the New Presentation dialog box, select the template you saved, and click OK.
If you need assistance applying your new template to a presentation, see Apply a template to your presentation.

Apply a template to a new presentation
Links to more information about PowerPoint templates
When you create a presentation, and then save it as a PowerPoint Template (.potx) file, you can share it with your colleagues and reuse it more than once.
To apply a new or different PowerPoint 2007 template that already exists, see Apply a template to your presentation.
Best practice for creating a template
When you create a template, add any content to the slide master in Slide Master view that you want to protect from being changed by users of your template, such as instructional prompt text, logos, header and footer information, subject matter content, a background, formatting, colors, fonts, and effects.
Users of your template will work in Normal view, guided by the instructional prompts that you added. The template users will replace the instructional prompt text and other placeholder content with data that is specific to their own project or presentation.
Create a PowerPoint template
-
Open a blank presentation, and then on the View tab, in the Presentation Views group, click Slide Master.
-
On the Slide Master tab, in the Edit Master group, click Insert Slide Master.
Notes:
-
In the slide thumbnail pane, the slide master represents the larger slide image, and the associated layouts are positioned beneath it.
-
Many presentations contain more than one slide master, so you may have to scroll to find the one that you want.
-
-
To begin customizing the slide master, do one or more of the following:
-
To remove any of the built-in slide layouts that accompany the default slide master, in the slide thumbnail pane, right-click each slide layout that you don't want to use, and then click Delete Layout.
-
To remove an unwanted, default placeholder, in the slide thumbnail pane, click the slide layout that contains the placeholder, click the border of the placeholder in the presentation window, and then press DELETE.
-
To add a text placeholder, in the slide thumbnail pane, click the slide layout that you want to contain the placeholder, and then do the following:
-
-
On the Slide Master tab, in the Master Layout group, click Insert Placeholder, and then click Text.
-
Click a location on the slide master, and then drag to draw the placeholder.
Tip: To resize a placeholder, drag the corner of one of its borders.
-
Type descriptive text that prompts the users of your template to enter specific information.
-
To add other types of placeholders that contain content such as pictures, clip art, SmartArt graphics, charts, movies, sounds, and tables, on the Slide Master tab, in the Master Layout group, click the type of placeholder that you want to add.
-
To apply a theme (to include color, formatting, effects, in a layout) to your presentation, on the Slide Master tab, in the Edit Theme group, click Themes, and then click a theme.
-
To change the background, on the Slide Master tab, in the Background group, click Background Styles, and then click a background.
-
To set the page orientation for all of the slides in your presentation, on the Slide Master tab, in the Page Setup group, click Slide Orientation, and then click either Portrait or Landscape.
-
To add text to appear in the footer at the bottom of all of the slides in your presentation, do the following:
-
On the Insert tab, in the Text group, click Header & Footer.
-
In the Header and Footer dialog box, on the Slide tab, select the Footer check box, and then type the text that you want to appear at the bottom of your slides.
-
To display the footer content on all slides, click Apply to All.
For more information about using footers, see Show footer information on your slides.
-
-
Save a presentation as a PowerPoint template (.potx)
-
Click the Microsoft Office Button
 , and then click Save As.
 -
In the File name box, type a file name, or do nothing to accept the suggested file name.
-
In the Save as type list, click PowerPoint Template (*.potx).
When you choose the "template" type, PowerPoint automatically switches the storage location to the appropriate folder, the \Program Files\Microsoft Office\Templates\ folder.
-
Select Save.
-
If you need assistance applying your new template to a presentation, see Apply a PowerPoint 2007 template.
Microsoft Office Tutorials: Create And Save A Powerpoint Template >>>>> Download Now
ReplyDelete>>>>> Download Full
Microsoft Office Tutorials: Create And Save A Powerpoint Template >>>>> Download LINK
>>>>> Download Now
Microsoft Office Tutorials: Create And Save A Powerpoint Template >>>>> Download Full
>>>>> Download LINK Il