Assign a macro to a Form or a Control button
You can use a button (a Form control) or a command button (an ActiveX control) to run a macro that performs an action when a user clicks it.
Both a Form control button and an ActiveX control command button are also referred to as a push button. You might use a button or a command button to automate the printing of a worksheet, the filtering of data, or the calculation of numbers. In general, a Form control button and an ActiveX control command button are similar in appearance and function. However, they do have a few differences, which are explained in the following sections.
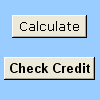
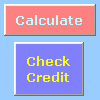
| Button (Form control) | Command button (ActiveX control) |
Macros and VBA tools can be found on the Developer tab, which is hidden by default, so the first step is to enable it.

To do that:
-
In Excel 2016, Excel 2013, and Excel 2010
-
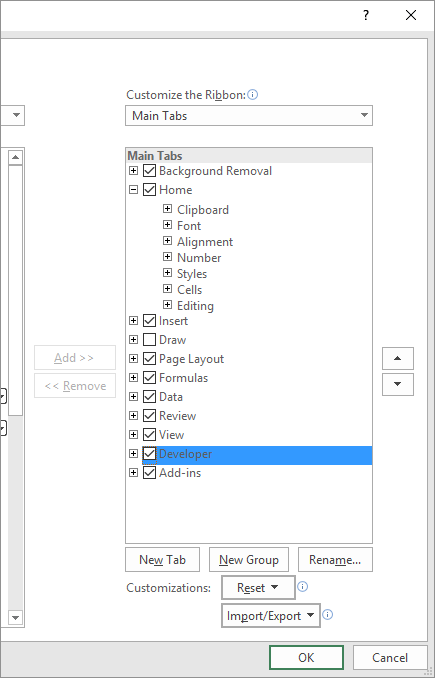
Go to File > Options >Customize Ribbon.
-
In the Customize Ribbon category, in the Main Tabs list, select the Developer check box, and then click OK.
-
-
In Excel 2007
-
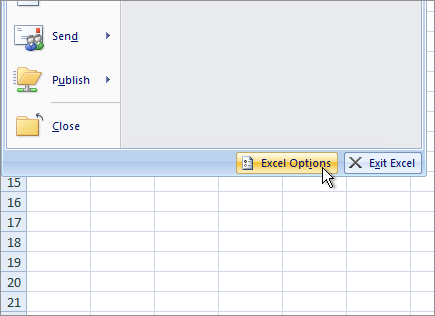
Click the Microsoft Office Button
 , and then click Excel Options.
-
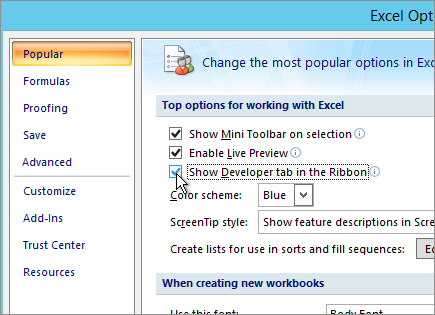
In the Popular category, under Top options for working with Excel, select the Show Developer tab in the Ribbon check box, and then click OK.
-
Add a button (Form control)
-
On the Developer tab, in the Controls group, click Insert, and then under Form Controls, click Button
 .
.
-
Click the worksheet location where you want the upper-left corner of the button to appear.
The Assign Macro dialog box appears.
-
Assign a macro to the button, and then click OK.
-
To specify the control properties of the button, right-click the button, and then click Format Control.
Add a command button (ActiveX control)
-
On the Developer tab, in the Controls group, click Insert, and then under ActiveX Controls, click Command Button
 .
.
-
Click the worksheet location where you want the upper-left corner of the command button to appear.
-
In the Controls group, click View Code.
This starts the Visual Basic Editor. Make sure that Click is selected in the dropdown list on the right. The sub procedure called CommandButton1_Click, as shown in the following picture, runs two macros when the button is clicked: SelectC15 and HelloMessage.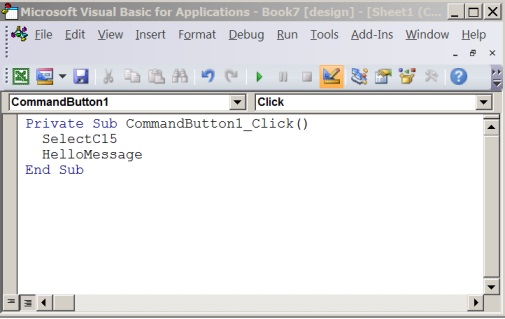
-
In the sub procedure for the command button, do one of the following:
-
Type the name of an existing macro in the workbook. You can find macros by clicking Macros in the Code group. You can run multiple macros from a button by typing the macro names on separate lines inside the sub procedure.
-
Type your own VBA code.
-
-
Close the Visual Basic Editor, and make sure design mode is turned off by clicking Design Mode
 .
. -
To run the VBA code that is attached to the button, click the ActiveX command button that you just created.
-
To edit the ActiveX control, make sure that you are in design mode. On the Developer tab, in the Controls group, turn on Design Mode.
-
To specify the control properties of the command button, on the Developer tab, in the Controls group, click Properties
 . You can also right-click the command button, and then click Properties.
Note: Before you click Properties, make sure that the object for which you want to examine or change properties is already selected.
The Properties box appears. For detailed information about each property, select the property, and then press F1 to display a Visual Basic Help topic. You can also type the property name in the Visual Basic Help Search box. The following table summarizes the properties that are available.
| If you want to specify | Use this property |
| General: | |
| Whether the control is loaded when the workbook is opened. (Ignored for ActiveX controls.) | AutoLoad (Excel) |
| Whether the control can receive focus and respond to user-generated events. | Enabled (Form) |
| Whether the control can be edited. | Locked (Form) |
| The name of the control. | Name (Form) |
| The way the control is attached to the cells below it (free floating, move but do not size, or move and size). | Placement (Excel) |
| Whether the control can be printed. | PrintObject (Excel) |
| Whether the control is visible or hidden. | Visible (Form) |
| Text: | |
| Font attributes (bold, italic, size, strikethrough, underline, and weight). | Bold, Italic, Size, StrikeThrough, Underline, Weight (Form) |
| Descriptive text on the control that identifies or describes it. | Caption (Form) |
| Whether the contents of the control automatically wrap at the end of a line. | WordWrap (Form) |
| Size and Position: | |
| Whether the size of the control automatically adjusts to display all the contents. | AutoSize (Form) |
| The height or width in points. | Height, Width (Form) |
| The distance between the control and the left or top edge of the worksheet. | Left, Top (Form) |
| Formatting: | |
| The background color. | BackColor (Form) |
| The background style (transparent or opaque). | BackStyle (Form) |
| The foreground color. | ForeColor (Form) |
| Whether the control has a shadow. | Shadow (Excel) |
| Image: | |
| The bitmap to display in the control. | Picture (Form) |
| The location of the picture relative to its caption (left, top, right, and so on). | PicturePosition (Form) |
| Keyboard and Mouse: | |
| The shortcut key for the control. | Accelerator (Form) |
| A custom mouse icon. | MouseIcon (Form) |
| The type of pointer that is displayed when the user positions the mouse over a particular object (standard, arrow, I-beam, and so on). | MousePointer (Form) |
| Whether the control takes the focus when clicked. | TakeFocusOnClick (Form) |
Microsoft Office Tutorials: Assign A Macro To A Form Or A Control Button >>>>> Download Now
ReplyDelete>>>>> Download Full
Microsoft Office Tutorials: Assign A Macro To A Form Or A Control Button >>>>> Download LINK
>>>>> Download Now
Microsoft Office Tutorials: Assign A Macro To A Form Or A Control Button >>>>> Download Full
>>>>> Download LINK Fv